26
Installation
WARNING!!!
The heating medium can have high temperature and pressure, therefore it is nec-
essary to discharge the liquid from the system or close the cut-o valves on both
sides of the pump before the ampoule head screws are removed.
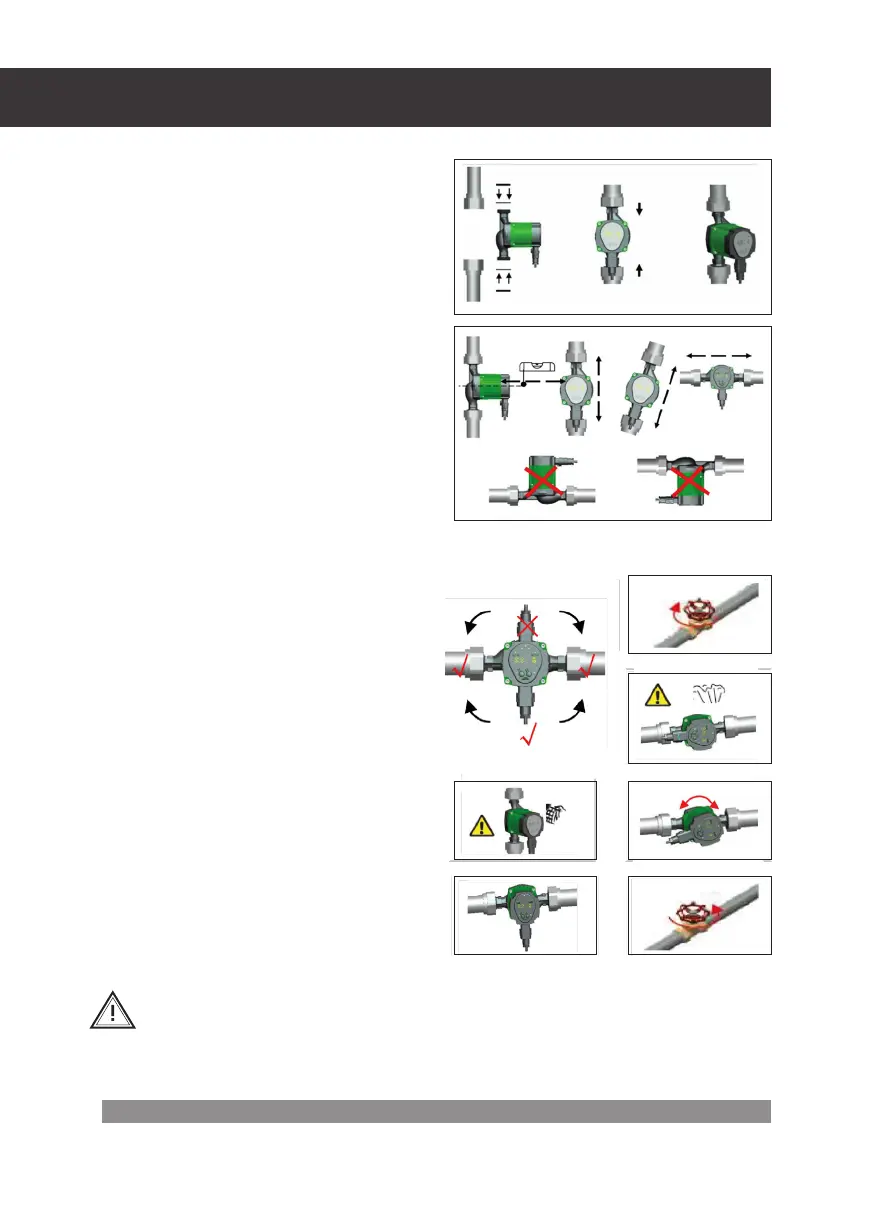
In installation, please pay attention to the
ow direction of the heating medium. An
arrow on the pump body shows the ow
direction forced by the pump. That direction
must be compliant with the circulation of the
medium in the system.
In installation, please use the bolts with rubber
sealing included in the set.
The pump should be installed in such a way
that the pump shaft is horizontal
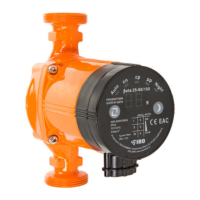
Permissible positioning of the control panel
Change in arrangement of the control panel
The control panel along with the motor corpus
can rotate every 90°. To change the position
of the junction box, perform the following
activities:
1.
Disconnect the pump from power supply.
2. Close the cut o valves at the inow and
outow of the pump and perform decom-
pression;
3.
Loosen and remove four bolts xing the
head in the pump body;
4.
Rotate the motor into the desired position
and t four openings for bolts;
5. Insert four ampoule head screws to prop-
er sockets and tighten them;