EasyManua.ls Logo

Icom IC-756PRO - Service Manual

Icom IC-756PRO
93 pages
Print Icon
To Next Page IconTo Next Page
Loading...
HF/50MHz ALL BAND TRANSCEIVER
i756PRO
SERVICE
MANUAL

Other manuals for Icom IC-756PRO

Questions and Answers

  • S
    sharonbrownAug 19, 2025
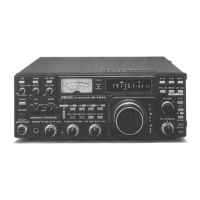
    Why won't my Icom IC-756PRO power on?
    • G
      griffithdebraAug 19, 2025
      If your Icom Transceiver isn't powering on, there are a couple of things to check: First, make sure the DC power cable is properly connected. If it is, then check the fuse. If the fuse is blown, identify the cause, and replace it with a spare. Fuses are located in the DC power cable and the internal PA unit.
  • A
    Andrew PatelAug 21, 2025
    What to do if there is no sound from the Icom IC-756PRO Transceiver speaker?
    • K
      Katelyn BrownAug 21, 2025
      If you're not getting any sound from your Icom Transceiver's speaker, here are a few things to check: * Ensure the volume isn't too low by rotating the [AF] control clockwise. * Make sure the squelch isn't closed by rotating the [RF/SQL] to the 10 o’clock position. * Verify the transceiver isn't in transmitting mode by pushing [TRANSMIT] to receive, or check the SEND line of any connected external unit.
  • R
    robersonstephenAug 25, 2025
    How to fix low output power on Icom IC-756PRO?
    • D
      Daniel AllenAug 25, 2025
      If the output power of your Icom Transceiver is too low, try the following: * Rotate the [RF POWER] control clockwise. * Adjust the [MIC GAIN] to a suitable position. * Ensure that you have selected an antenna suitable for the operating frequency. * Manually tune the antenna by pushing [TUNER] for 2 seconds.
  • J
    jamesramosAug 26, 2025
    Why is the Icom Transceiver sensitivity so low?
    • L
      lynchkatherineAug 26, 2025
      If your Icom Transceiver has low sensitivity, consider these potential causes: * The antenna may not be connected properly; try reconnecting it. * You may have selected an antenna for a different band; choose an antenna suitable for your operating frequency. * The antenna might not be properly tuned; push [TUNER] for 2 seconds to manually tune it. * The attenuator may be activated; push [ATT] one or more times to select 'ATT OFF.'
  • T
    Tammy LaneAug 28, 2025
    How to resolve distorted receive audio on Icom IC-756PRO Transceiver?
    • H
      heather31Aug 28, 2025
      If the receive audio on your Icom Transceiver is distorted, here are some possible solutions: * Ensure you've selected the correct operating mode. * If the PBT function is activated, push [PBT CLR] for 2 seconds to reset it. * Turn the noise blanker function OFF by pushing [NB]. * Turn the preamp OFF by pushing [P.AMP] once or twice. * If the noise reduction is activated, adjust the [NR] control for maximum readability.
  • T
    tranjenniferAug 30, 2025
    What to do if I can't contact another station using my Icom IC-756PRO Transceiver?
    • Z
      zmasonAug 30, 2025
      If you're unable to contact another station with your Icom Transceiver, check the following: Ensure that the RIT or ?TX function is turned OFF by pushing [RIT] or [?TX]. Also, make sure that the split frequency function and/or dualwatch are deactivated by pushing [SPLIT] and/or [DUALWATCH].
  • M
    mitchellscottSep 1, 2025
    How to access a repeater with Icom IC-756PRO?
    • M
      Michele KnoxSep 1, 2025
      If you're having trouble accessing a repeater with your Icom Transceiver, make sure the split frequency function is turned ON by pushing [SPLIT]. If that doesn't work, the programmed subaudible tone frequency may be incorrect; reset the frequency using set mode.
  • K
    Kimberly ReedSep 3, 2025
    What causes distorted transmitted signals on Icom IC-756PRO Transceiver?
    • H
      harrisonmelindaSep 3, 2025
      If your Icom Transceiver is transmitting distorted signals, the [MIC GAIN] might be set too far clockwise. Adjust the [MIC GAIN] to a suitable position.
  • C
    Colleen SnyderSep 5, 2025
    Why doesn't the programmed scan stop on my Icom Transceiver?
    • B
      barnesteresaSep 5, 2025
      If the programmed scan on your Icom Transceiver doesn't stop, it could be because the squelch is open. Try setting [RF/SQL] to the threshold point. Alternatively, if [RF/SQL] is assigned to RF gain control, reset the [RF/SQL] control assignment and set it to the threshold point.
  • N
    Nicole BradleySep 7, 2025
    Why doesn't the [ANT] switch function on my Icom IC-756PRO?
    • D
      Diane HamiltonSep 8, 2025
      If the [ANT] switch on your Icom Transceiver isn't working, it may not be activated. Set the antenna switch in set mode to 'Auto' or 'Manual'.

Summary

INTRODUCTION

DANGER

Critical safety warnings for transceiver operation and handling.

SECTION 1 SPECIFICATIONS

GENERAL

Covers frequency coverage, modes, memory channels, connectors, and power.

RECEIVER

Details receiver system, frequencies, sensitivity, and selectivity.

TRANSMITTER

Lists transmitter output power, modulation system, and emissions.

ANTENNA TUNER

Specifies antenna tuner impedance range, input power, and loss.

SECTION 2 INSIDE VIEWS

BOTTOM VIEW

Identifies components from the bottom view of the transceiver.

TOP VIEW

Identifies components from the top view of the transceiver.

SECTION 3 CIRCUIT DESCRIPTION

3-1 RECEIVER CIRCUITS

Explains signal path from antenna through receiver stages to DSP.

3-2 TRANSMITTER CIRCUITS

Details signal path from microphone input to antenna output.

3-3 PLL CIRCUITS

Describes PLL unit functions for generating local oscillator frequencies.

3-6 POWER SUPPLY CIRCUITS

Lists voltage lines and descriptions for various transceiver units.

SECTION 4 ADJUSTMENT PROCEDURES

4-1 PREPARATION BEFORE SARVICING

Lists required test equipment and connection diagrams for servicing.

4-2 PLL ADJUSTMENTS

Step-by-step procedures for adjusting PLL circuit parameters.

4-3 RECEIVER ADJUSTMENTS

Procedures for tuning receiver peak, mixer balance, and FM distortion.

4-4 TRANSMITTER ADJUSTMENTS

Procedures for adjusting transmitter idling current, peak, and output power.

4-5 TUNER ADJUSTMENT

Procedures for adjusting the SWR detector and tuner calibration.

SECTION 5 PARTS LIST

[FRONT UNIT]

Lists mechanical and electronic parts for the front unit.

[DISPLAY BOARD]

Lists components for the display board.

[RF UNIT]

Lists components for the RF unit.

[MAIN UNIT]

Lists components for the main unit.

[PLL UNIT]

Lists components for the PLL unit.

SECTION 6 MECHANICAL PARTS

[FRONT UNIT]

Lists mechanical parts for the front unit.

[CHASSIS PARTS]

Lists general chassis parts.

[RF UNIT]

Lists mechanical parts for the RF unit.

[PLL UNIT]

Lists mechanical parts for the PLL unit.

SECTION 8 BOARD LAYOUTS

8-1 PBT, RIT AND MIC BOARDS

Shows component placement for PBT, RIT, and MIC boards.

8-2 DISPLAY BOARD

Shows component placement for the display board.

8-4 RF UNIT (TOP VIEW)

Shows component placement for the RF unit (top view).

8-5 PLL UNIT (TOP VIEW)

Shows component placement for the PLL unit (top view).

8-6 MAIN UNIT (TOP VIEW)

Shows component placement for the main unit (top view).

SECTION 9 BLOCK DIAGRAM

BOARD BOARD

Illustrates the overall system architecture and interconnections.

SECTION 10 VOLTAGE DIAGRAM

10-1 FRONT UNIT

Voltage distribution diagram for the front unit.

10-2 DSP BOARD

Voltage distribution diagram for the DSP board.

10-4 MAIN UNIT (1)

Voltage distribution diagram for the main unit (part 1).

10-6 PLL UNIT

Voltage distribution diagram for the PLL unit.

10-8 RF UNIT

Voltage distribution diagram for the RF unit.

Icom IC-756PRO Specifications

General IconGeneral
TypeHF/50MHz Transceiver
Supply Voltage13.8 V DC
Receiver TypeTriple conversion superheterodyne
Frequency Range0.03-60 MHz
ModesSSB, CW, AM, FM, RTTY
Selectivity2.4 kHz (SSB), 6 kHz (AM)
Image Rejection70 dB
Current Drain20 A (max)
Intermediate Frequencies455 kHz

Related product manuals