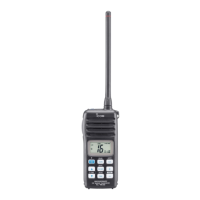
■ Setting TAG channels
For more efficient scanning, add the desired channels as
TAG channels or clear TAG for unwanted channels.
Channels that are not tagged will be skipped during scan-
ning. TAG channels can be assigned to each channel group
(U.S.A., International, Canadian and ATIS) independently.
q Push and hold [CH] for 1 sec. once or twice to select the
desired channel group.
w Select the desired channel to be set as a TAG channel.
e Push and hold [FAV TAG] for 1 sec. to set the displayed
channel as a TAG channel.
• “ ” appears on the display.
r
To cancel TAG channel setting
, push and hold [FAV TAG]
for
1 sec.
• “ ” disappears.
✔ Clearing (or setting) all tagged channels
While pushing and holding [FAV TAG], turn power ON to
clear all TAG channels in the selected channel group.
• Repeat above procedure to set all channels as TAG channels
(when no TAG channel has been set.)
■ Starting a scan
Set the priority scan function, scan resume timer and auto
scan function in advance, using the set mode. (p. 18)
q Push and hold [CH] for 1 sec. once or twice to select the
desired channel group.
w Push [SCAN DUAL] to start priority or normal scan.
• “SCAN” blinks in the display.
• “16” appears on the sub channel readout during priority scan.
• When a signal is received, scan pauses until the signal disap-
pears or resumes after pausing 5 sec. according to the set
mode setting.
• Push [Y]/[Z] to check which channels have been set as TAG
channels, change the scanning direction or resume the scan
manually.
e To stop the scan, push [SCAN DUAL].
• “SCAN” disappears.
• Pushing [PTT], [16 C], [CH] or [FAV TAG] also stops the scan.
15
5
SCAN OPERATION
1
2
3
4
5
6
7
8
9
10
11
12
13
14
15
16
[Example]: Starting a normal scan.
Push
Blinks Blinks
Scan starts
When a signal is received
Appears