TM 10-7360-226-13&P
CONTAINERIZED KITCHEN (CK) 0006 00
OPERATION UNDER USUAL CONDITIONS
0006 00-13
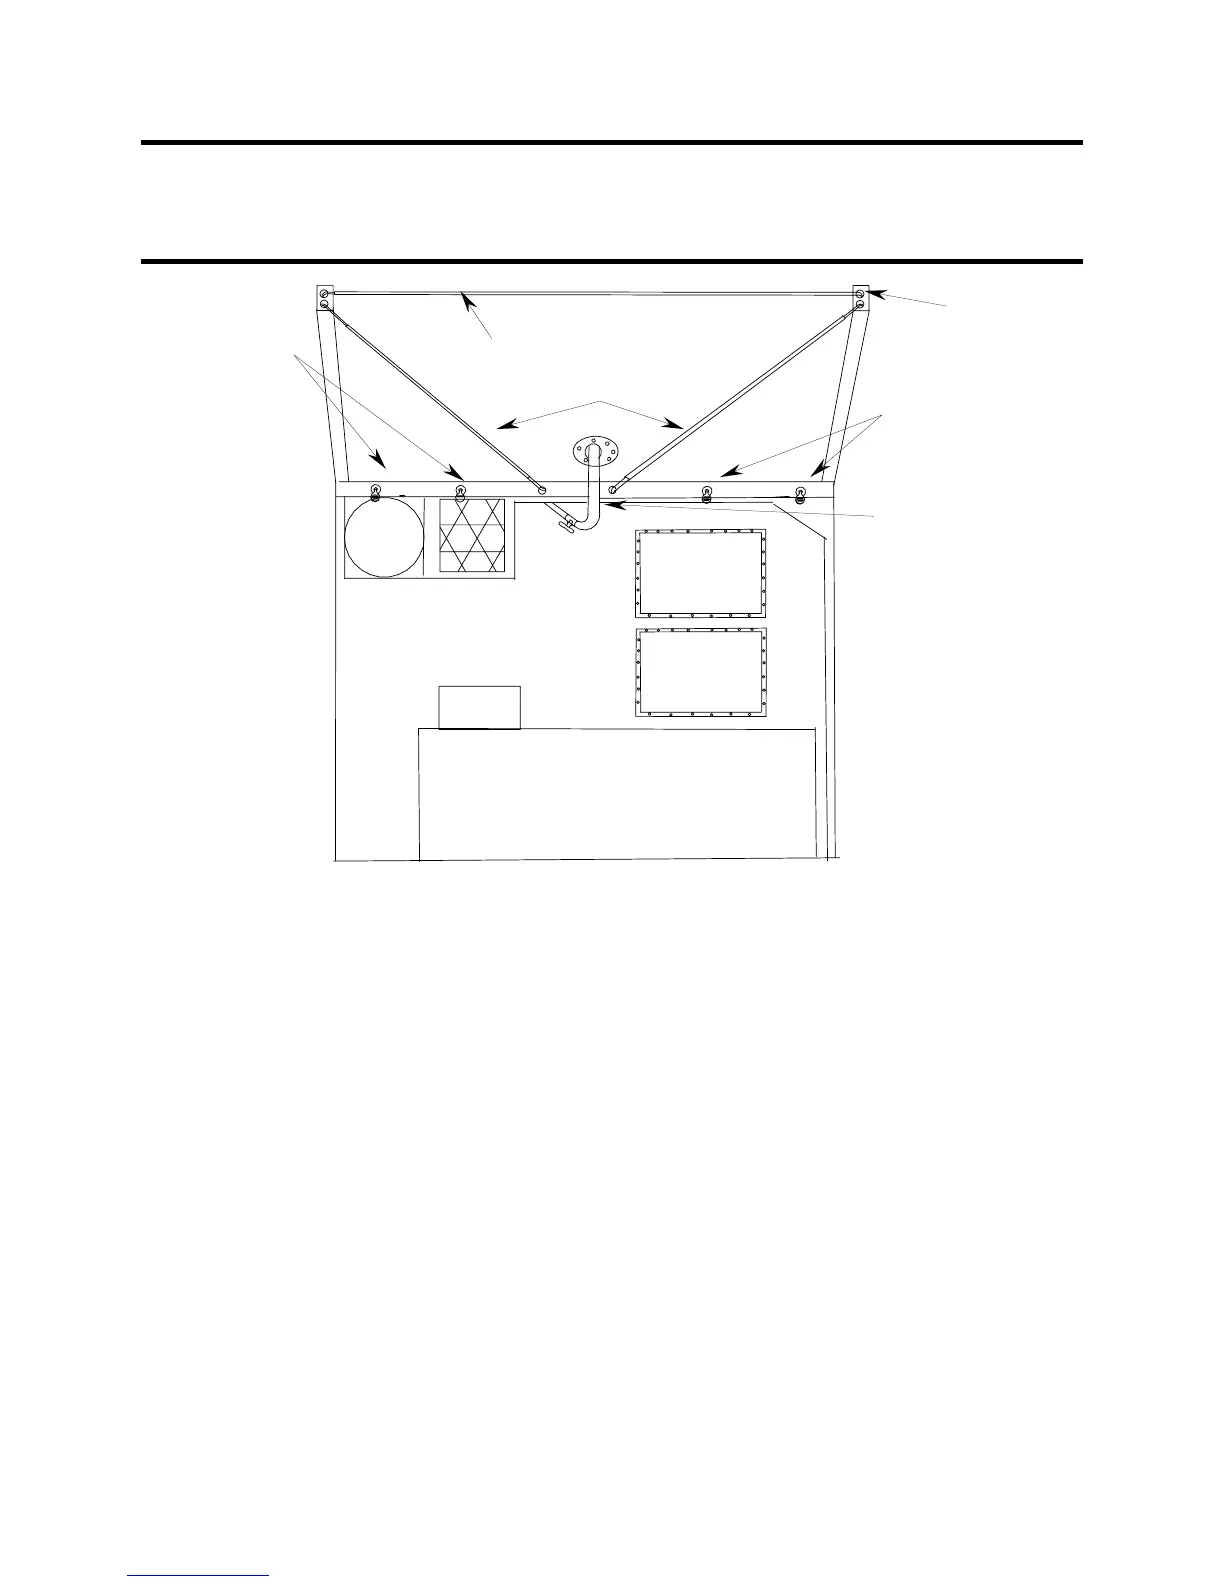
Figure 11. Awning Installation.
4. Retrieve the generator exhaust elbow pipe from its storage location to the right of the
generator. Insert the open end of the pipe down through the opening in the awning from the
top side. Attach the elbow pipe to the fixed exhaust pipe using the clamp coupler provided.
Ensure the outlet end of the elbow pipe is pointing straight upward.
5. Retrieve the two door braces from their storage location on the floor under the air
conditioners. Place the S-shaped end of one brace through one of the center two grommets
in the awning and into the corresponding hole in the top door jamb.
6. Place the other end of the brace in the inner hole in the bracket on the door. The other of
the two holes holds the awning support rod.
7. Repeat the previous two steps for the other door brace.
8. Retrieve the long awning support rod from its storage location on the floor. Slip the rod
through the long loop on the underside of the outboard end of the awning and place the
ends of the rod in the outer holes of the brackets on the doors.
9. Pull the edge of the awning over the awning support rod and buckle the straps (not shown)
to the mating buckles attached to the doors.
10. Hang the ends of the three cloth discharge ducts to the door braces using the attached
straps.
THUMBSCREWS
THUMBSCREWS
DOOR BRACES
TOP DOOR JAMB
(DOOR OMITTED
FOR CLARITY)
AWNING SUPPORT ROD
EXHAUST ELBOW