44
Installation and Servicing
SECTION 3 - SERVICING
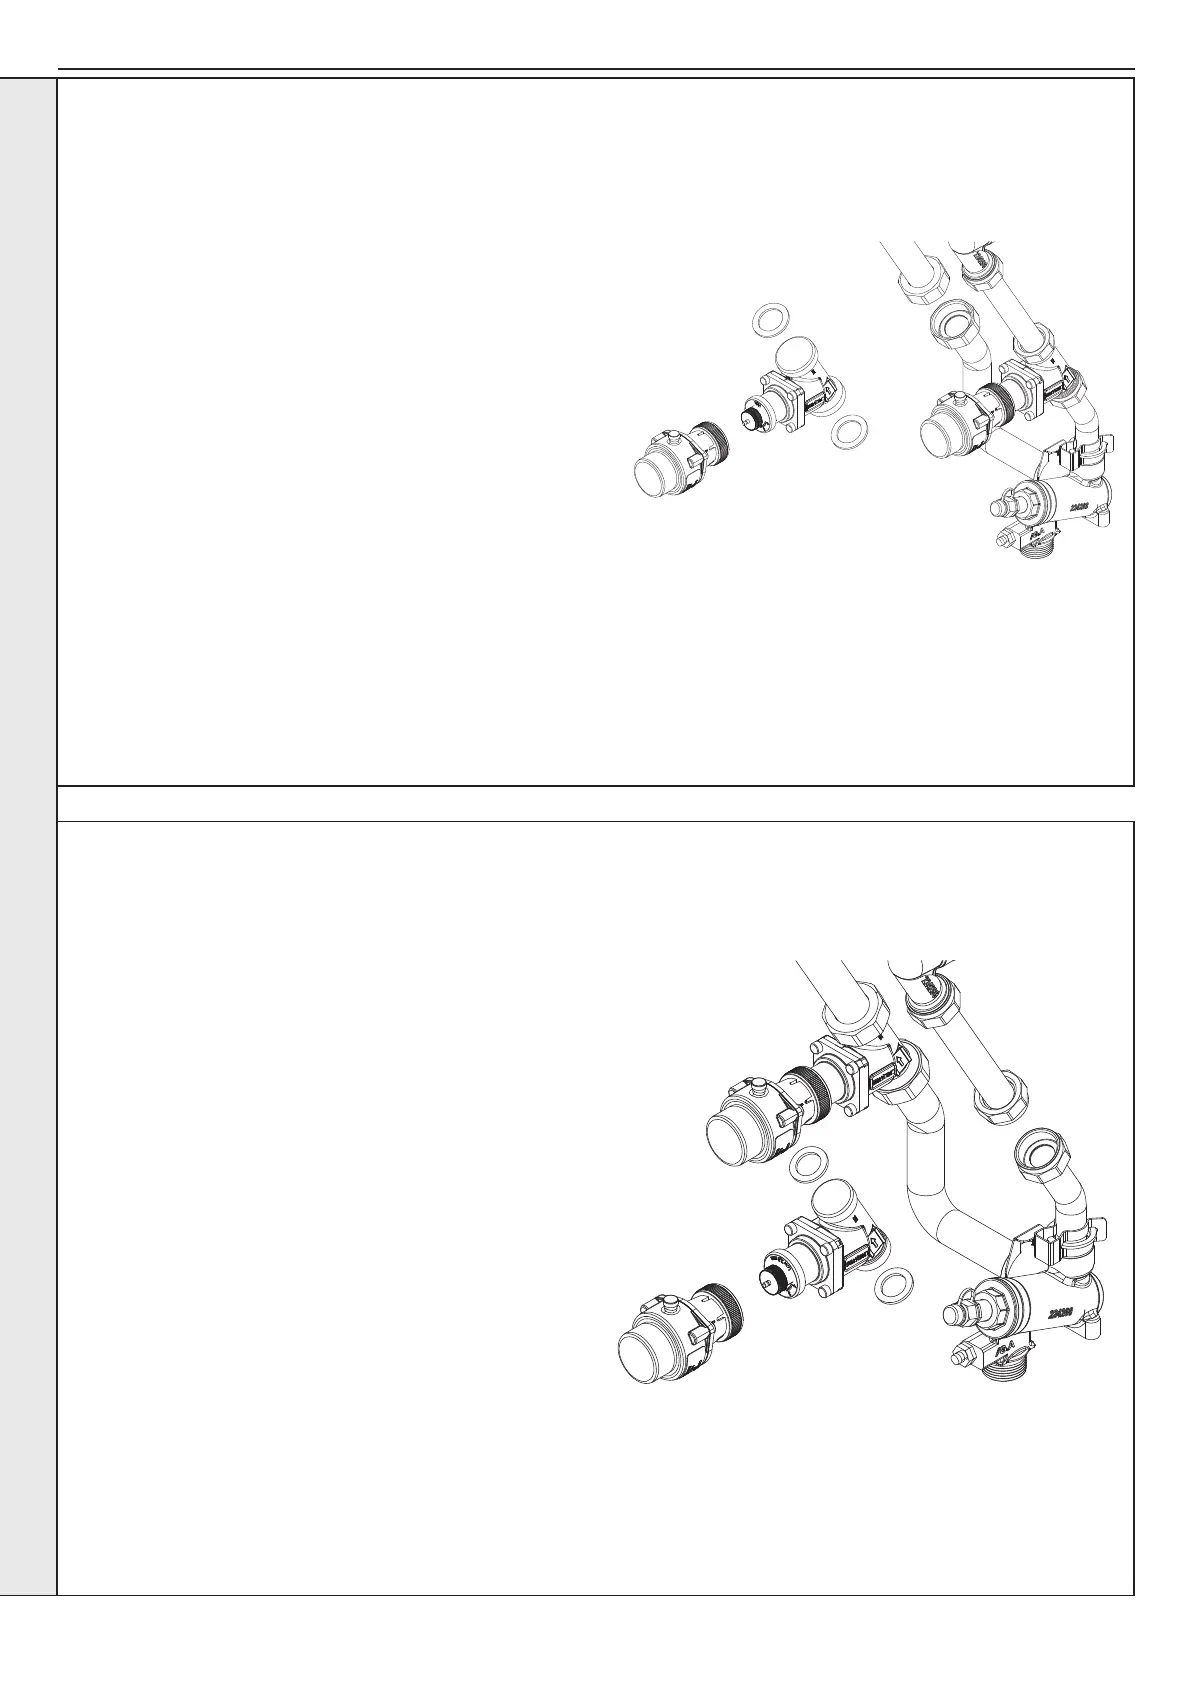
3.24 CH PICV
1. Isolate the mains electrical supply.
2. Remove the front panel. Refer to Section 3.4.
3. Remove insulation front section to expose plate heat
exchanger(s). Refer to Section 3.12.
4. Isolate and drain the HIU. Refer to Section 3.5.
5. Disconnect the electrical connector to the PICV actuator.
6. Unscrew the actuator from the PICV body.
7. Loosen the upper and lower connection nuts each side of
the PICV body.
8. Remove the PICV body from the 2 pipes.
9. Using new sealing washers ret the new PICV body note
the ow direction arrow and the position of the valve.
10. Tighten the valve body onto the associated pipe work.
11. Rell in accordance with Section 2.5 and check for leaks.
12. Ret the actuator to the PICV body. Make sure the thread
travels the full length of the valve body thread.
13. Ret electrical connection.
Note: If the Actuator does not travel the majority of the
valve body's actuator mounting thread, turn the mains
electrical supply on and activate a CH delivery this will
open the valve and allow the actuator mounting collar
to be tighten fully on to the valve. The unit must be then
turned off at the mains and back on to allow the valve to
recalibrate its position.
1. Isolate the mains electrical supply.
2. Remove the front panel. Refer to Section 3.4.
3. Remove insulation front section to expose plate heat
exchanger(s). Refer to Section 3.12.
4. Isolate and drain the HIU. Refer to Section 3.5.
5. Disconnect the electrical connector to the PICV actuator.
6. Unscrew the actuator from the PICV body.
7. Loosen the upper and lower connection nuts each side of the
PICV body.
8. Remove the PICV body from the 2 pipes.
9. Using new sealing washers ret the new PICV body. Note the
ow direction arrow and the position of the valve.
10. Tighten the valve body onto the associated pipe work.
11. Rell in accordance with Section 2.5 “primary circuit lling” and
check for leaks.
12. Ret the actuator to the PICV body, Make sure the thread
travels the full length of the valve body thread.
13. Ret electrical connection.
Note: If the actuator does not travel the majority of the valve
body's actuator mounting thread, turn the mains on and activate
a DHW delivery. This will open the valve and allow the actuator
mounting collar to be tighten fully on to the valve. The unit must
be then turned off at the mains and back on to allow the valve to
recalibrate its position.
3.23 DHW PICV
SERVICING