5.8 Completing pipe-work
The valve-box should now be securely mounted in the wall or
panel at the desired location. If not already done so, t connectors
to the valve-box, see 5.1.
Remember one outlet can be closed off using the blanking plug
(see 4.6).
Some preliminary pipe-work may already be attached to the valve-
box.
Complete all plumbing to valve-box & to outlet device(s). Observe
appropriate connections points, see 4.5.
For examples of pipe-work solutions see 5.9.
Remember to t isolating valves in the supply pipes at an easily
accessible location.
Before closing wall cavity, switch on the water supplies & check all
pipe-work & connections for leaks.
Where appropriate, the wall can be nished with tiles.
5.9 Examples of installations
This section illustrates just a few examples of how to run pipe-work to other bathroom accessories. Easybox
Slim products can be used with many different combinations of shower kits & tub lling products. Contact our
representatives or customer care for more details.
The illustrations shown should only be used as guidelines for possible solutions for a bathroom layout. Con-
sult a professional plumber for advice on how to customise the best solution for your bathroom.
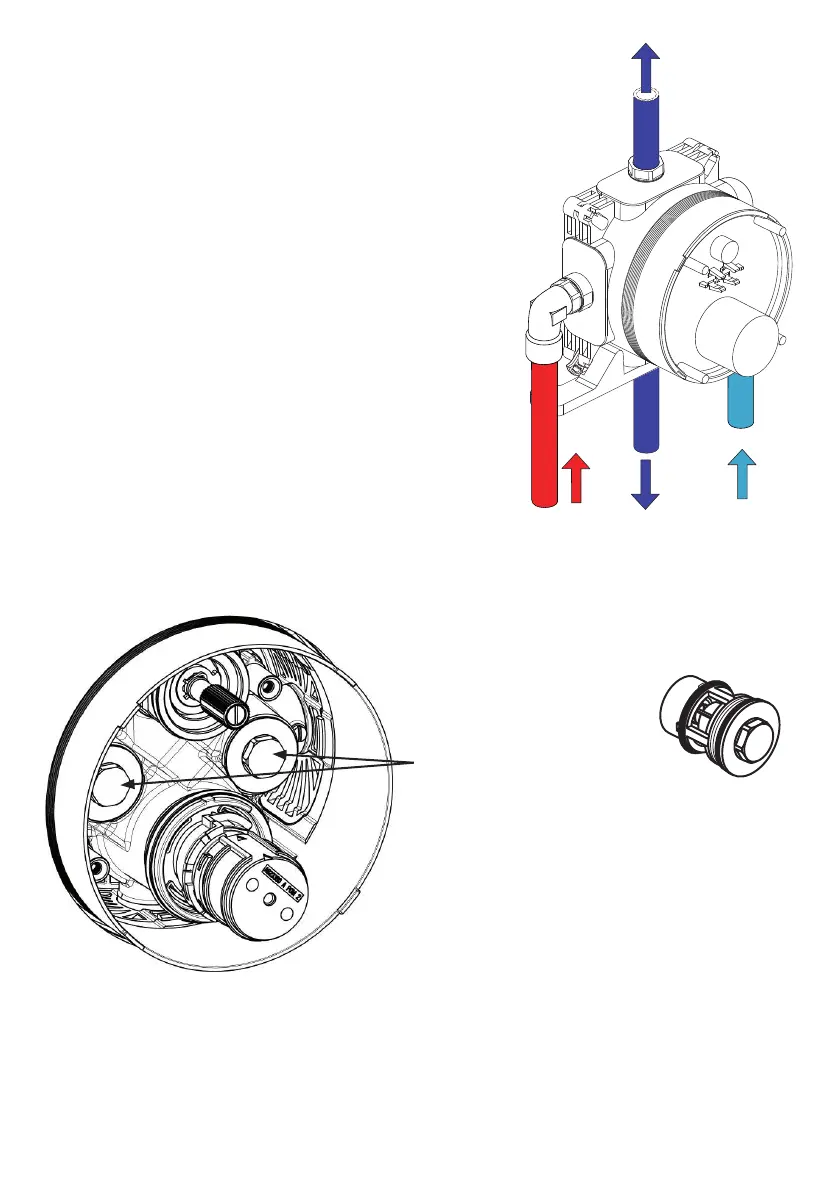
NOTE: The check valve housings also permit the
supplying pipes to be ushed through the valve-
box:
• Isolate the water supplies.
• Pull off plaster guard from
the valve-box (if tted).
• Remove the two check-valve
housings (Use 15mm A/F socket).
• Place a vessel under the valve-box.
• Gently open the isolating valves allowing
water to be discharged from the open areas.
Avoid dripping water onto panels, plaster board
& oor. Upon completion of ushing, reverse the
above procedure.
Integral check valves
These products are tted with integral check valves on both inlets to comply with water regulations. The
check valve housings include strainers (lters). From time to time it may become necessary to clean debris
from the check-valves & strainers.
These mechanisms should be cleaned carefully.
23
 Loading...