- 77 -
Removing Filters
Be sure to turn off and unplug the unit before removing filters.
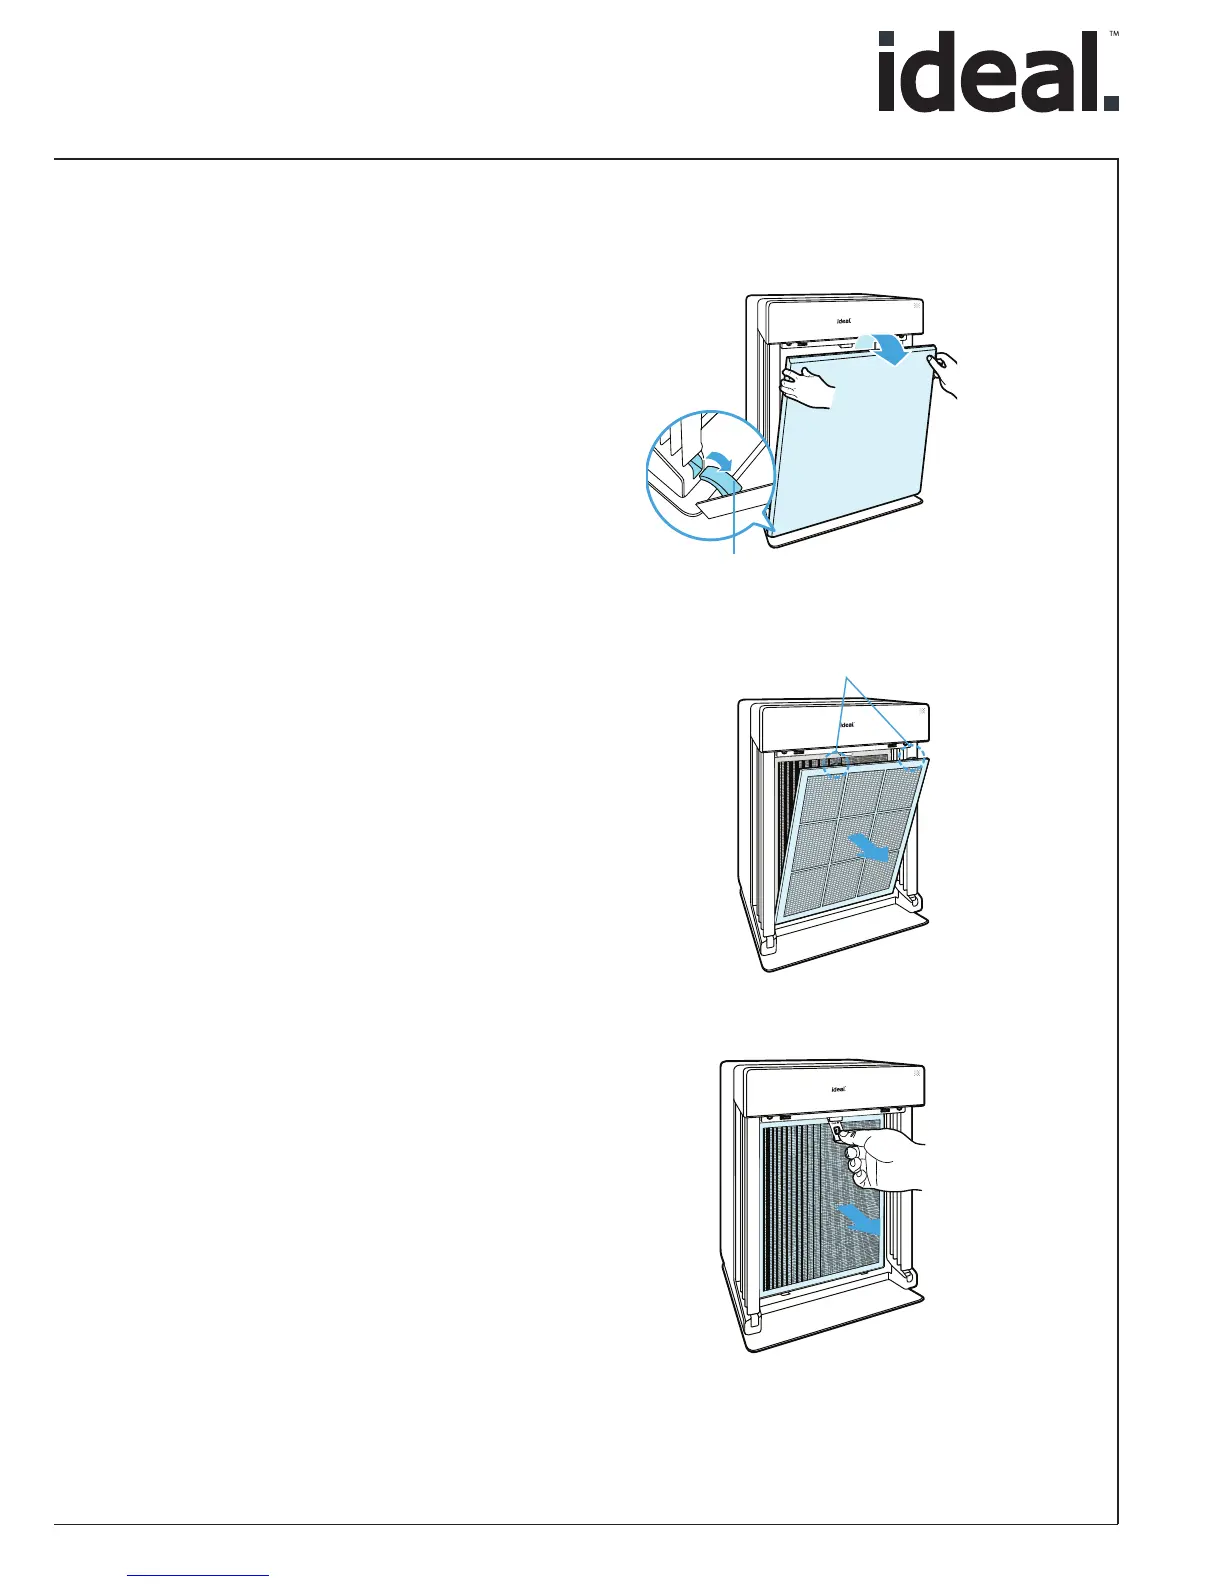
①
Remove the front panel by grasping its
upper edge and gently pulling forward.
x
To remove the front panel, the latch at the
lower edge of the panel must be released
from its position.
Latch
②
Press the tabs on the top edge to
remove the Pre-filter.
Tabs
③
The Carbon deodorization filter and
the Anti-microbial HEPA filter must be
removed in that order by pulling on the
numbered tags at the top.
x
Remove the
Carbon deodorization lter
before removing the
Anti-microbial HEPA
lter.
Remplacement des fi ltres
Assurez-vous que l’appareil soit éteint et que la prise murale soir
débranchée avant de remplacer les fi ltres.
Retirez le couvercle frontal en
saisissant son bord supérieur et en
tirant doucement vers l‘avant, puis
soulever le couvercle pour libérer le
crochet de verrouillage du bord
inférieur.
Pressez vers le bas les onglets du
bord supérieur du pré-fi ltre pour
le retirer.
Le fi ltre au charbon actif CD
et le
fi ltre True HEPA
antimicrobien
doivent
être retirés dans cet ordre en tirant sur la
languette présente sur le bord supérieur.
Retirez le fi ltre au charbon actif CD
avant
de retirer le fi ltre True HEPA
antimicrobien
.
douille
attache