- 78 -
AP 40
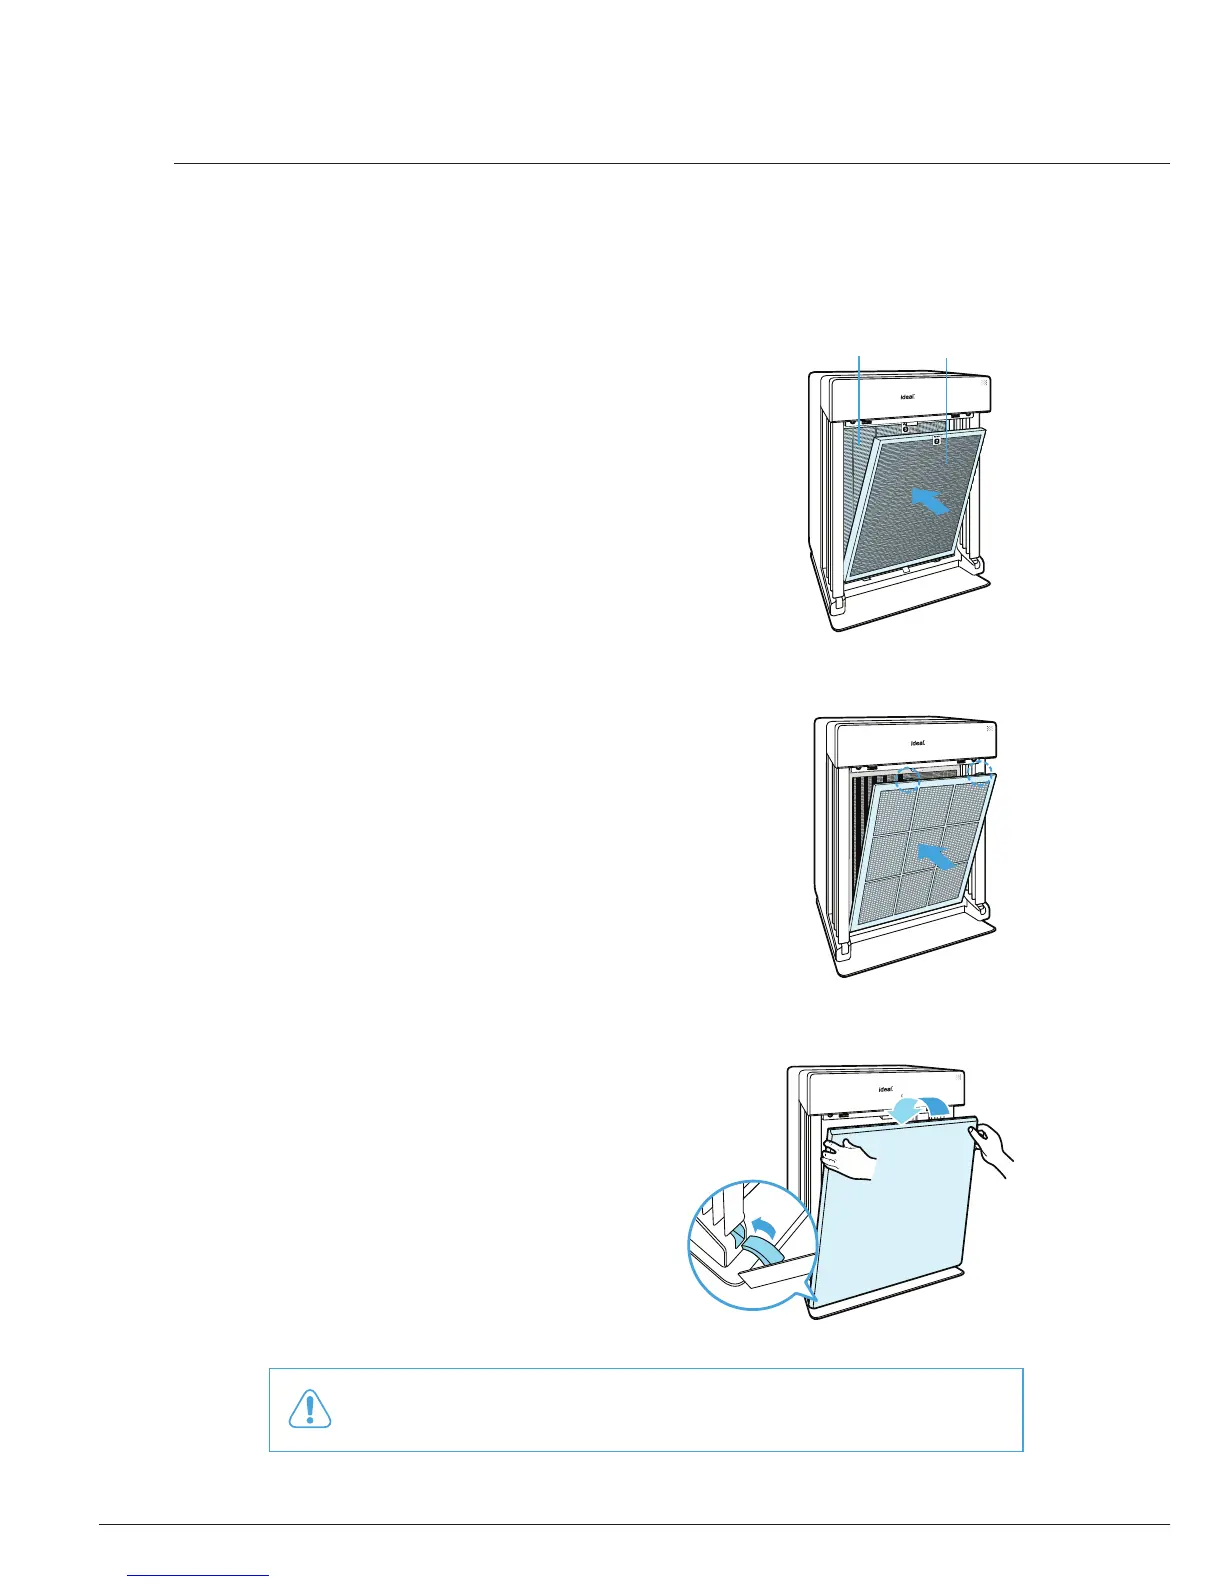
Filter Assembly
Filters should be re-assembled in the reverse order of their removal.
①
Insert the Anti-microbial HEPA filter
and Carbon deodorization filter, in
that order.
x
Be sure to remove the plastic wrap from new
lters.
Operating the unit without removing the
plastic wrap from the lters may cause
abnormal noise, deformation, or re from
overheating.
Anti-microbial
HEPA filter
Carbon
deodorization
filter
②
Insert the Pre-filter.
x
Fit this pair of lters into the grooves on
either side of the lower part of the unit, and
then insert the tabs at the top and gently
push until both sides of the middle section
audibly click into place.
③
Replace the front panel by first inserting
the latch at the bottom edge and then
snapping the upper part shut.
X
Only genuine Winix filters should be used with this unit.
Remplacement des fi ltres
Placez les nouveaux fi ltres dans l’ordre inverse.
Insérez en premier le fi ltre True HEPA
antimicrobien et après le fi ltre au charbon
actif.
Retirez l’emballage en plastique des
nouveaux fi ltres. Si vous installez les fi ltres
sans retirer l’emballage, vous risquez de
provoquer des bruits anormaux, une
déformation ou un incendie.
Insérez le pré-fi ltre.
Lors de l’installation du pré-fi ltre, d’abord
l’insérer dans la rainure de chaque côté de la
partie inférieur, après accrochez-le en haut
et appuyez dessus simultanément en bas,
à droite et à gauche pour l’enfoncer sur le
purifi cateur d’air.
Montez le couvercle frontal sur l’appareil
Accrochez-le en bas et appuyez dessus
simultanément en haut, à droite et à
gauche pour l’enfoncer sur le purifi cateur
d’air.
Utilisez uniquement des fi ltres préconisés par le
fabricant.
Note
Filtre au
charbon actif CD
Filtre True HEPA
antimicrobien