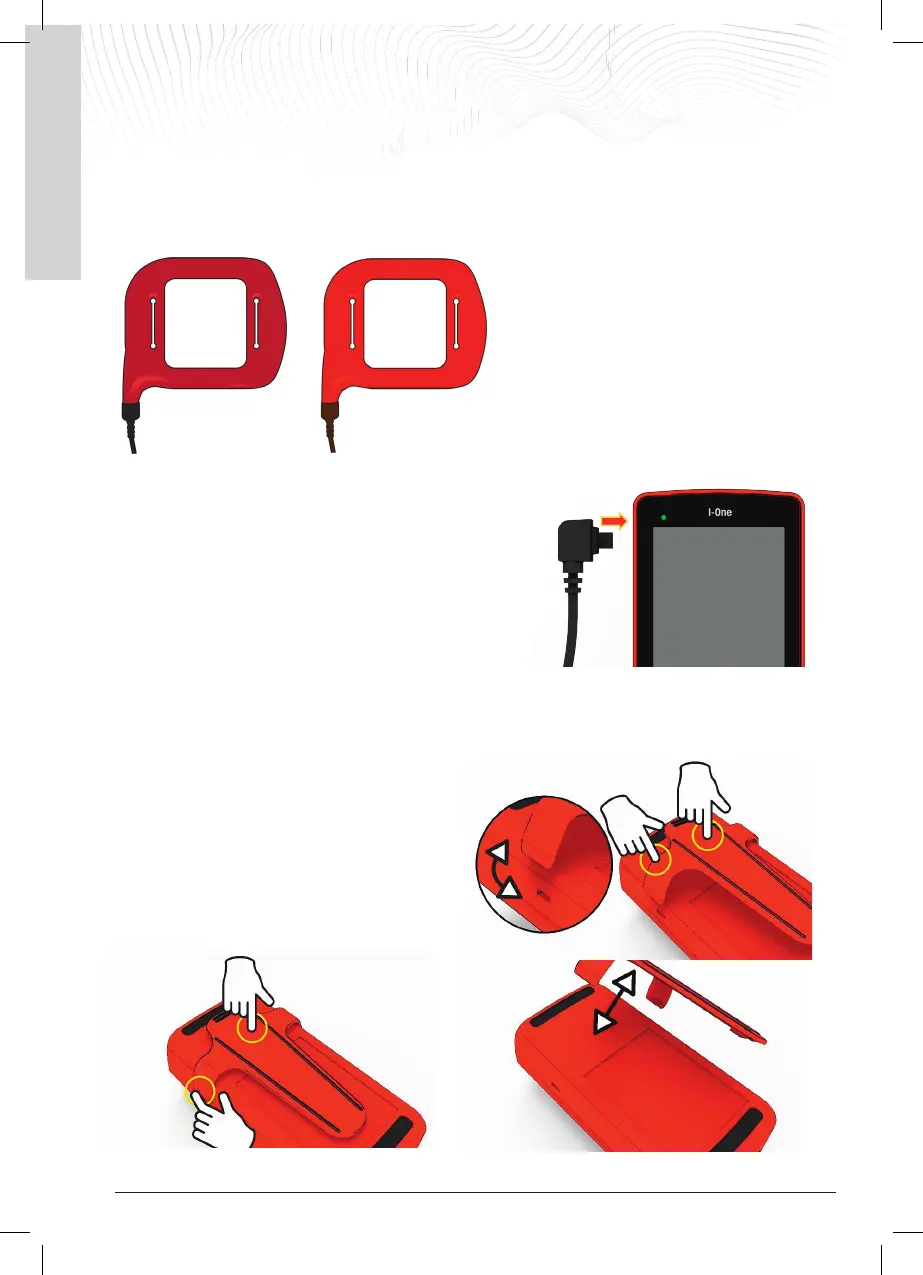
Insert the coil connector into the coil socket on the left side of the
generator (P), pressing down until you hear a 'click'.
When switched on, the device will automatically recognise the
connected coil and emit the required alarm level.
4. CLIP ATTACHMENT AND REMOVAL
If necessary, the generator can be clipped onto the belt using the supplied clip, so that the treatment can also be
carried out on the move.
To fit the clip, engage one side notch in the slot provided
and apply light pressure to the centre of the clip until the
second notch is also fully engaged.
The generator can now be attached to the belt.
To remove the clip, press gently in the centre to release
the first side notch from its socket, followed by the second.
Now lift the clip and remove it.
IGEA I-ONE - User Manual
Page 6
5. ADMINISTERING THE TREATMENT
5.1 Coil positioning
Position the coil so that the place undergoing treatment is in the centre of the coil,
then secure it with the supplied band or other suitable means; an example of
positioning it on the knee is shown here.
It is not necessary for the coil to come into contact with the skin; for hygienic
reasons, it is always recommended to place the coil on light clothing, the presence
of which does not have an impact on the treatment. Particularly if the skin has
lesions in the treatment area, place a light garment between the coil and the skin
or, if this is not possible, clean the coil before each application.
5.2 Turning on the generator
After charging the battery and connecting the coil, switch on the generator by
pressing the power button for about 2 seconds until you hear a confirmation 'beep'
and a short vibration, then release the button.
The display lights up and an initial Welcome screen appears. Then the main screen
appears with the battery symbol at the top and the timer counting down the treatment time in the middle of the
screen. The device immediately starts providing the treatment. Below the timer, the PAUSE button allows the
treatment to be paused.
The
I-ONE suggests a treatment time of 4 hours every time it is switched on, which is
the recommended time in order for the treatment to be effective.
The LED at the top of the display flashes green and the timer on the display starts to
count down the treatment time.
In the adjacent figure you can see the timer, where 3:00 is the remaining treatment
time. The timer updates with every minute of treatment that has been performed until
the preset daily treatment time of 4 hours is reached.
During the treatment phase, it must be remembered that:
After 10 seconds of inactivity, the display lowers its brightness, and after 30 seconds, it
switches off to save battery power; the green LED that continues to flash informs the
patient that treatment is in progress.
During treatment, the patient can reactivate the display
with a quick press of the ON/OFF button, e.g. to read the treatment time remaining
or the remaining battery charge.
When switched on, the display shows: