NanoPhotometer
®
P-Class User Manual
Version 2.1 Page 41 / 70
5.2 Concentration
This makes simple concentration measurements on samples, by measuring the amount of light that has passed
through a sample relative to a reference (this can be air). Concentration is obtained by multiplying the measured
absorbance at a specific wavelength by a factor. The factor may be known in advance, or may be calculated by the
instrument by measuring a standard of known concentration.
The procedure is as follows:
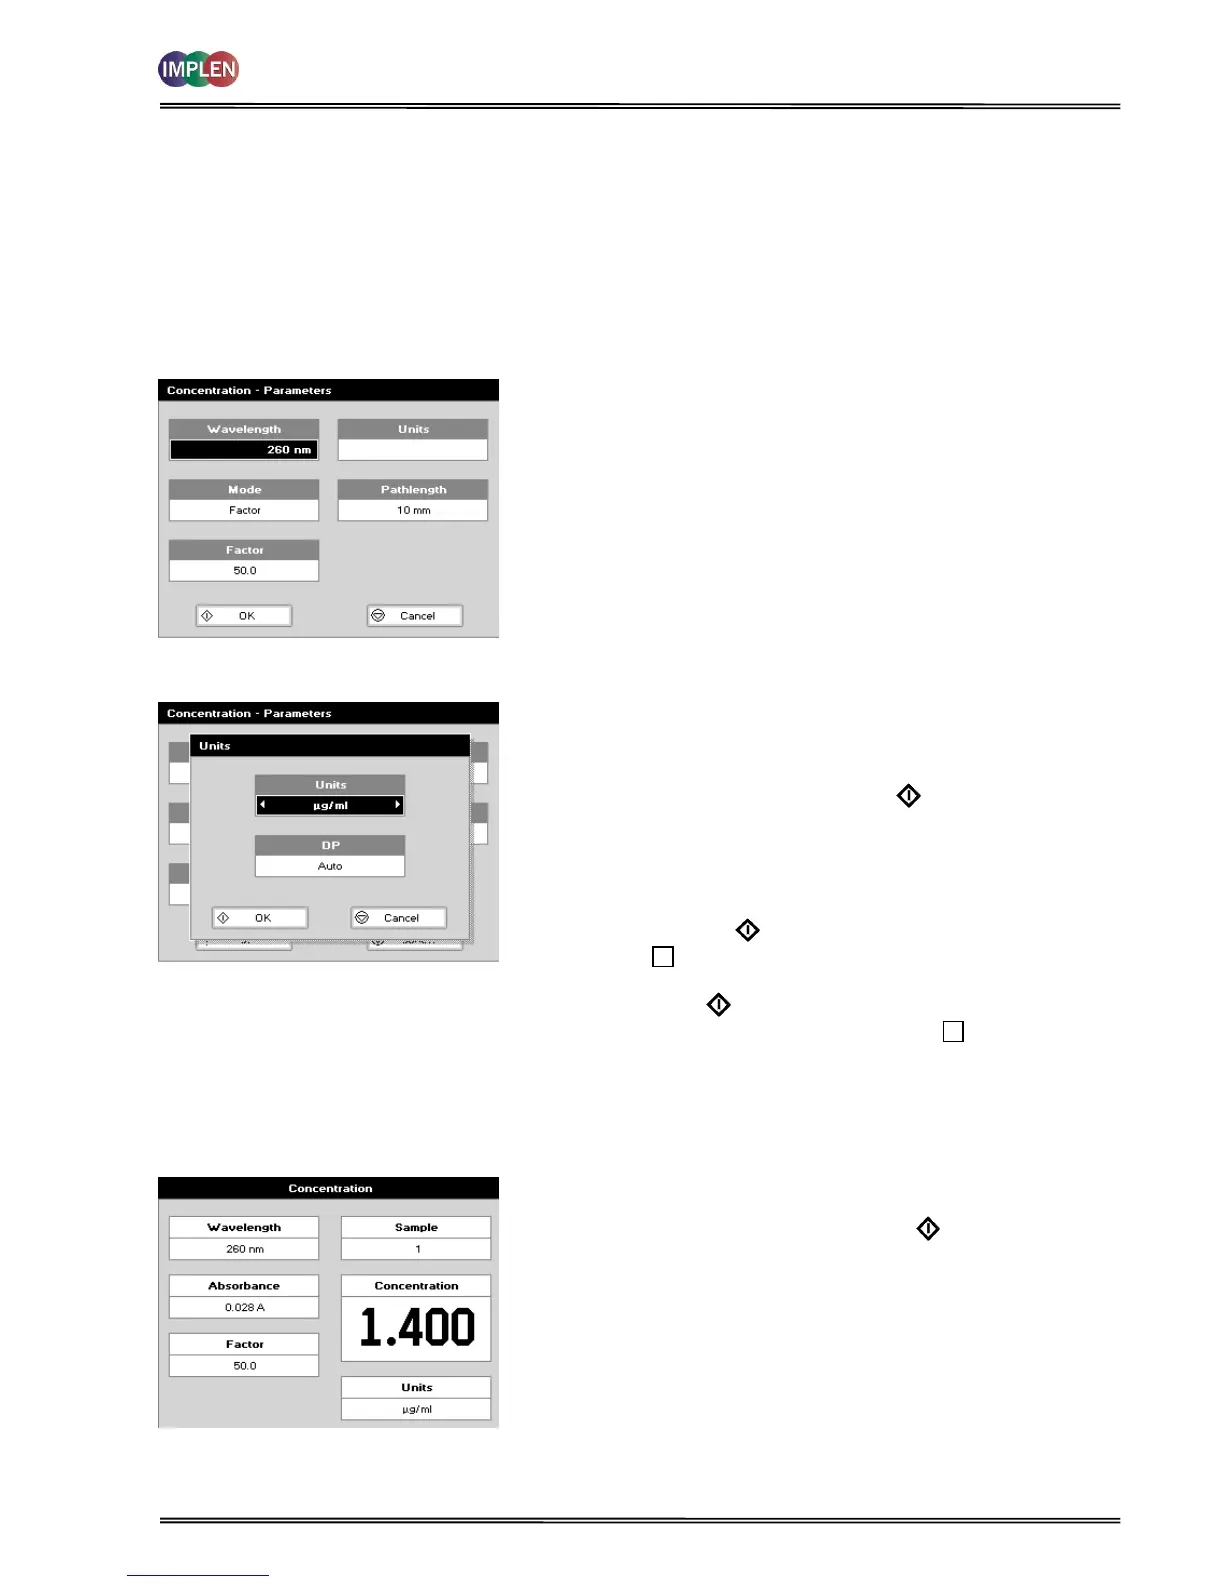
Parameter Screen
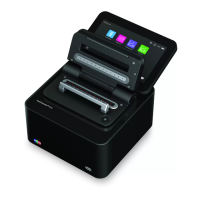
Results Screen (if using a Factor)
Parameter Screen
Step 1 Press 3 to select Functions.
Step 2 Press 2 to select Concentration
Step 3 Set Wavelength by using keypad numbers or left and right
arrows.
Step 4 Select the Mode: Factor (user entered) or Standard (factor
is calculated from a calibration sample), using the left
and right arrows.
Step 5 (if Factor is selected) Enter the Factor using the keypad
numbers. Range 0.001 to 9,999. Use the C button to
delete the last digit entered.
Step 6 (if Standard is selected) Enter the concentration using
keypad numbers. Range 0.01 to 9,999. Use the C button
to delete the last digit entered.
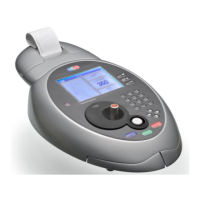
Step 7 Units: The user can enter a text string up to 8 characters
long. To access a list of pre-defined units press the
Menu/Options key and then use the left/right arrows
(µg/ml, µg/µl, pmol/µl, mg/ml, mmol/l, µmol/l, g/l,
mg/l, µg/l, U/l, %, ppm, ppb, conc or none). These units
can also be edited once OK is pressed. This screen
also allows the number of displayed Decimal Points (DP)
to be selected, from 0 to 2. Note that the result will
always be fixed to 5 significant figures regardless of how
many decimal points are selected (so 98768.2 will
display as 98768 even with 1 decimal point selected).
Press OK to store the chosen parameters or Cancel
.
Step 8 To enter the results screen with the selected parameters
press OR cancel the selections and return to the
Functions folder by pressing Cancel .
Results Screen (if using a Factor)
Step 9 Insert the reference sample. Press Blank key. This will be
used for all subsequent samples until changed.
Step 10 Insert sample and press Sample .