NanoPhotometer
®
P-Class User Manual
Version 2.1 Page 20 / 70
4.2.2 Protein UV Method
The procedure is as follows:
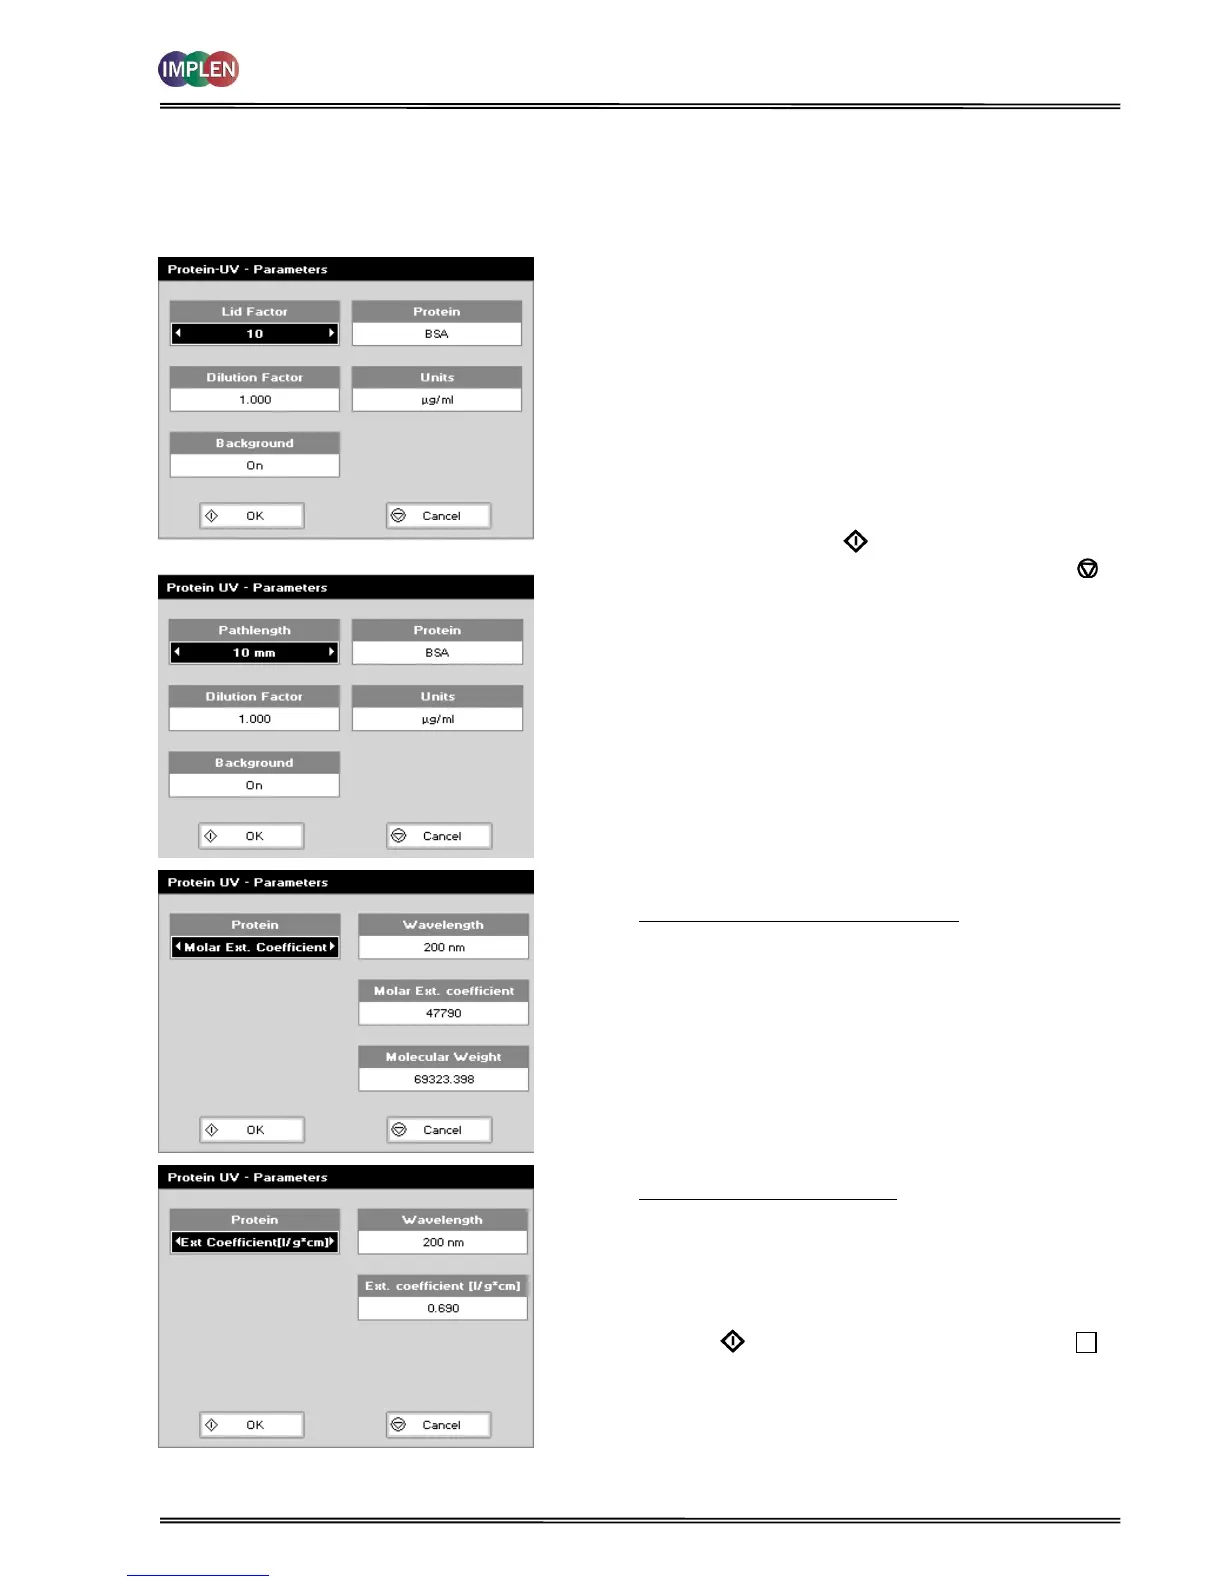
Parameter Screen
NanoVolume Applications
Cuvette Applications
Parameter Screen
Step 1 Press 1 for NanoVolume OR 2 for Cuvette folder.
Step 2 Press 2 to select Protein folder.
Step 3 Press 1 to select Protein UV mode.
Step 4 Using NanoVolume Applications select the Lid Factor as
described in the “Average Detection Range Sheet” or under
3.2. A minimum of 1.5 µl sample volume (for lid 10) is
recommended.
Step 17 Enter the Dilution Factor using the keypad numbers. Range
1.00 to 9,999. Use the C button to backspace and clear the
last digit entered. OR press Menu/Options to enter the
dilution factor screen. Enter the volume of the sample
using the keypad numbers. Range 0.01 to 9,999. Enter the
volume of the diluent using the keypad numbers. Range
0.01 to 9,999. Press OK to calculate the dilution factor
and return to the Parameters screen OR press Cancel to
cancel the selections and return to the Parameters screen.
Step 5 Select whether the Background correction at 320 nm is
used or not with the left and right arrows. It is
recommended to switch on the Background correction.
Step 6 Select the Protein (BSA (default), Serum Albumin (mouse),
Serum Albumin (human), IgG, Lysozyme, Custom or OD 1).
Step 7 If using Custom Protein there are two possibilities to enter
the correct factors:
Molar extinction coefficient (M
-1
* cm
-1
):
Ranges are:
Wavelength: 200 nm to 340 nm
Molar extinction coefficient (M
-1
* cm
-1
): 10,000 to
9,999,999
Molecular weight: 0.001 to 9,999,999
Extinction coefficient (l/g * cm):
Ranges are:
Wavelength: 200 nm to 340 nm
Extinction coefficient (l/g * cm): 0.001 to 9,999
Step 8 Select the Units of measurement using the left and right
arrows. Options: mg/ml, μg/ml, ng/μl and μg/μl.
Step 9 Press OK to enter the Results screen OR Cancel to
return to the Protein folder.