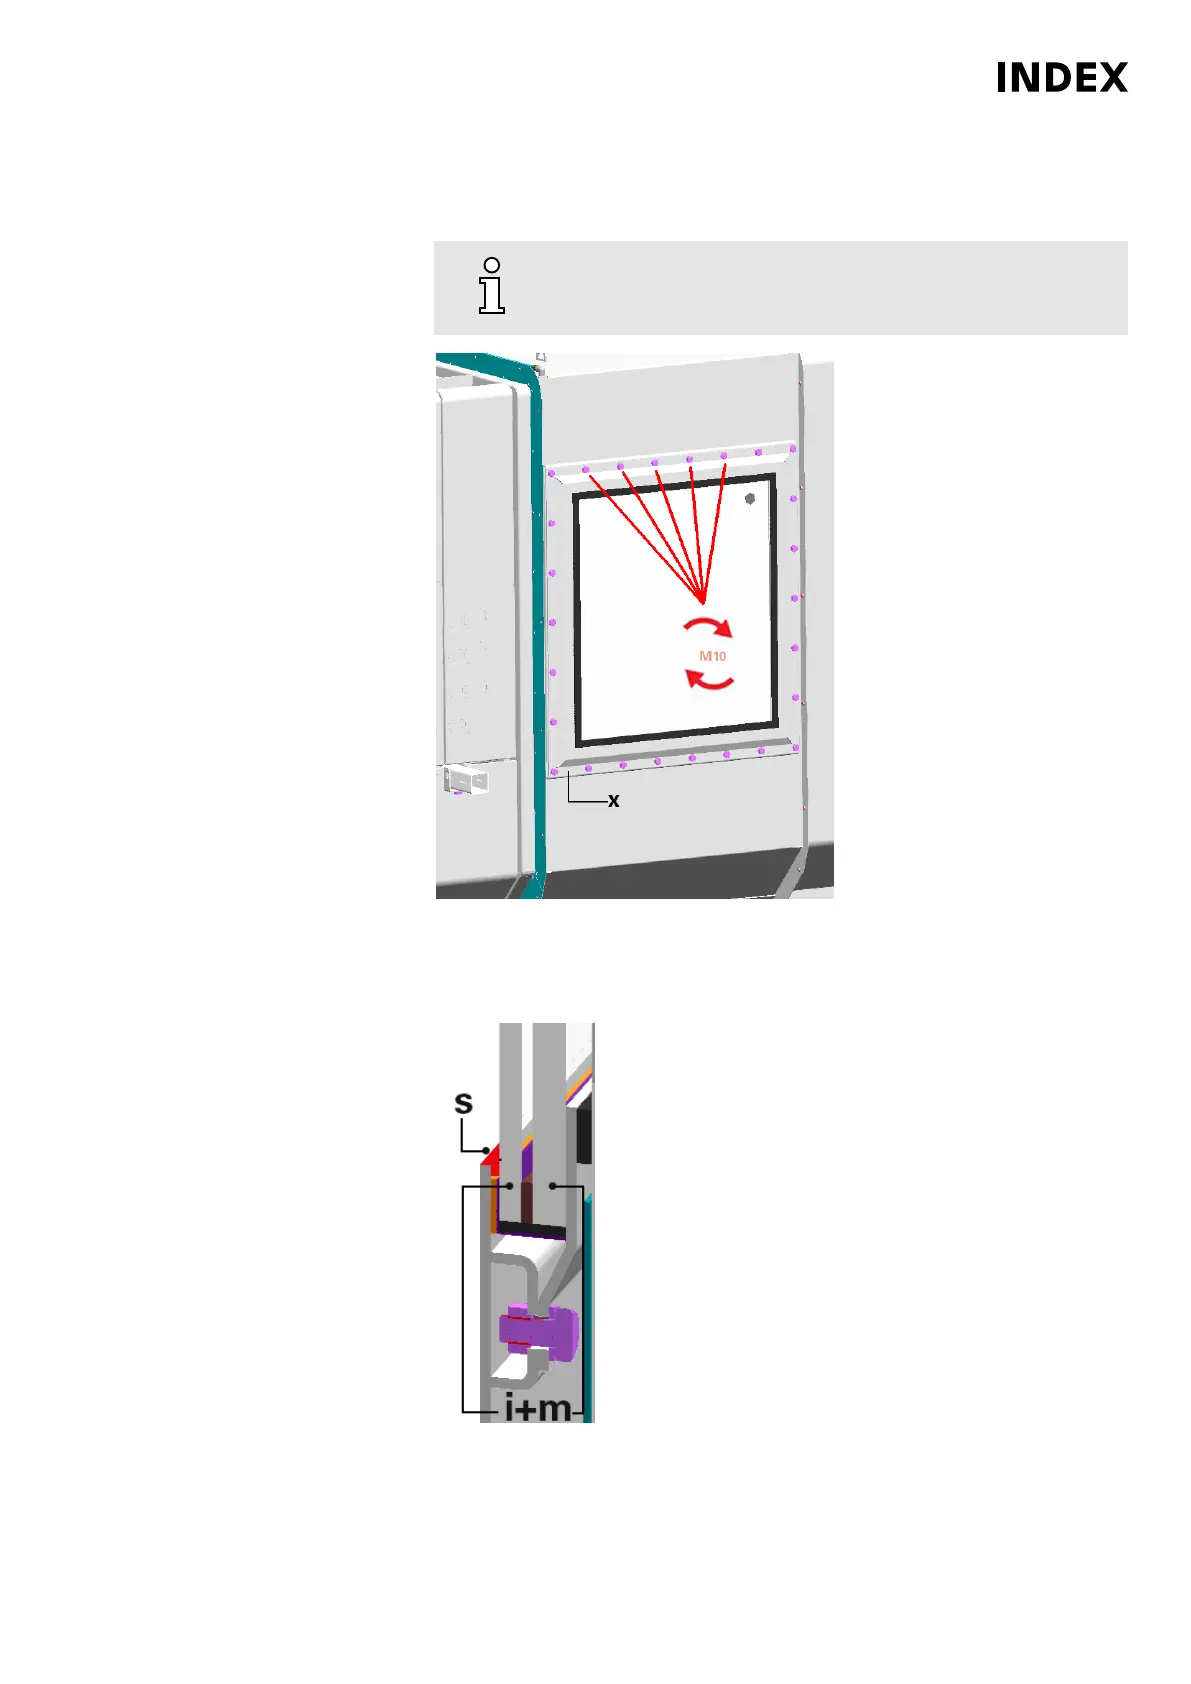
5. For assembly, follow the steps in reverse order. Ensure proper cleanliness
during the installation.
6.
Make sure of cleanliness and stress-free installation when
mounting the clamping frame into the work area door.
Example: G200.2 Work area door 07
Reinstall the glass package and clamping frame. After installation, tighten all
screws (Fig.:_07) to the prescribed torque.
7.
Example: G200.2 Work area door 06
Maintenance Summary - 8 Years
147
Maintenance Instructions
G200.3 G220.3
DIE248EN - 15.08.2022


 To Next Page