8 IG9972BEN (2017-09) Plug-In Boards.om
4 Installation
Use screened cables only (connect screen to barrel of connector). If both
ends of the screen are connected to ground, compensating currents must
be prevented (e.g. by connecting all involved units to a common power
distributor).
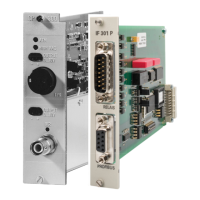
In a Profibus-DP installation (IF300P board), use the recommended special
cable only (→ [2]).
For safety reasons, vacant slots should always be covered with blank
panels.
Disconnect all cables from the unit before installing / removing any plug-
in modules.
Modules should only be handled on an ESD protected bench.
• Switch off the unit and wait one minute
• Remove all cables (power cable last)
• Unscrew the blind plate / plug-in module
• Insert / remove plug-in module
• Screw on the plug-in module / blind plate
• Connect the cables (mains cable first)
• Switch on the unit again
To ensure correct operation, check that the screws of the plug-in
modules are tightened.
Additional protective measures must be taken if certain processes in the
vacuum system (e.g. flashovers) can cause hazardous voltages on the
gauge terminals.
Although the gauge cables are screened, they should not be routed in
parallel to lines producing strong electrical noise.
Connect the gauge to the <TPR> connector on the rear panel. The connectors are
locked so that they cannot be separated accidentally.
General
4.1 Installing / Removing
the Plug-In Boards
Procedure
4.2 Connecting the Pirani
Gauge