14 15
Entering Standby Mode
Standby mode may be activated at any time to conserve battery life.
1. From the home screen, short press the Power
Button to
enter / exit standby mode.
NOTE: When in standby mode, the indicator LED (13) will flash red.
Adjusting the Focus
ADJUSTING THE DIOPTER/EYEPIECE
1. Rotate the eyepiece diopter adjustment ring (12) at the rear of
the FINDERV2 right or left until the user interface is clear.
2. Look closely to ensure all screen icons and the status bar appear
sharp and in focus.
NOTES:
• After the initial adjustment, there is no need to rotate the diopter
adjustment ring (12) for long distances or other conditions.
• If necessary during standard use, you may rotate the objective
lens focus ring(2) to adjust fine focus on the target object being
observed. See Focusing the Objective Lens below.
FOCUSING THE OBJECTIVE LENS
To adjust the focus on the target object:
1. Rotate the objective lens focus ring (2) left or right to adjust fine
focus on the target object being observed.
NOTE: Re-adjusting the focus will be necessary if the distance to
your target changes.
Status Bar Overview
17:16/2023/10/15
M
×1.0
O u t
N W N EN
H :+ 10.0°
V :- 07.0°
+ 30
0
- 30
0
- 30
+ 30
1
12
11
10
2 3 4 5 6 987
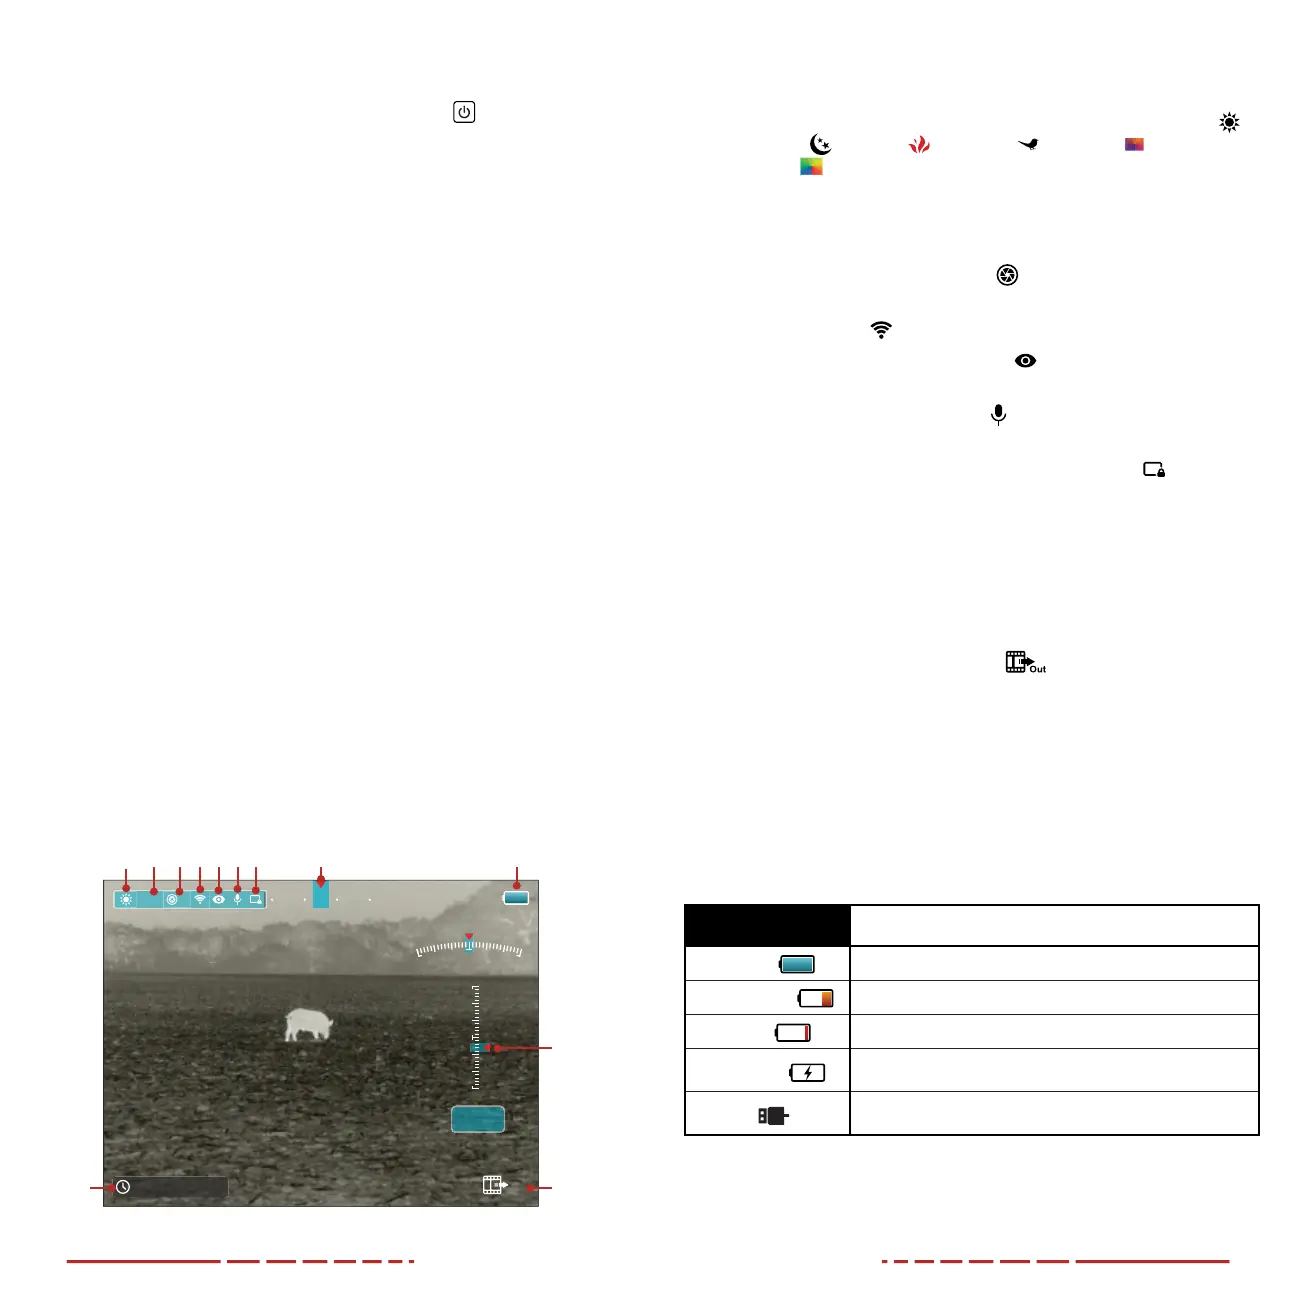
The status bar at the top of the screen shows information on the
operating status of the FINDERV2. Additional status information is
displayed along the screen edges.
1 Color Palette: Shows the selected color palette: white hot
,
black hot
, red hot , highlight , ironbow , or
rainbow
.
2 Digital Zoom Level: Shows the selected digital zoom level: 1×,
1.5×, 2×, 2.5×, 3×, 3.5×, or 4×.
3 Non-Uniformity Correction (NUC) Mode: Shows the
non-uniformity correction (NUC)
icon and selected mode:
automatic (A) or manual (M).
4 Wi-Fi: The Wi-Fi
icon displays when Wi-Fi is turned on.
5 Ultra-clear Mode: The Ultra-clear
icon displays when
Ultra-clear mode is turned on.
6 Microphone: The microphone
icon displays when the
microphone is turned on.
7 Automatic Display-o: The automatic display-o
icon
displays when the automatic display-o feature is turned on.
8 Digital Compass: The digital compass appears at the top of the
screen when turned on.
9 Battery: Shows the current battery status.
10 Gravity Sensor: The gravity sensor appears on the right side of
the screen when turned on.
11 Video Output: The video output
icon displays when video
output is turned on.
12 Time and Date: Shows the current time, in 24-hour format, and
the date.
BATTERY STATUS
The battery icon color and fill level indicate the current battery status.
The battery status icon is replaced by the charging icon or the USB
icon when an external power supply is connected.
COLOR / ICON BATTERY STATUS
Blue Battery
30% – 100%
Orange Battery
20% – 30%
Red Battery
<20%; charge the battery pack right away.
Charging Icon
The battery pack is charging; an external power supply or
computer is connected via the data cable.
USB Icon
An external power supply or computer is connected via
the data cable, but no battery is installed.
 Loading...