16
En
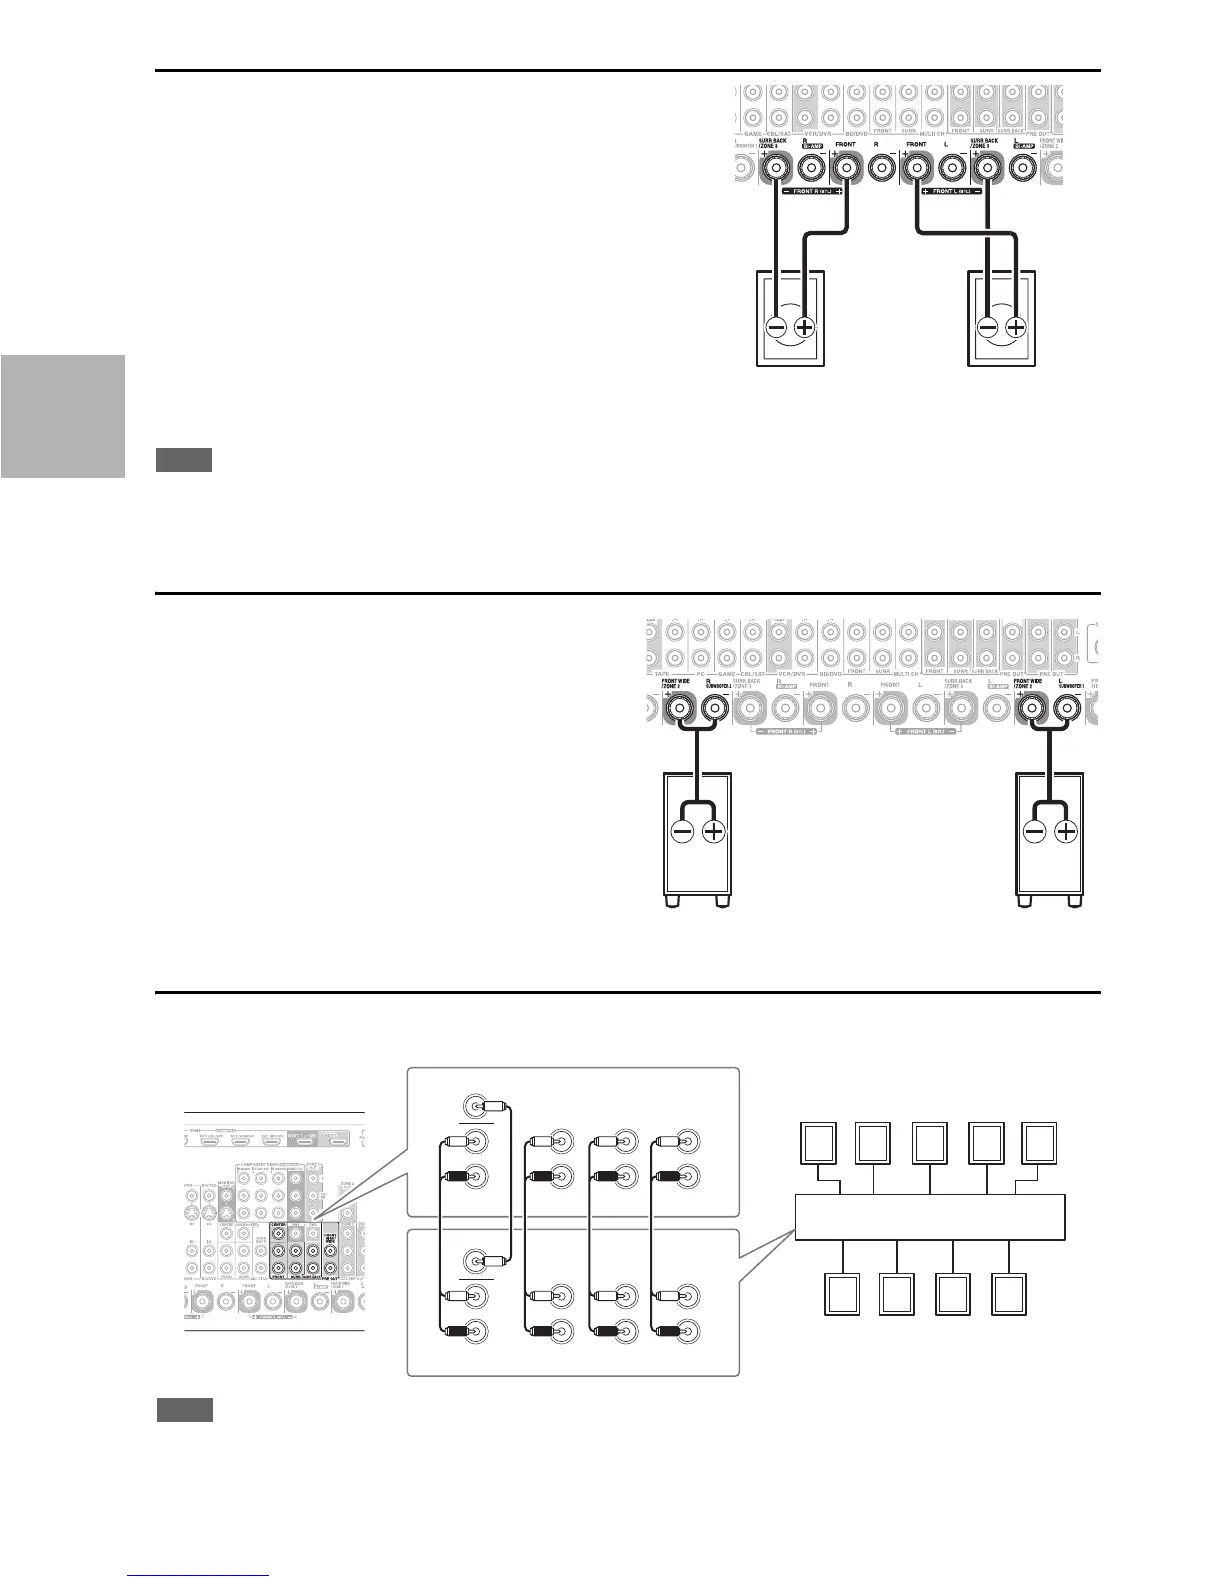
Bridging the Front Speakers
The FRONT L/R and SURR BACK/ZONE 3 L/R terminal
posts can be used with front speakers and surround back speak-
ers respectively, or bridged together to provide almost double
the output power for the front speakers.
• When bridging is used, surround back speakers cannot be
used.
• For bridging, the positive (+) FRONT L/R and SURR
BACK/ZONE 3 L/R terminal posts are used, but the negative
(–) FRONT L/R and SURR BACK/ZONE 3 L/R terminals
are not.
• Once you’ve completed the bridging connections shown below
and turned on the AV receiver, you must set the
“Speakers Type(Front)” setting to “BTL” to enable bridging
(➔ 54).
Note
• Use only front speakers with an impedance of 8 ohms or higher for bridging. Failure to do so may seriously damage the AV
receiver.
• When using bridging, make sure that your front speakers can handle the additional power.
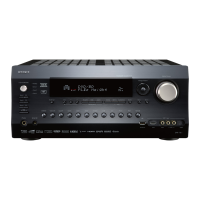
Connecting the Passive Subwoofers
The FRONT WIDE/ZONE 2 L/R terminal posts can be
used with front wide speakers or passive subwoofers.
• Once you’ve connected the passive subwoofers and
turned on the AV receiver, you must set the “Passive
Subwoofer” setting to “Use” (➔ 54).
• When the passive subwoofers are used, the Powered
Zone 2/4 cannot be used.
• If you use one passive subwoofer, connect it to the
SUBWOOFER1 terminals.
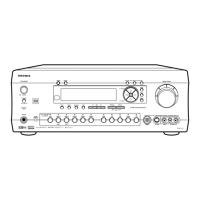
Connecting a Power Amplifier
If you want to use a more powerful power amplifier and use the AV receiver as a preamp, connect it to the PRE OUT
jacks, and connect all speakers to the power amplifier.
Left speakerRight speaker
Subwoofer 2 Subwoofer 1
abc
h
f
dge
i
FRONT HIGH OR
FRONT WIDE
FRONT
HIGH/
WIDE
CENTER
FRONT
FRONT
R
L
R
R
L
L
R
R
L
L
R
L
R
R
L
L
CENTER
SURR
SURR SURR BUCK
SURR BUCK
PRE OUT
aFront left speaker
bCenter speaker
cFront right speaker
dSurround left speaker
eSurround right speaker
fSurround back left speaker
gSurround back right speaker
hFront high/Front wide left speaker
iFront high/Front wide right speaker
Note
• Specify “None” for the channel that you don’t want to output
(➔ 55).
Power amplifier