EasyManuals Logo

Intel D975XBX Product Guide

Intel D975XBX
78 pages
To Next Page IconTo Next Page
To Previous Page IconTo Previous Page
Page #36 background imageLoading...
Page #36 background image
Intel Desktop Board D975XBX Product Guide
36
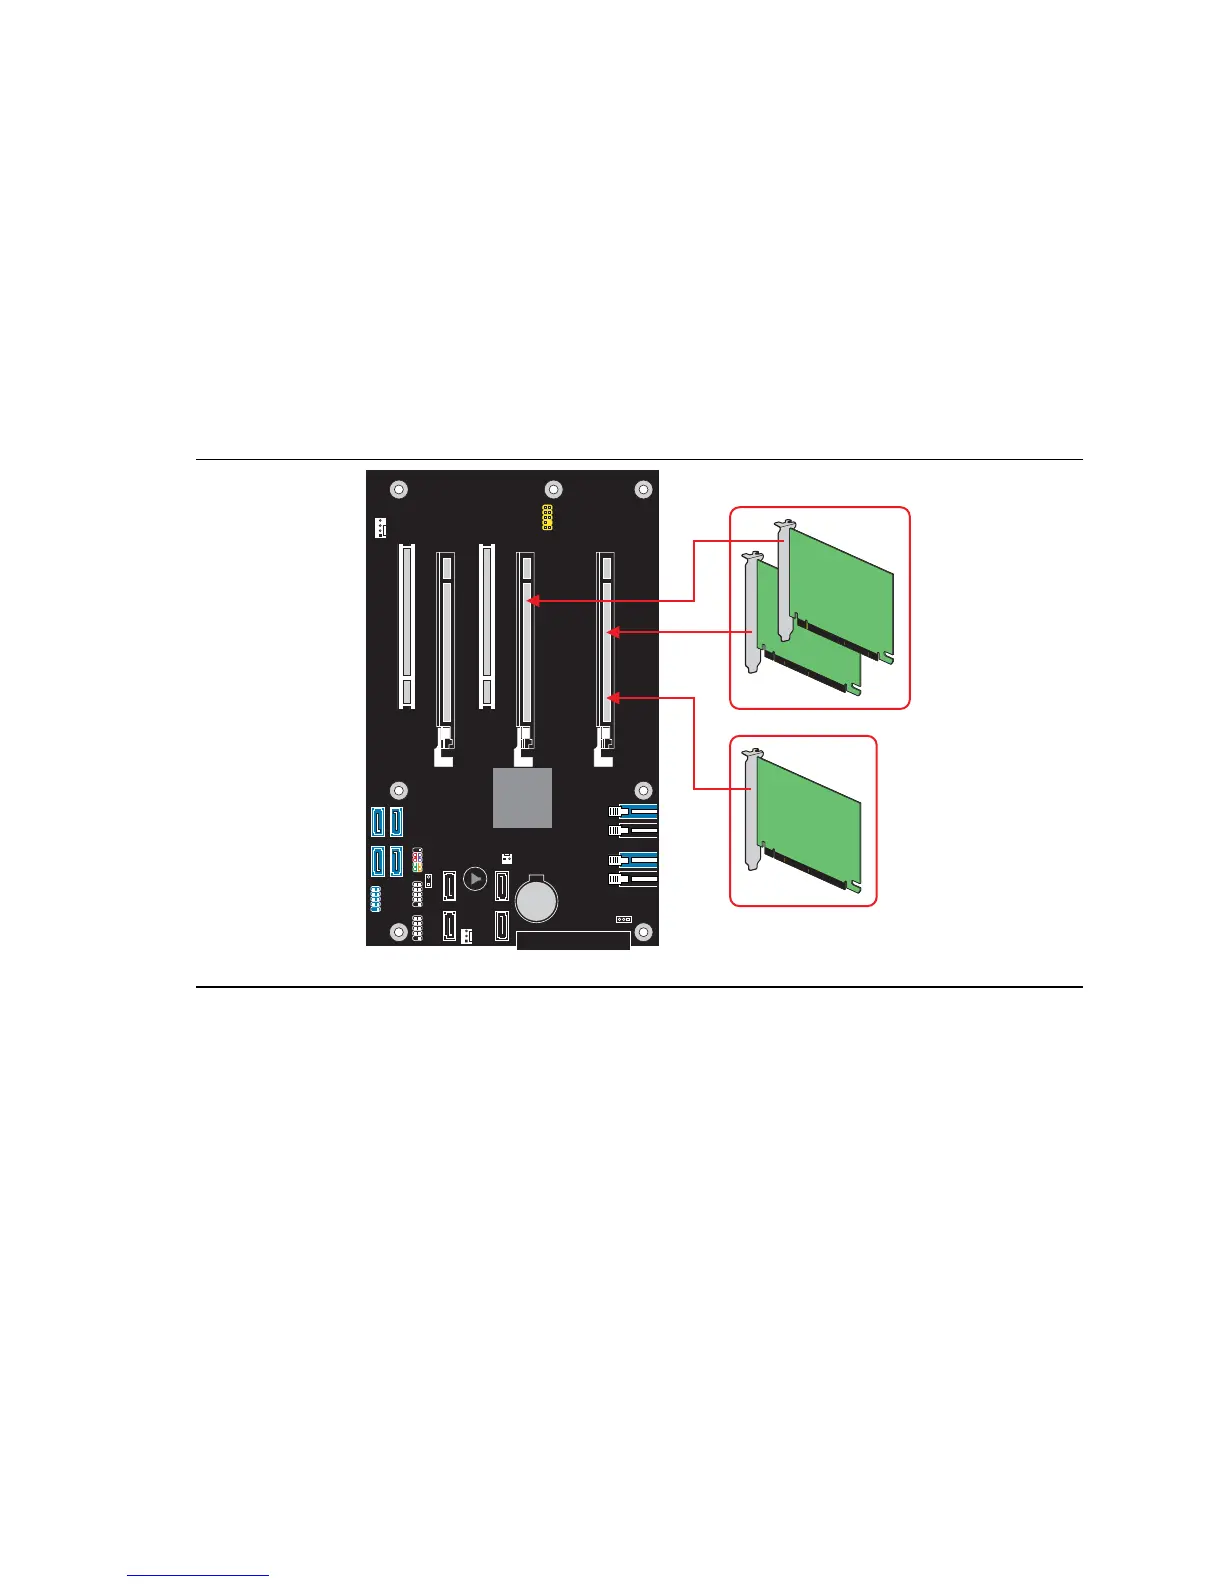
Installing a PCI Express x16 Card
If you are installing a single PCI Express Graphics card, install it in PCI Express connector 1 (see
Figure 18, A) for optimum performance. However, if you are installing two PCI Express Graphics
cards, install them in PCI Express connectors 1 and 2 (see Figure 18, B).
Follow these instructions to install any PCI Express x16 card:
1. Observe the precautions in "Before You Begin" on page 23.
2. Place the card in the PCI Express x16 connector.
3. Press down on the card until it is completely seated in the PCI Express x16 connector and the
card retention notch snaps into place around the RM pin.
4. Secure the card’s metal bracket to the chassis back panel with a screw.
OM18187
B
A
Figure 18. Installing PCI Express Graphics Cards

Table of Contents

Other manuals for Intel D975XBX

Questions and Answers:

Question and Answer IconNeed help?

Do you have a question about the Intel D975XBX and is the answer not in the manual?

Intel D975XBX Specifications

General IconGeneral
ChipsetIntel 975X
SocketLGA 775
Memory TypeDDR2
Memory Slots4
Maximum Memory8 GB
Form FactorATX
RAID SupportRAID 0, 1, 5, 10
USB Ports8 x USB 2.0
Supported ProcessorsIntel Pentium 4, Pentium D, Core 2 Duo
Memory Speed533/667 MHz
Expansion Slots2 x PCI Express x16, 1 x PCI Express x4, 2 x PCI
Storage Interfaces4 x SATA 3Gb/s, 1 x PATA
AudioIntel High Definition Audio
LANGigabit Ethernet

Related product manuals