Intel
®
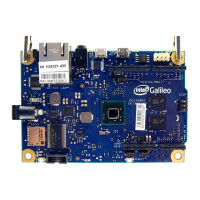
Galileo Board Getting Started Guide
6 Order Number: 329685-002US
4. Launch the IDE.
The first time you compile and install a sketch, the Galileo software will be
installed automatically. This requires appropriate file and directory access
permissions. You may be required to run the IDE as root or using sudo arduino
depending on your Linux distribution.
5. Select your board via Tools > Board > Intel Galileo Fab D
6. Select the port Tools > Serial Port > /dev/ttyAMC0
Note: If the serial ttyACM0 is not available, make sure you have the proper rights to
access the ports. If the serial port is disabled on your IDE, exit the IDE and
execute again using the command: sudo arduino
Mac OS:
The Galileo board is supported by the Mac OS built-in USB drivers, however, the board
has to boot for it to show up because the port is driven by software on the board.
1. If not done already, connect the 5V power cable to the board and to a power
outlet. Wait for the board to boot.
Note: Always connect the 5V power before the USB connection.
2. Connect the USB cable to the USB Device Port (closest to the Ethernet) and to
your Mac. Check the System Profiler > USB setting to be sure that Gadget
Serial is selected. If you are installing a new version of the IDE, you may need to
re-select this setting.
3. In the Arduino IDE, the correct serial port shows in the Tools > Serial Port menu
as /dev/cu.usbmodemnnnnn where nnnnn is a number such as fd121.
Do not select the /dev/tty port.
5. Launch the Arduino IDE application
Windows: In the folder arduino-1.5.3, double-click arduino.exe
Linux: In the folder arduino-1.5.3, launch Arduino by executing ./arduino
Note: You may see an error stating Java is not present. If you are using Ubuntu, run
the command sudo apt-get install default-jre to clear this error.
Mac OS: Double-click the Intel Galileo Install disk image. When the disk volume
mounts, drag and drop the Arduino application on your Applications folder.
6. Update your board firmware
The IDE contains the release-specific firmware for your board. Follow the steps below
to update your board firmware using the IDE.
1. Remove all power from the board (USB and 5 V power cord). This makes sure that
no sketch is running on the board.
2. Remove the SD card from the board (if it is inserted).
3. Power up the board by plugging in the 5V power supply.
4. Connect the USB cable to the USB Device Port (closest to the Ethernet).
Note which COM port it is connected on.