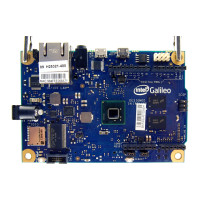
Intel
®
Galileo Board Getting Started Guide
Order Number: 329685-006US 5
2. Connect the USB cable to the USB Client Port (closest to the Ethernet) and to a
PC. Wait for Windows to begin its driver installation process. After a few moments,
the process will fail.
3. Click on the Start Menu, and open up the Control Panel. While in the Control
Panel, navigate to System. Next, click on System. Once the System window is
up, open the Device Manager.
4. Look under Ports (COM & LPT). You should see an open port named Gadget
Serial V2.4. If you do not see this open port, follow steps a-c in the Note below.
5. Right-click on the Gadget Serial V2.4 port and choose the Update Driver
Software option.
6. Choose the Browse my computer for Driver software option.
7. Navigate to the hardware/arduino/x86/tools directory. This allows the proper
driver file linux-cdc-acm.inf to be installed.
8. Once the driver is successfully installed, Device Manager will show a
Galileo (COMx) device under Ports (COM & LPT). Note the COMx port number
as it will be needed in the IDE later. The example below shows COM5.
Note: You may find Gadget Serial 2.4 under Other devices in Device Manager. If
this is the case, do the following:
a. In Windows Explorer, go to C:\Windows\System32\drivers and look for
usbser.sys. If it is present, you can skip these steps. If it is missing,
copy usbser.sys from the archive location identified below:
Windows 7:
C:\Windows\System32\DriverStore\FileRepository\mdmcpq.inf_amd6
4_neutral_fbc4a14a6a13d0c8\usbser.sys (archive file)
Windows 8:
C:\Windows\System32\DriverStore\FileRepository\mdmcpq.inf_amd6
4_d9e0b9c4fe044b4d\usbser.sys (archive file)
b. In Windows Explorer, copy to: C:\Windows\System32\drivers
You may need to provide Administrator Permission to complete the copy.
c. Once usbser.sys is copied, continue with step 5 above.
Linux:
1. If not done already, connect the 5V power cable to the board and to a power
outlet. Wait for the board to boot.
Note: Always connect the 5V power before the USB connection.
2. Connect the USB cable to the USB Client Port (closest to the Ethernet) and to a
PC.
3. Check that ACM port is available by typing in the terminal ls /dev/ttyACM*

 Loading...