Chapter 3 — Replacing Parts
48 EasyCoder PD41/PD42 Printer Service Manual
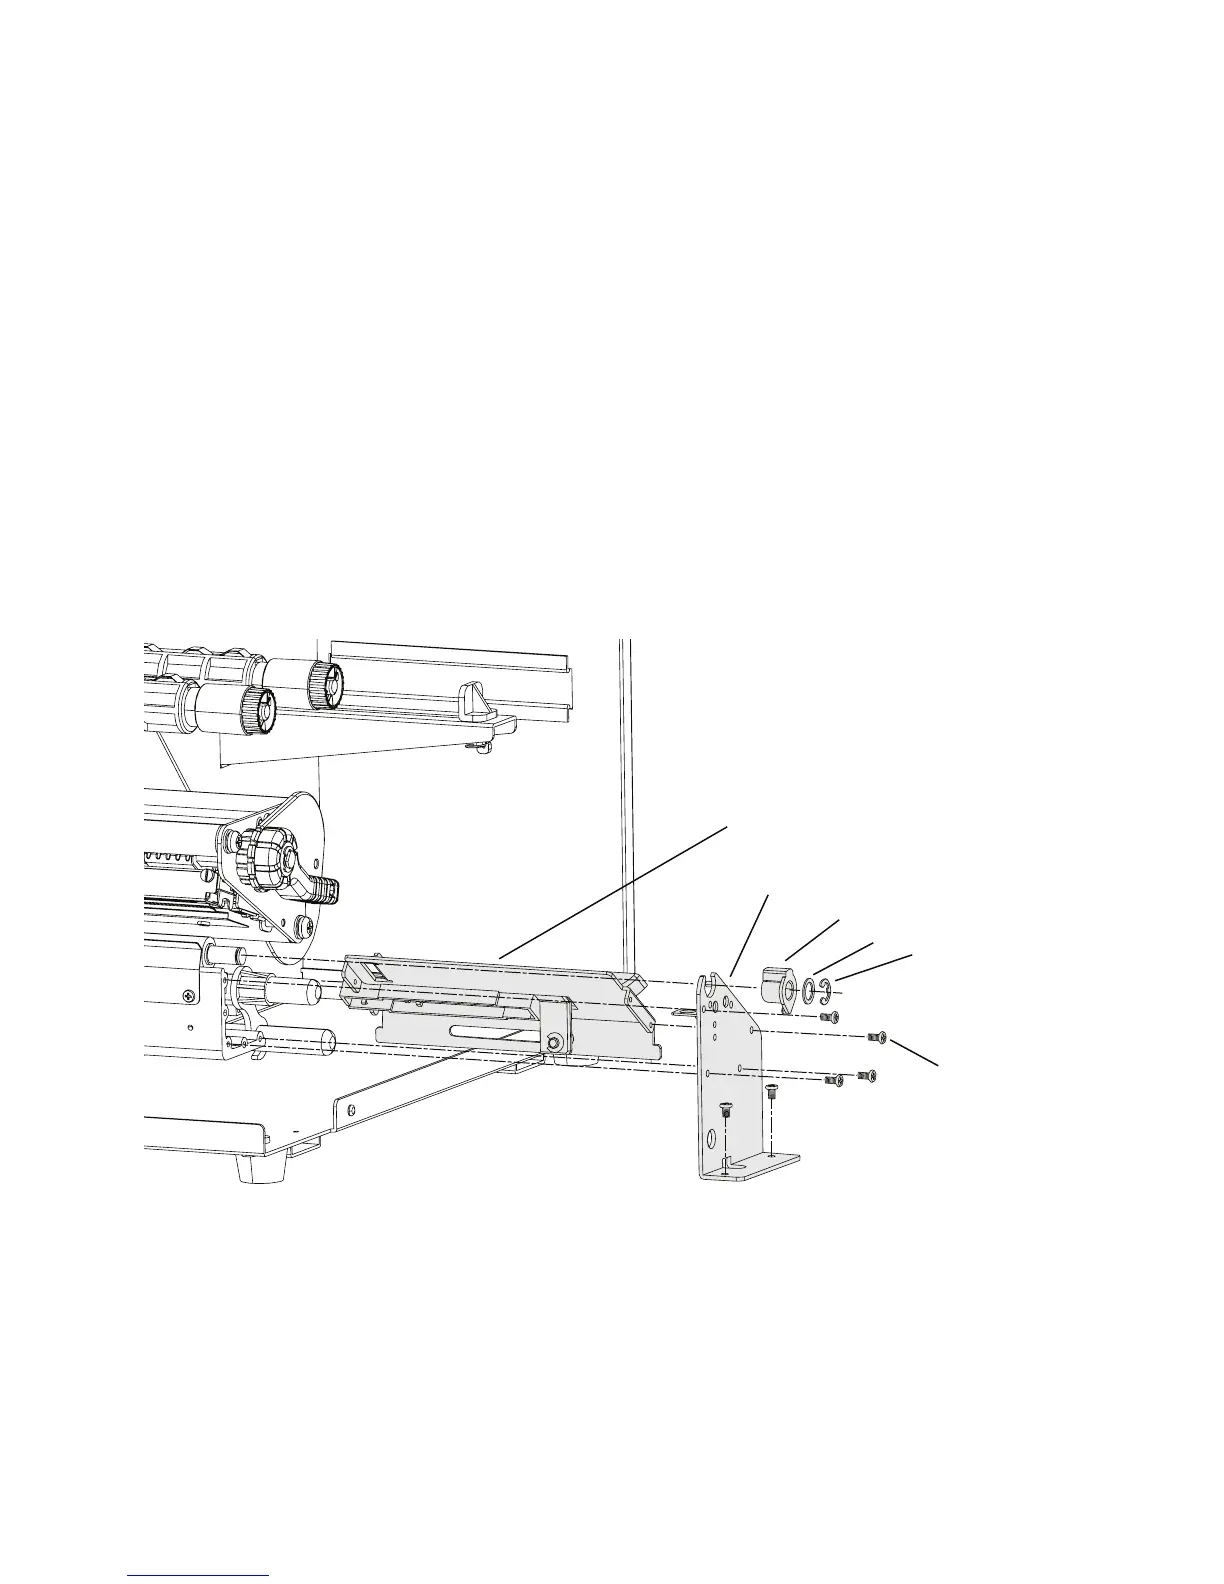
3 Remove the E-ring, washer, and bearing from the outer end of the
platen roller (the end in the media compartment).
4 Remove the six screws that hold the outer gable of the printhead.
5 Fold the outer gable aside, taking care not to damage the headlift sensor
and its cable (see “Headlift Sensor” on page 48).
6 Remove the single screw that holds the label gap sensor module in the
electronics compartment. It is situated immediately to the rear of the
black sensor module.
7 Disconnect the cables from P36 (“GAP”) and P37(“MARK”) on the
main board. Free the cables from the spiral bindings and the cable clip.
8 Pull out the entire label gap sensor module into the media
compartment.
9 Do not dismantle the module. The entire module is available as a
replacement part.
10 Install the label gap sensor module in reverse order.
Label Gap Sensor Assembly Exploded View
Headlift Sensor
The headlift sensor is a microswitch fitted inside the outer gable of the print
mechanism, immediately below the platen roller bearing. The microswitch
is activated by an arm connected to the printhead lever. If attempting to
print while the headlift sensor indicates that the printhead is open, Error 11
“printhead lifted” occurs.
Label Gap Sensor Module
Outer Gable
Bearing
Washer
E-ring
Screw (x6)