17
Getting Started Interwrite
TM
Board
1 Shut down and turn off the computer.
2 Plug the square USB B connector end into the USB Connector on the
Interwrite Board. Or, if you are using a PC and installing the serial cable,
attach one end of the serial cable to the Serial Connector on the board’s
Controller.
3 Plug the flat USB A connector into an available USB port
on your
computer or USB hub, or the serial cable into the serial port on the PC.
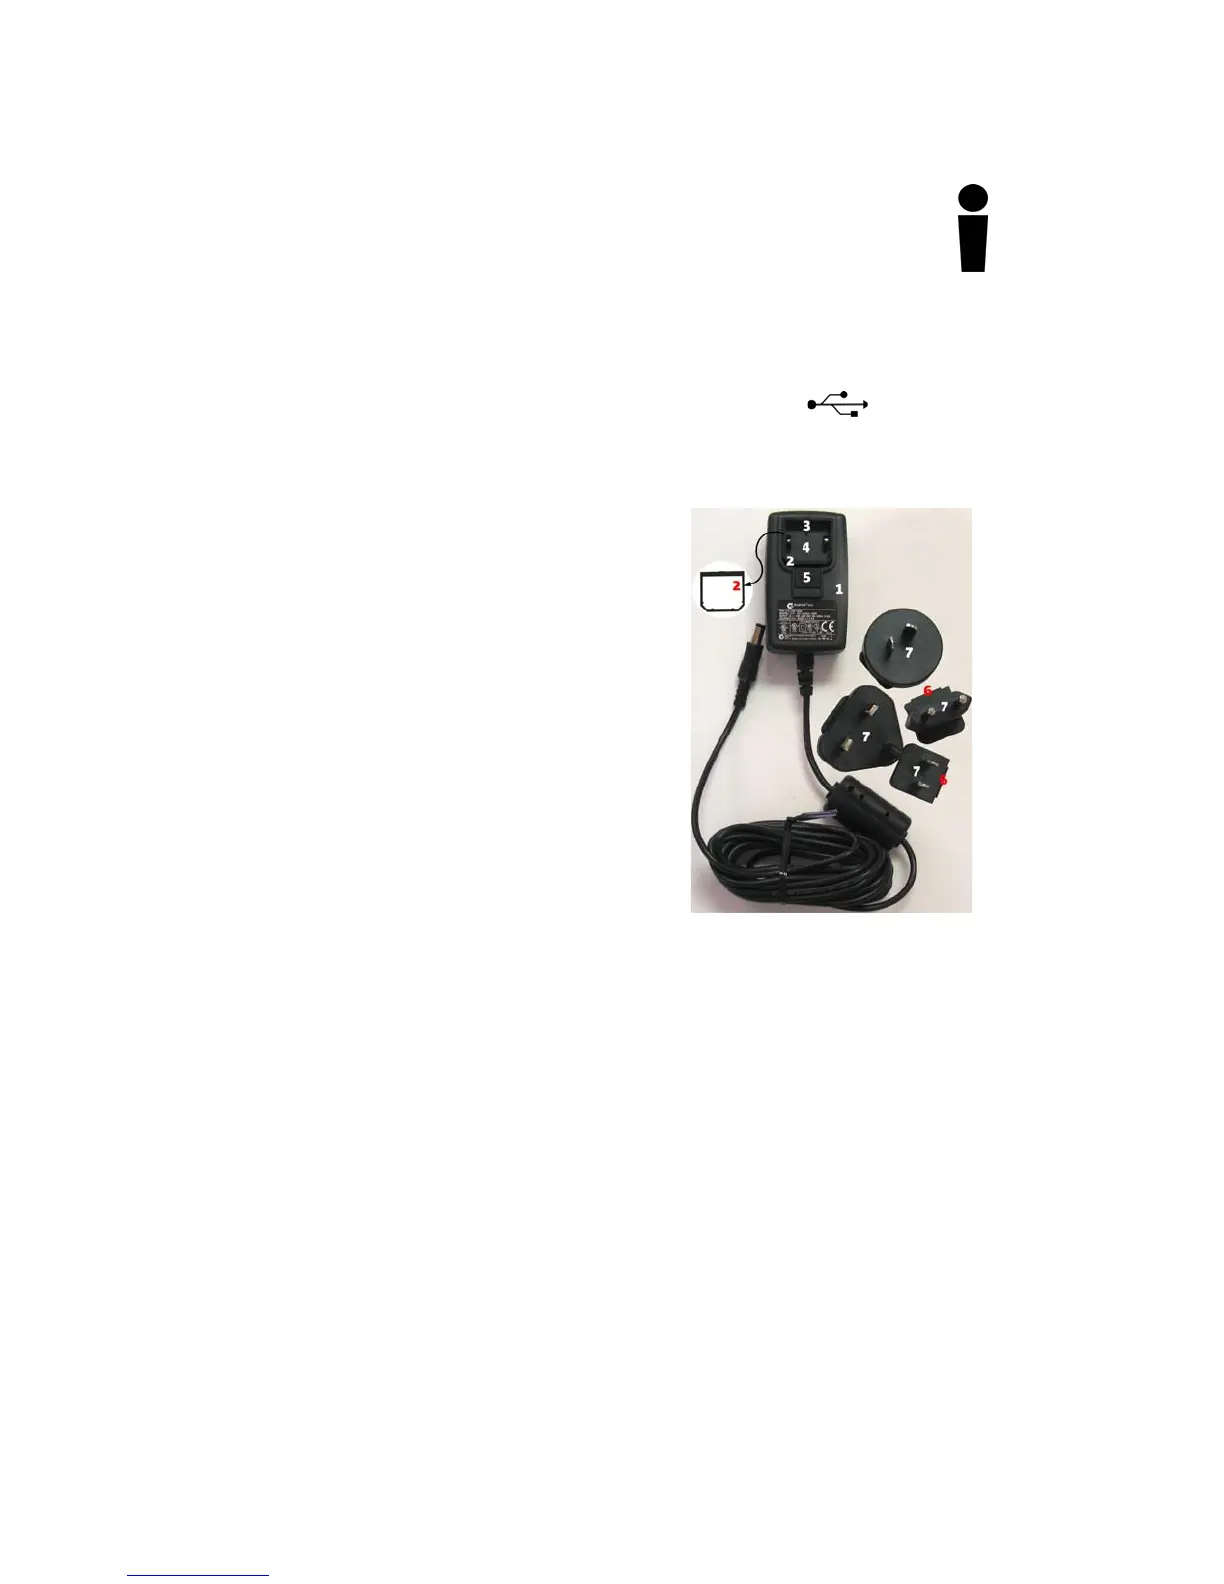
4 If necessary, attach the appropriate power plug adapter to the Power
Supply plug, following these simple instructions:
a Remove and discard the Shipping
Collar Insert.
b Note that each plug adapter has a lip
that fits into the recess at the top of
the plug housing. Locate the lip on
the plug adapter you selected and tilt
it into the recess.
c Snap the lower edge of the plug
adapter into the adapter well. If
necessary, slide the thumb grip away
from the well as you push the plug
down into the well.
5 Plug the cylindrical metal end of the
power cord into the Power Connector on
the side of the Controller and plug the
plug into a power socket.*
6 Use the supplied cable guides to manage
dangling cables. Remove the protective
covering to expose the adhesive surface
and stick them where you want to guide
the cable and power cord.
7 Toggle the Power Switch to turn on the
Interwrite Board. It will beep four times
and the Power LED will light up to
indicate the board has power.
8 Turn on the computer. It will automatically find the cable-connected
Interwrite Board.
9 The Pen Prox LED will light up and stay lit as long as the electronic
Interwrite Pen is in prox of or touching the Interwrite Board surface.
* The Power Supply is not necessary if you are using a USB connection.
However, if you are using a serial connection, attaching a BTCOM2 Module
for wireless communication, or attaching the Pen Charging Station, you must
connect the Power Supply.
6
Lip
3
Recess
4
Adapter Well
1
Plug Housing
2
Shipping Collar Insert
5
Thumb Grip
7
Plug Adapter