43
Getting Started Interwrite
TM
Board
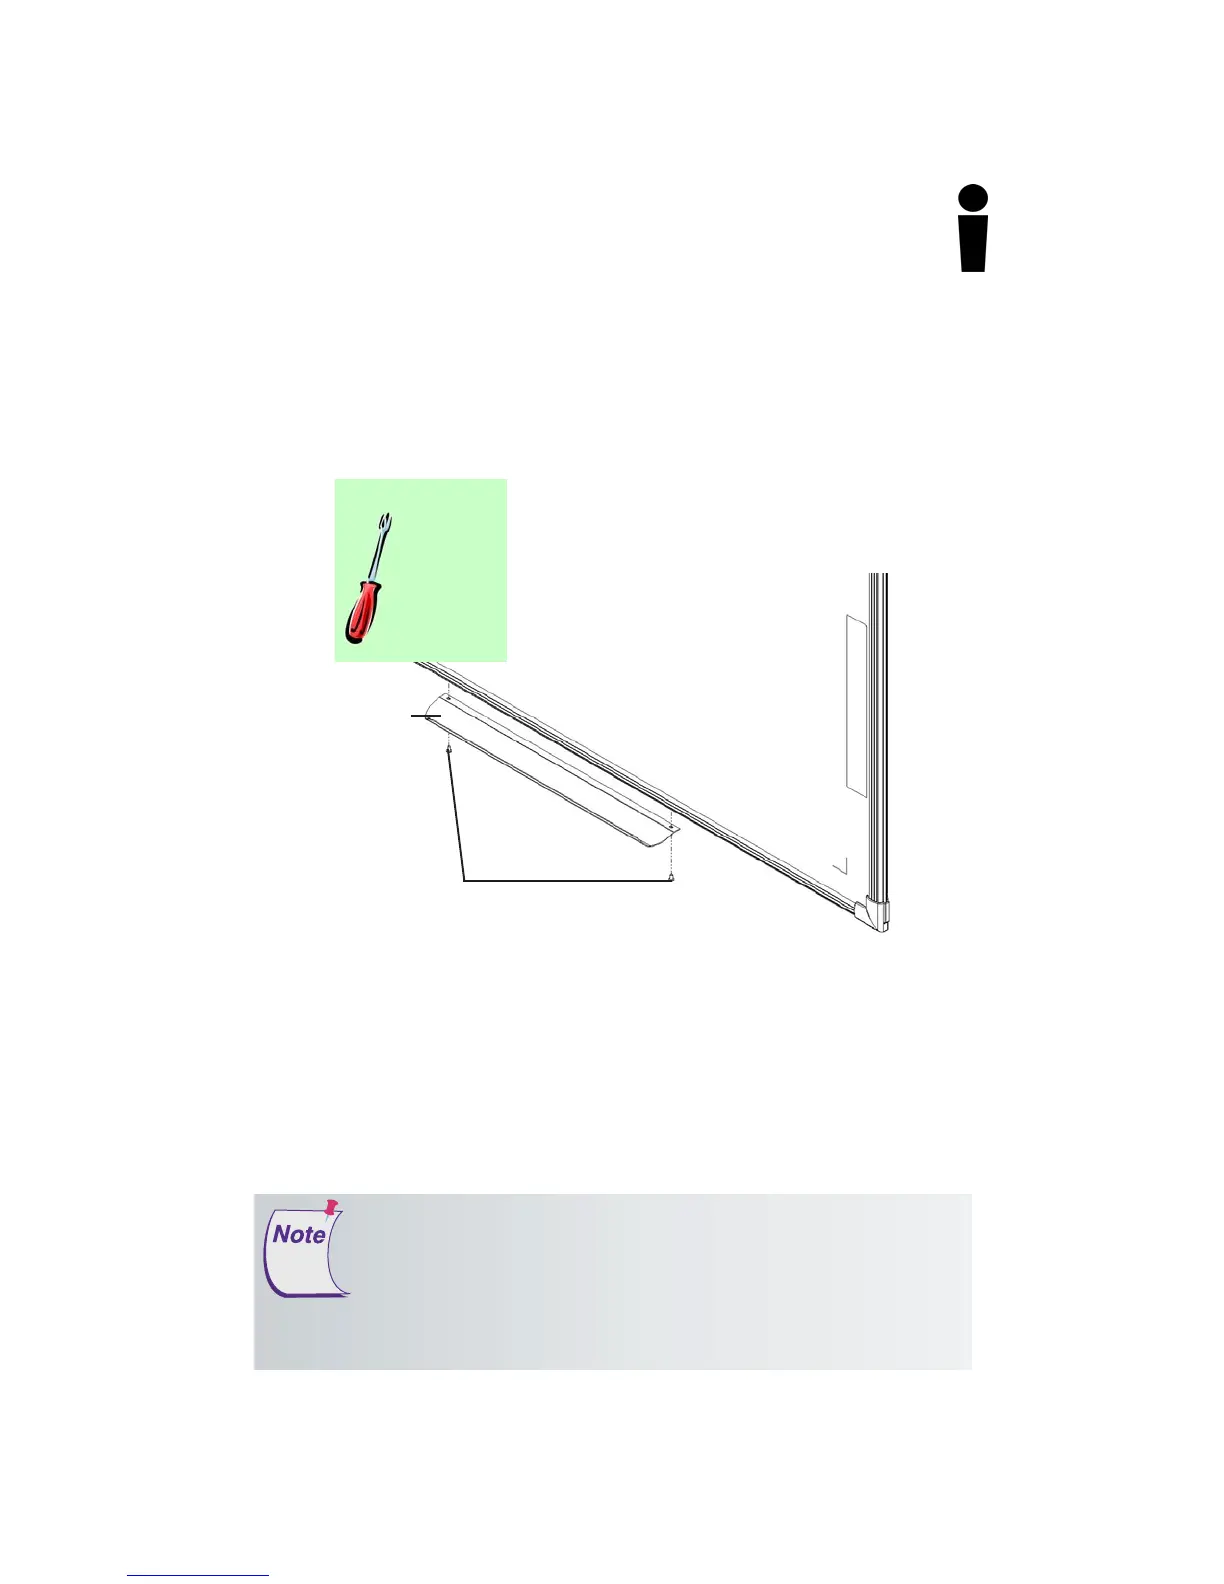
1 Locate the predrilled screw holes for the Pen Tray in the frame of the
Interwrite Board.
2 Attach the Pen Tray to the Interwrite Board using the small Phillips screws
provided, one for each hole in the Pen Tray.
3 Slide the rubber bumpers, if they came with your Pen Tray, onto each
end, fitting the contours of the bumper to those on the tray.
Attaching the Pen Tray to the Interwrite Board
If your Interwrite Board is going to be mounted on the wall, attach the op-
tional Pen Tray before you mount the board. If the Interwrite Board is going to
be mounted on a floor stand, the Pen Tray can be easily attached at any time.
The Interwrite Board Pen Tray attaches to the frame. Use one of the provided
Phillips screws for each attachment hole in the Pen Tray.
To avoid damage to the Interwrite Board controller located on the
back of the board near the corner, do not rest the Interwrite Board
on the controller housing. When handling and maneuvering your
Interwrite Board, be careful not to scratch or damage the Interwrite
Board’s writing surface.
Never nail or drill the Interwrite Board. Doing so will damage the
unit and void your warranty.
Pen Tray
Interwrite
Board
Phillips screws
Tools Required:
Phillips
screwdriver