Section 3: Operation
3.8 Connecting to Third-Party Radio
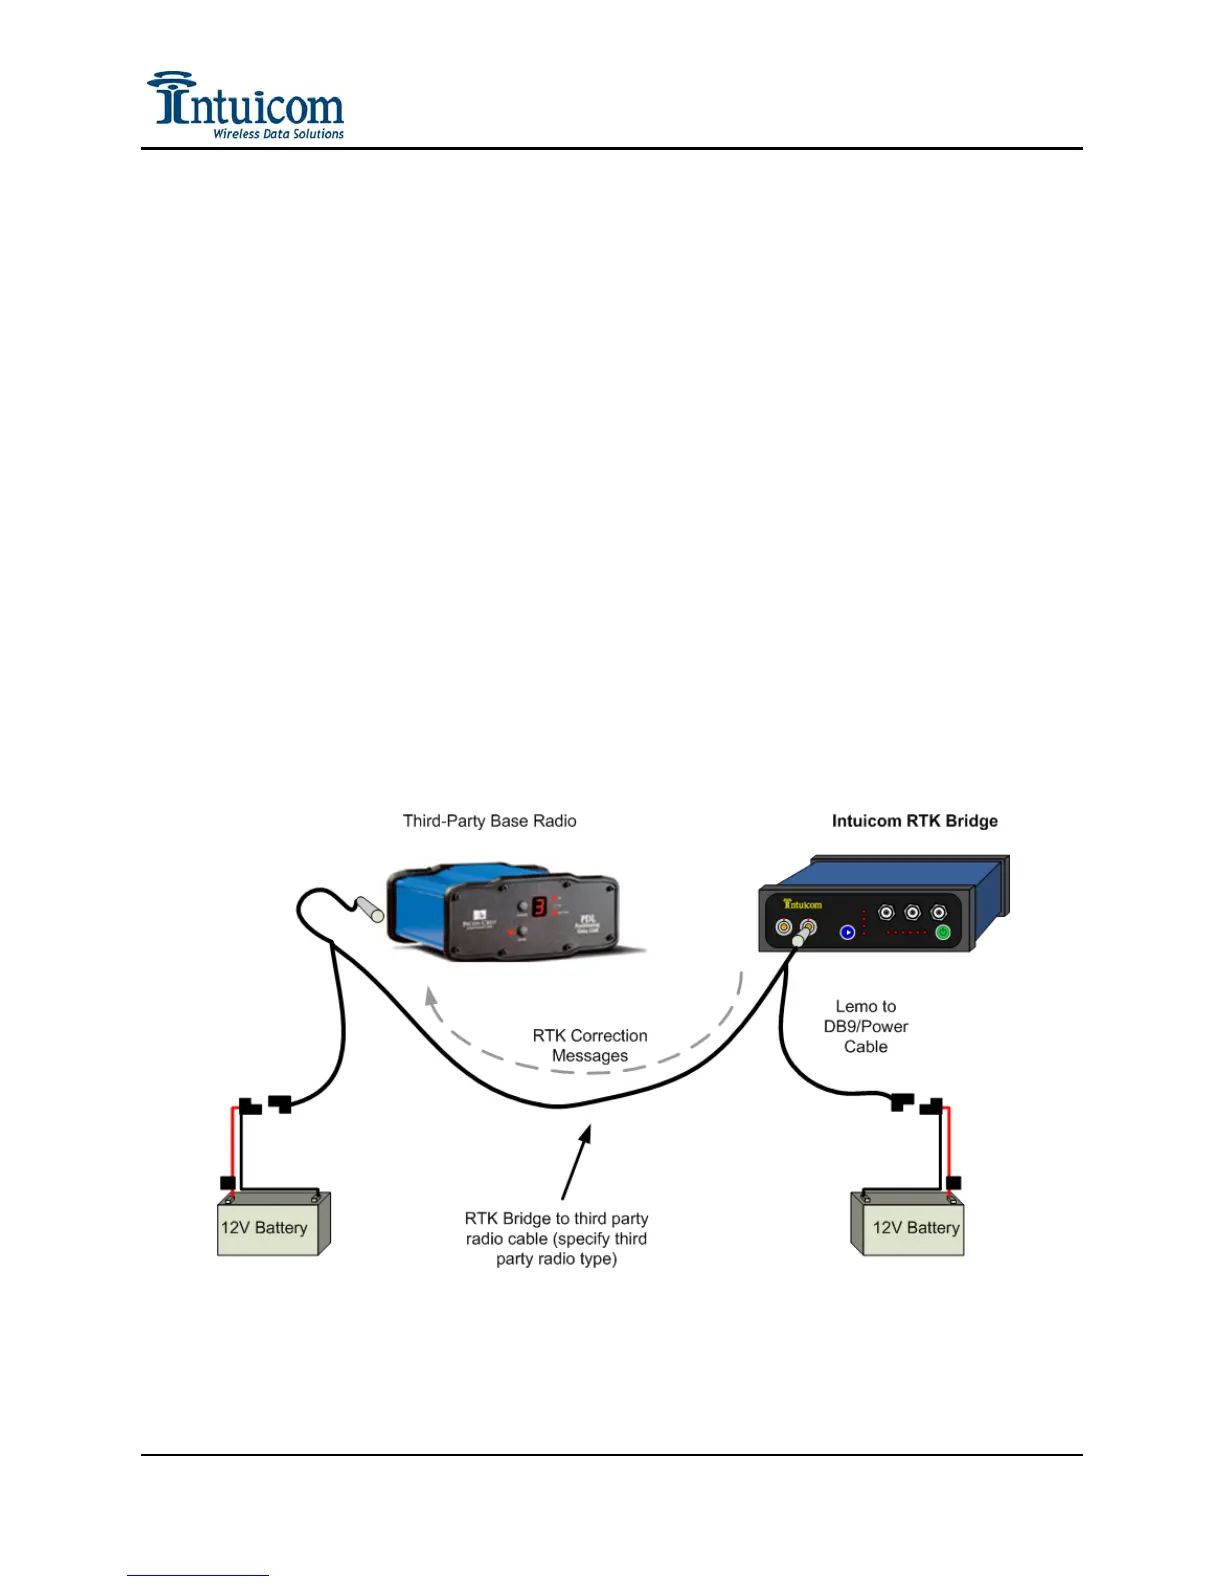
In addition to broadcasting RTK correction messages via the internal Intuicom 900MHz
Spread Spectrum Data Radio (if installed) – the correction messages are available via RS232
on the DATA port on the front panel of the unit and a cable can be used to connect to any
third party radio that accepts data via RS232.
To connect to an external third-party radio:
1. Configure the baud rate of the DATA port on the RTK Bridge to match the baud rate
of the third-party radio.
2. Connect the included Data/Power cable to the Data port on the front of the unit.
3. Connect power to the Data Power cable – being sure that power is only connected to
the unit at one point. Alternatively power could be applied using a different cable on
the Config port – but not both ports simultaneously.
4. Connect the DB9 end of the Data/Power cable to the data cable coming from the
third-party radio. This may require a null modem adapter, and/or a 25 to 9 pin serial
adapter.
5. Power up both units and confirm reception of corrections at rover radios receiving
from the third-party base radio.
Figure 3-9: Connecting to third-party base radio
Revision 1.4 36 © 2009 Intuicom, Inc.