Section 2: Initialization and Configuration
2 Initialization and Configuration
Prior to the first use of the Intuicom RTK Bridge must be activated and configured. A onetime
process of activation is required to setup the integrated CDMA or GSM cellular modem for use
on the chosen carrier’s network. For the device to connect to the current GNSS Network server,
further configuration is required. The unit can store up to four configuration sets called Profiles.
In the field, the current Profile can be changed without the need of a PC. Profiles enable the user
to do things like change NTRIP mountpoints, change GNSS servers, change how locations sent
to the server, etc. At least one Profile must be configured.
2.1 Accessing the Configuration Menu
All configuration and initialization is performed by accessing the configuration menu on the
RTK Bridge with a PC using a terminal emulation program (such as HyperTerminal,
ProComm, TerraTerm, or Minicom), an available serial port, the power/data cable, the RTK
Bridge itself, and the power adapter for the RTK Bridge.
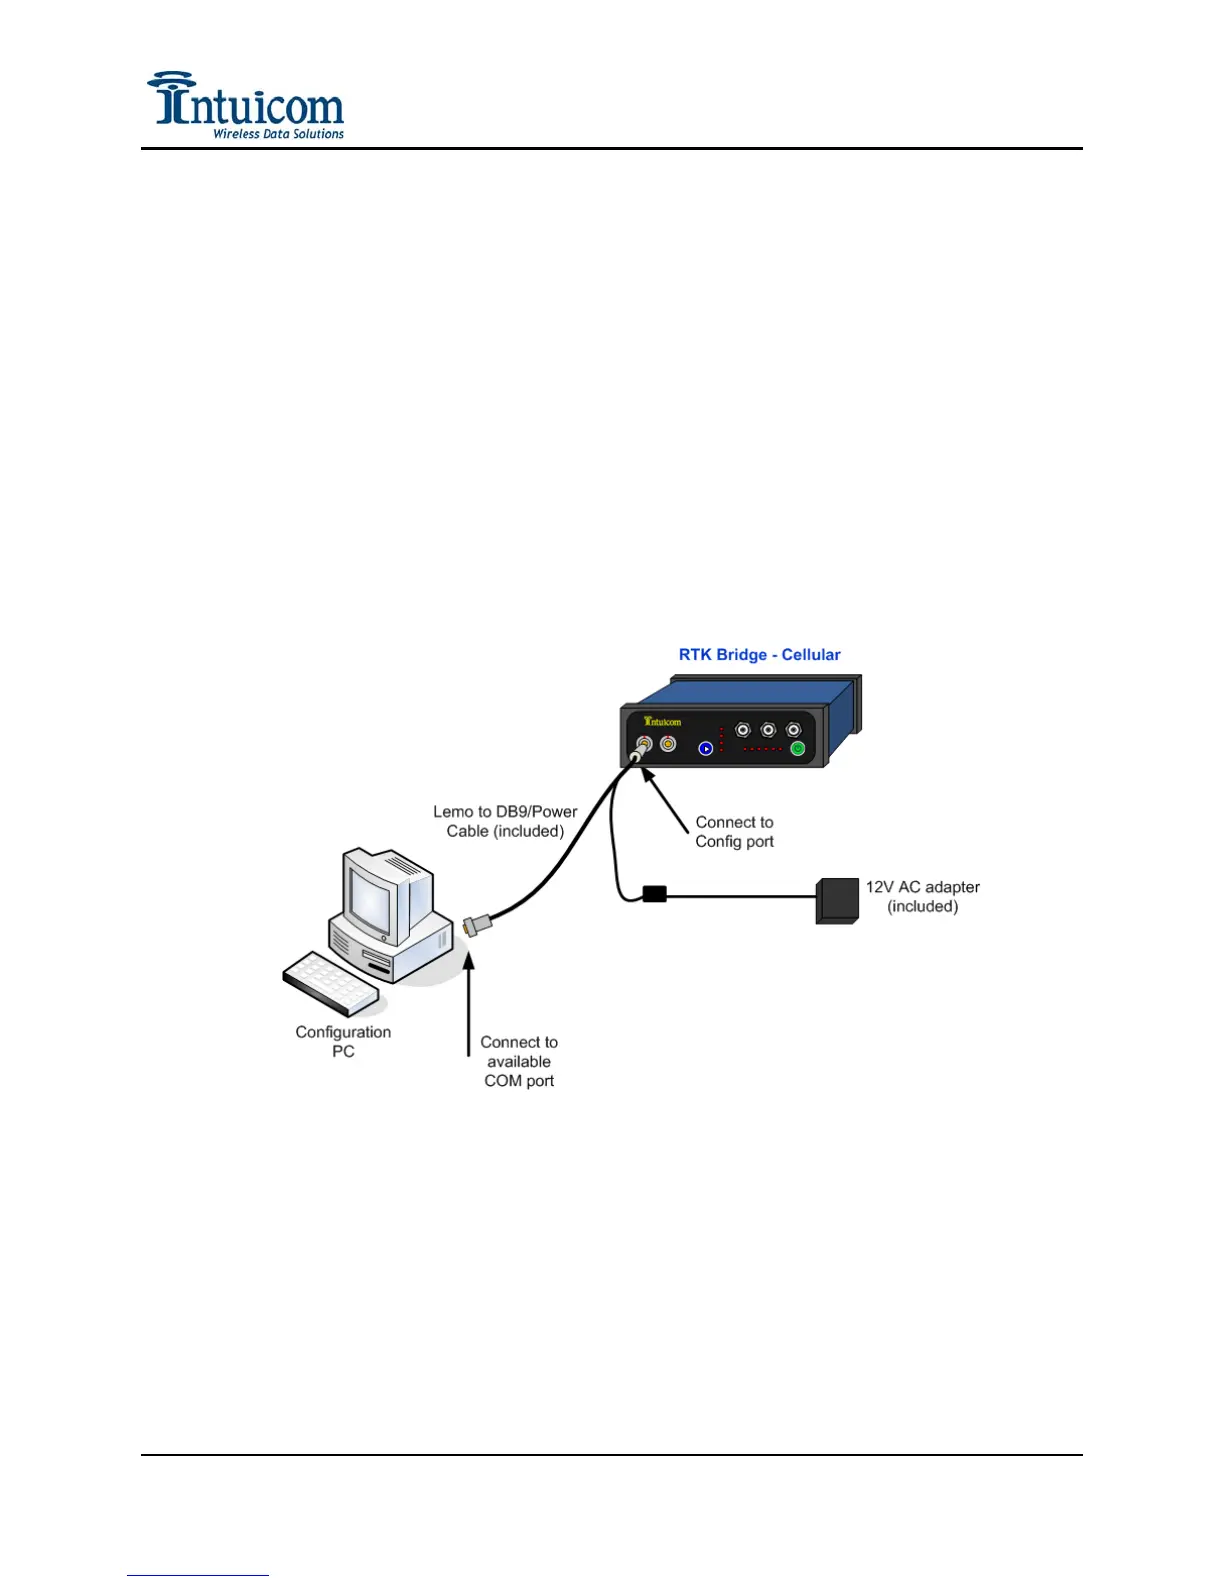
Figure 2-1: Cable Connections for Accessing Configuration Menu
To access the RTK Bridge configuration menu use the following steps:
1. Connect the Lemo end of the power/data cable to the CONFIG port of the RTK
Bridge, and the DB9 connector to an available DB9 COM port on the PC to be used
for configuration. If no COM port is available, a USB-COM port adapter may be
used. Attach the AC power adapter to the power connector on the power/data cable
and plug the AC adapter into an outlet.
Revision 1.4 6 © 2009 Intuicom, Inc.