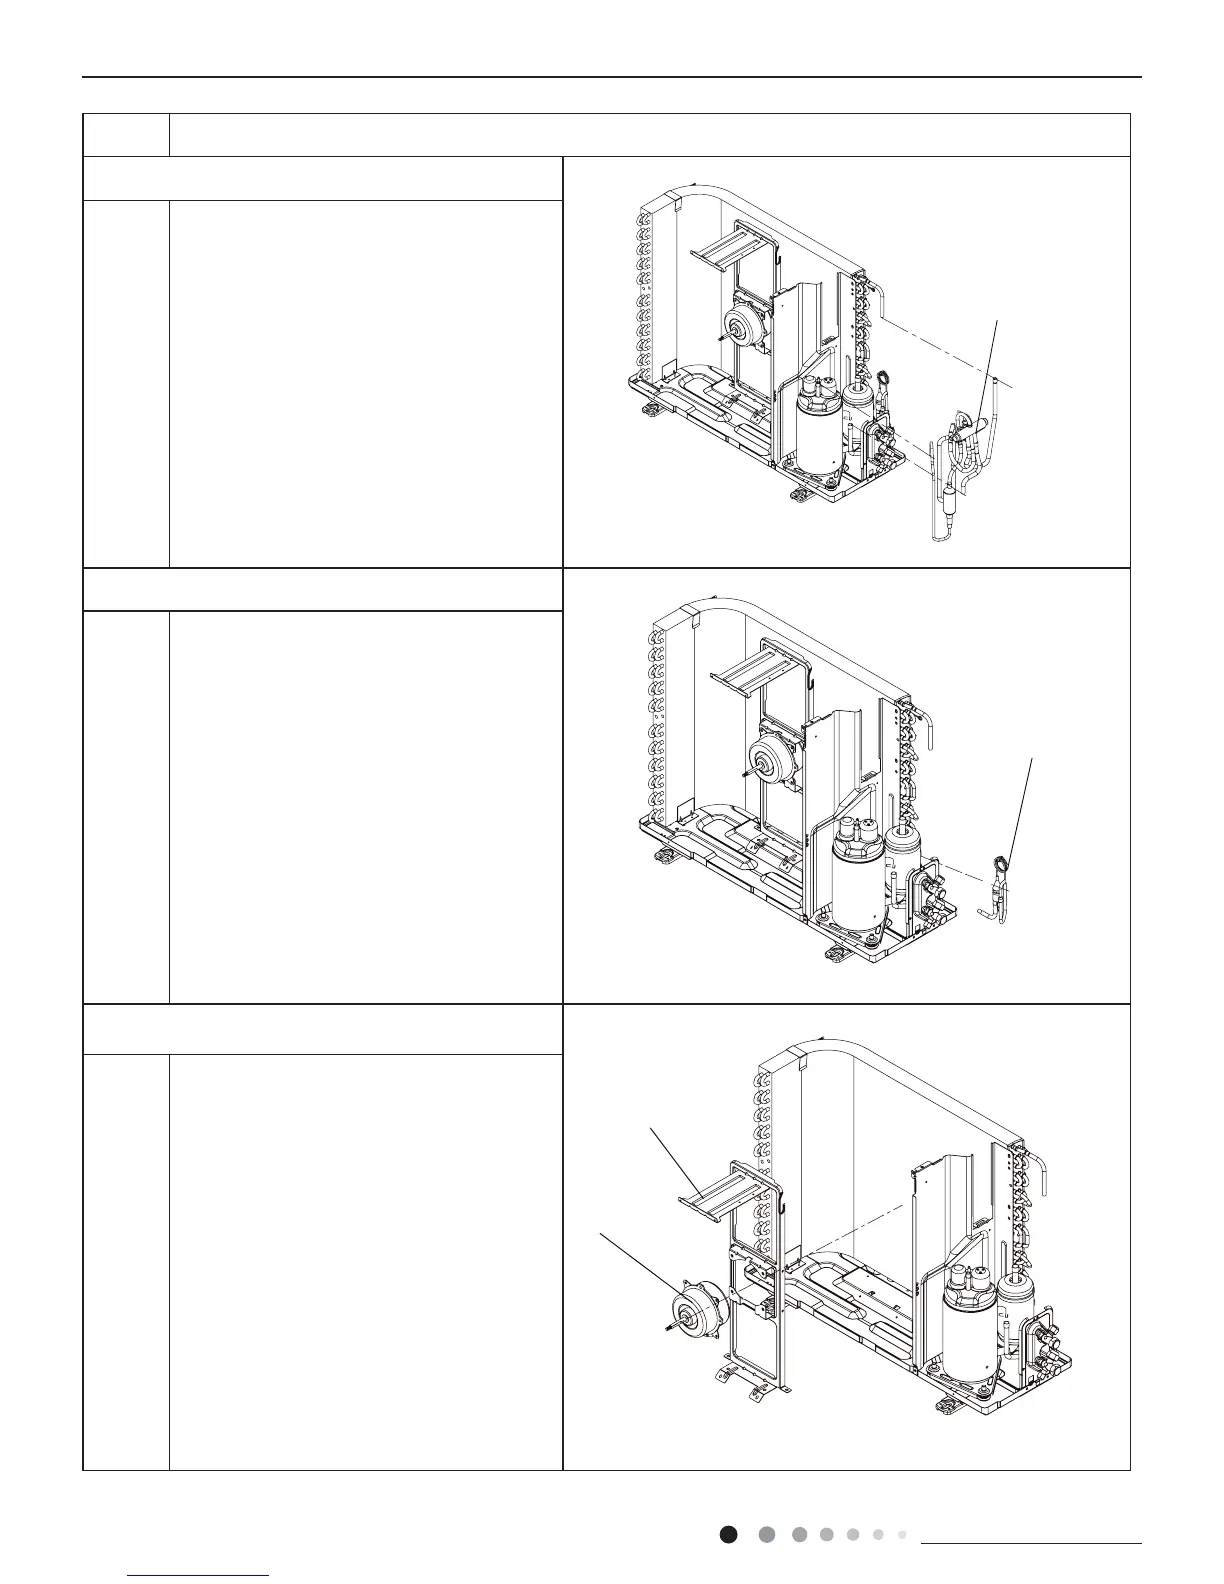
8. Remove 4-way valve assy
9. Remove capillary sub-assy
10. Remove motor and motor support
Unsolder the spot weld of 4-way valve assy,
compressor and condenser, and then remove
the 4-way valve assy .
Note:
When unsoldering the spot weld, wrap the
4-way valve with wet cloth completely to avoid
damaging the valve due to high temperature.
Unsolder weld point of capillary Sub-assy,valve
and outlet pipe of condensator. Thenremove
the capillary Sub-assy. Do not blockthe
capillary when unsoldering it. (Note: be-fore
unsoldering,discharge refrigerantscompletely)
Remove the 4 tapping screws xing the motor.
Pull out the lead-out wire and remove themotor.
Remove the 2 tapping screws xingthe motor
support. Lift motor support to re-move it.
ProcedureStep
4-way valve assy
Capillary Sub-assy
Motor support
Motor
 Loading...