INSTALLATION
18
Pulsar extractor fan | Installation and operation instructions
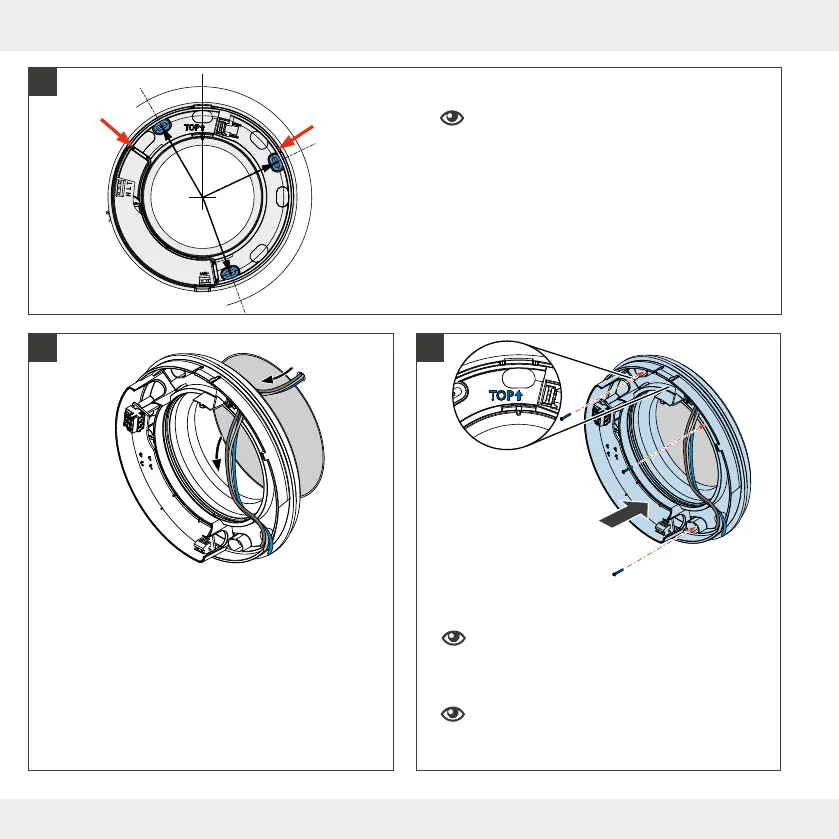
► Insert the fan housing into the wall sleeve from the
inside.
The lettering „TOP“ is facing upwards.
► Align the fan housing straight using a spirit level.
To do this, place the spirit level at the support points
of the fan housing (red arrows).
► Mark the 3 fastening holes (blue areas).
► Remove the housing from the wall sleeve and drill the
holes.
► Send the connection cable, AC 230 V, 50 Hz or
DC 12 V, through the cable gland created in the
rubber seal.
► Place the base plate, including the rubber seal, con-
gruent with the mounting holes in the wall sleeve.
The lettering TOP is legible and facing
upwards.
► Screw the base plate of the fan housing to the inside
wall.
The rubber seal completely seals the extractor
fan to the inner wall.
R75
65°
95°
!
!
!
9
7
8


 To Next Page