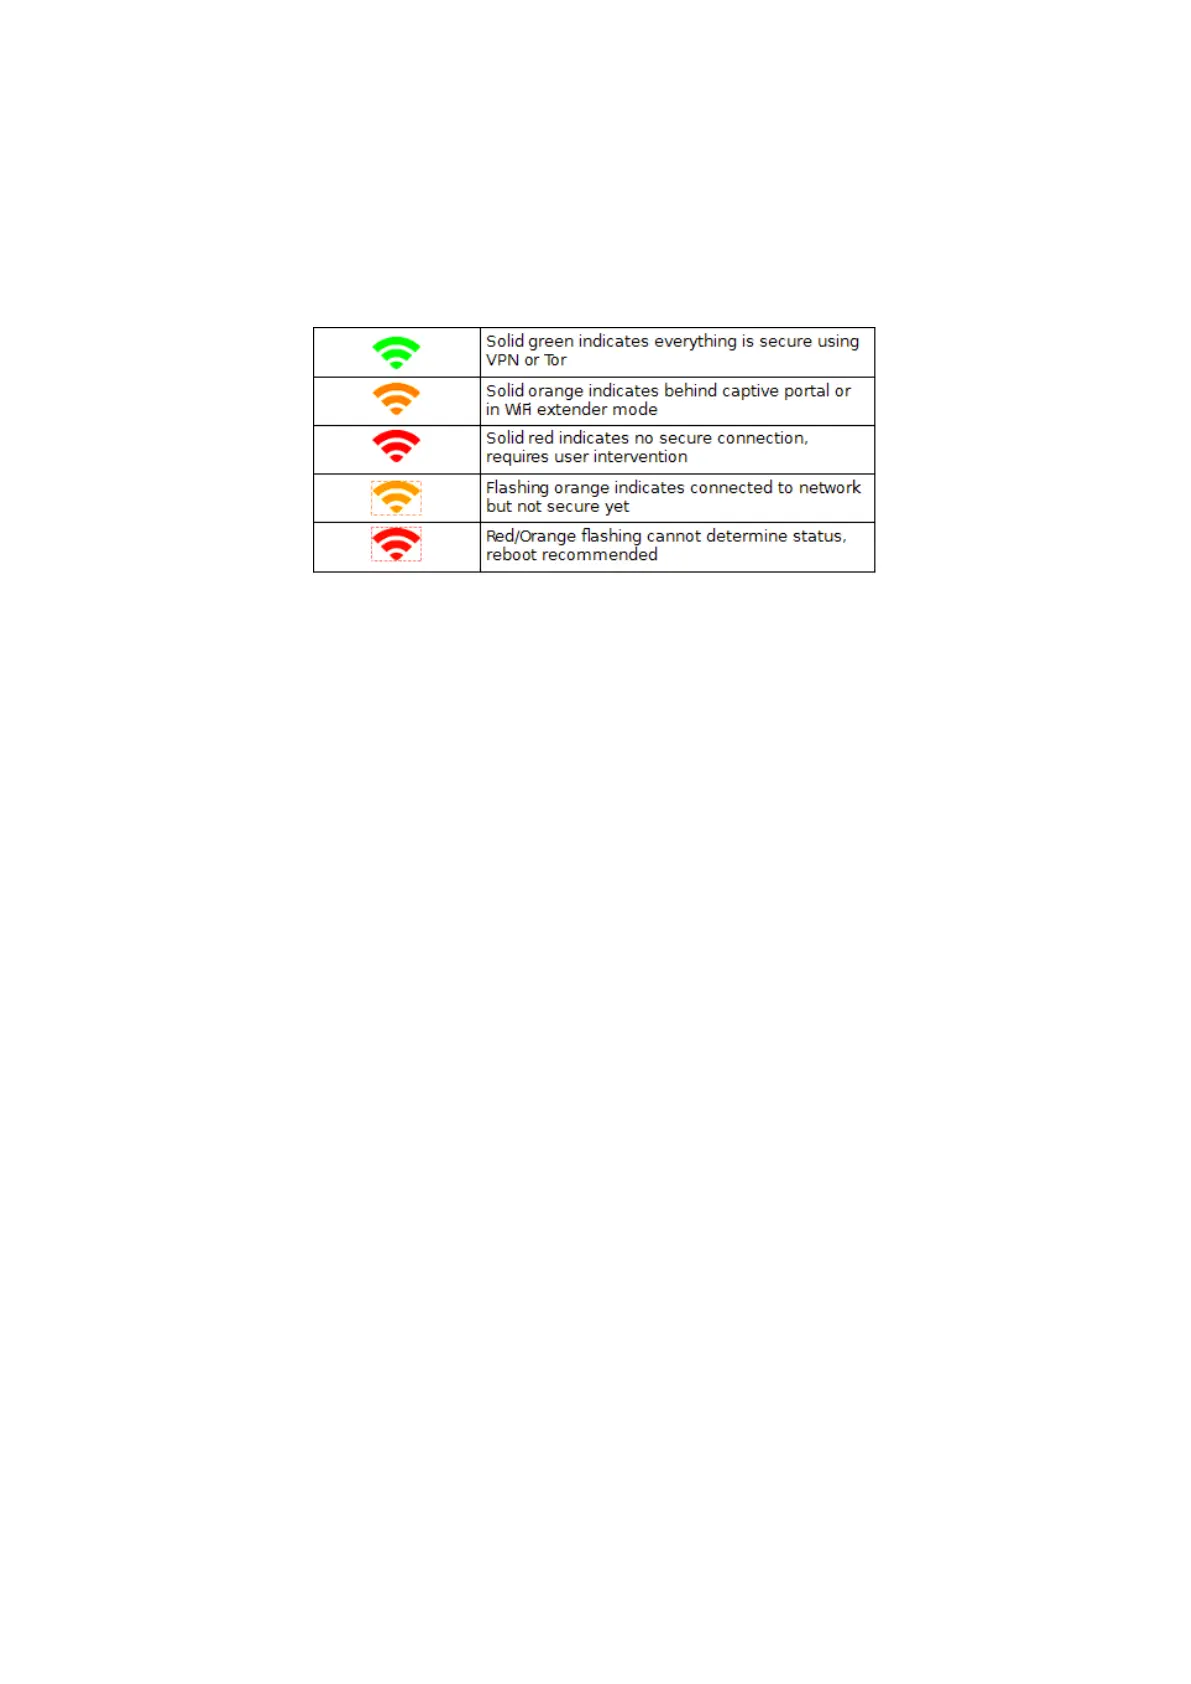
1.4 Wi-Fi LED display
Also on the non charging side, you can find a Wi-Fi shaped LED display. The purpose of this display is to
keep you informed on the networking state of the InvizBox Go.
2 First Connection to the InvizBox Go
2.1 Starting the InvizBox Go
In order to start your InvizBox Go (or stop), you need to press the top part of the casing where the InvizBox
Logo is. Under the case, there is a button which once pressed will start your device.
Within a couple of seconds after having pressed that button (keep it pressed for about 2s), the Wi-Fi LED
will be green, indicating that the device is booting.
That light will then switch off until the device can determine in which state its networking is. For example,
until the setup is complete, that light will be red (indicating that the InvizBox Go is not connected to any
network).
2.2 Connecting to the InvizBox Go
In order to connect to the InvizBox Go, you will need to identify the Wi-Fi hotspot that it is running and
connect to it. Initially, that network will be called "InvizBoxGo".
Just connect your phone or computer to that network as you would normally connect to any Wi-Fi network.
2.3 Accessing the InvizBox Go interface
Now that you are connected to your InvizBox Go, you need to access the Administration Interface.
• Some operating systems automatically identify that the hotspot requires a setup and will give you a
link to the setup page automatically. If this is the case, don't hesitate to use that link.
• On most devices, you will need to open your favourite browser and go to http://inviz.box
• Some devices are unable to access that URL, if it is the case for you, you will then need to go to
http://10.153.146.1
At any stage, you can access the InvizBox Go administration interface using http://inviz.box
(http://10.153.146.1 for some of you). And therefore, I would recommend that you bookmark that page as
you will need to access it when you want to change network or VPN Location in the future.
Now that you have accessed your device Administration Interface, you are ready to go through the
Installation Wizard as described in the next section.
Page 6 Section 1.4 Wi-Fi LED display