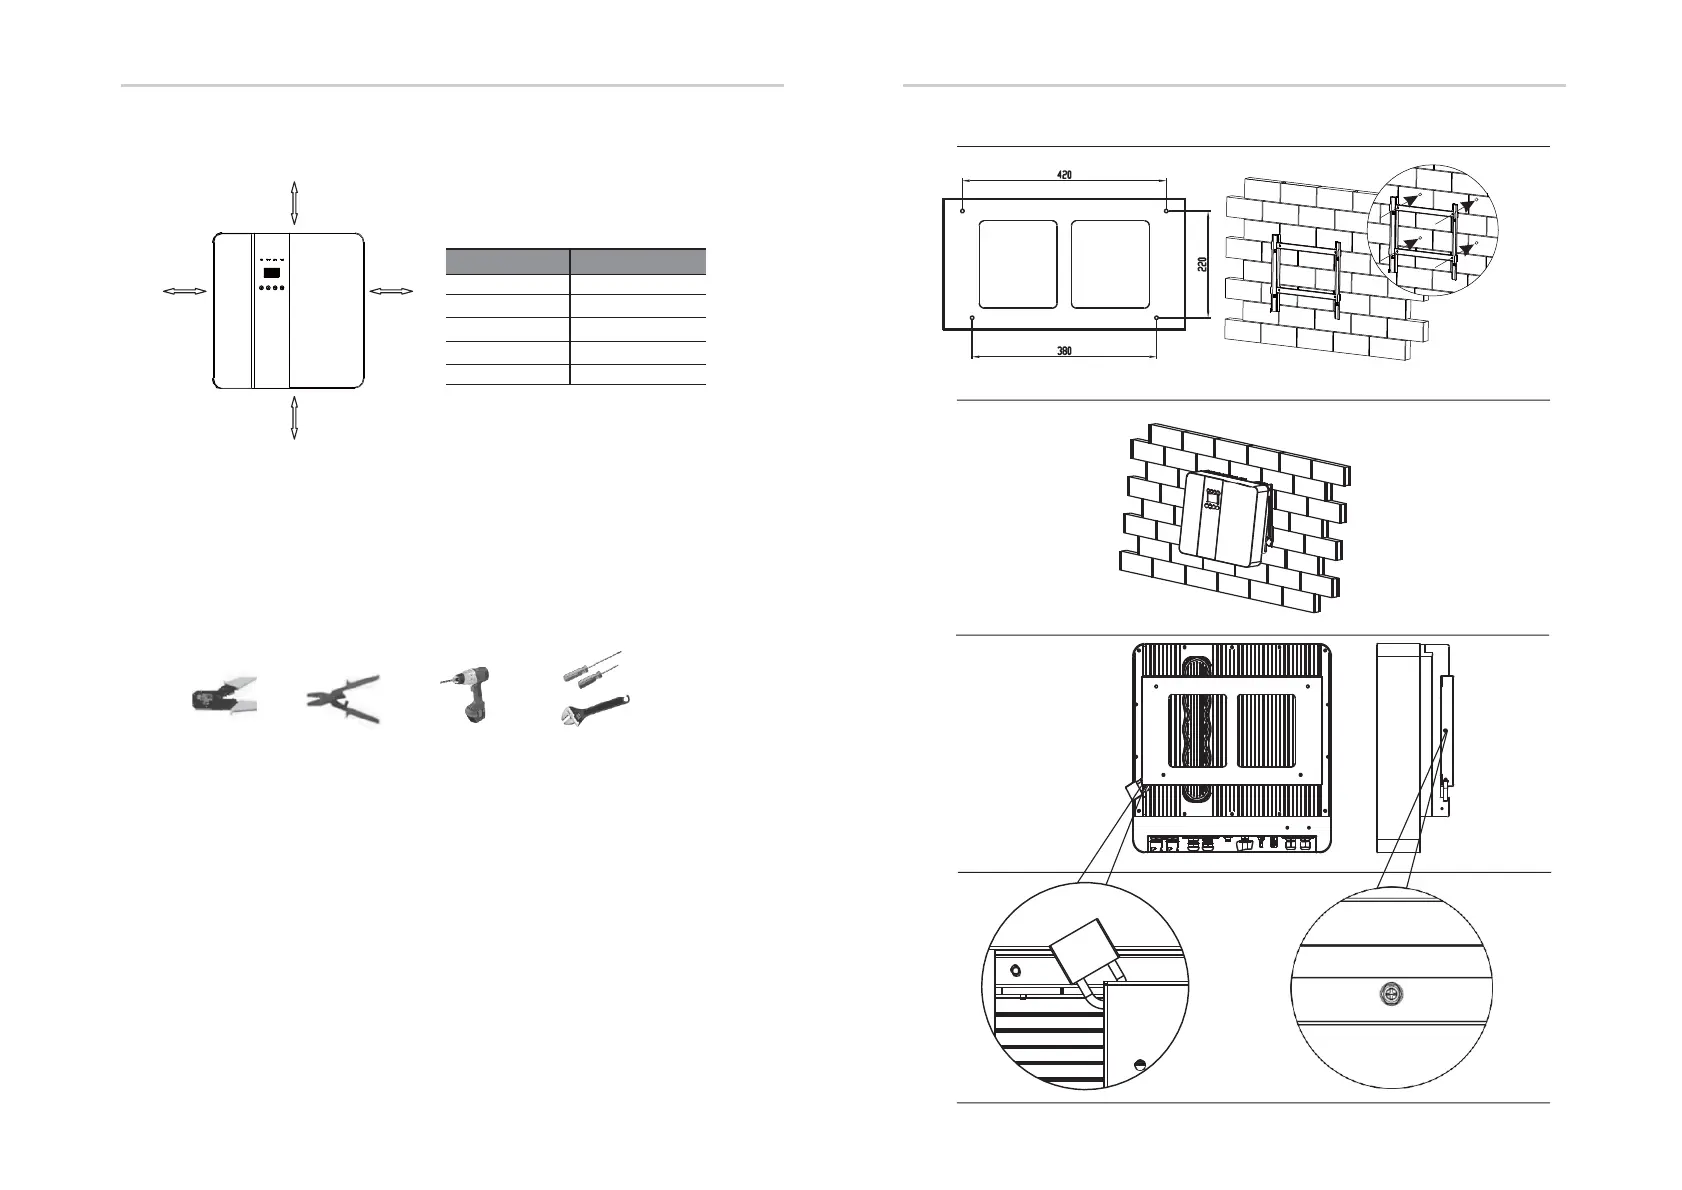
Space Requirement
Position Min.size
Left
300mm
Right
300mm
Top
300mm
Bottom
300mm
Front
300mm
300mm
300mm
Table Available Space Size
300mm
300mm
Installation Installation
Mounting Steps
Step 1: Screw the wall bracket on the wall
1. Place the bracket on the wall and mark down the position of the 4
holes.
2. Drill holes with driller, make sure the holes are deep enough (at
least 60mm) to support the inverter.
3. Install the expansion tubes in the holes, and tighten them. Then
install the wall bracket with the expansion screws.
Step 2: Place the inverter on the wall mounted bracket by holding the
handle on the side.
Tools required for installation.
Installation tools: crimping pliers for binding post and RJ 45,
screwdriver, manual wrench etc
Step 1
Step 2
20 21
Step 3
Step 4
Step 3: Tighten the fixing screws on both sides of the inverter.
Step 4: If necessary, costomer can install an anti-theft lock on the
left-bottom of the inverter.