TIGER XTL Instrument User Manual V1.0
Pioneering Gas Sensing Technology. Page 49 of 56 ionscience.com
Removing the MiniPID 2 Sensor
Protect the MiniPID 2 Sensor from exposure to silicone vapours as this may foul
the windows of the Lamps and reduce response to some gases. This can usually
be remedied by polishing the Lamp window with alumina powder.
Do not remove the MiniPID 2 Sensor Cover in the hazardous area.
Before Lamp cleaning or replacement, the the MiniPID 2 Sensor must be removed.
First ensure that the TIGER XTL is turned off and that you are in a clean environment so that the
sensor parts will not be contaminated by dust, oil or grease.
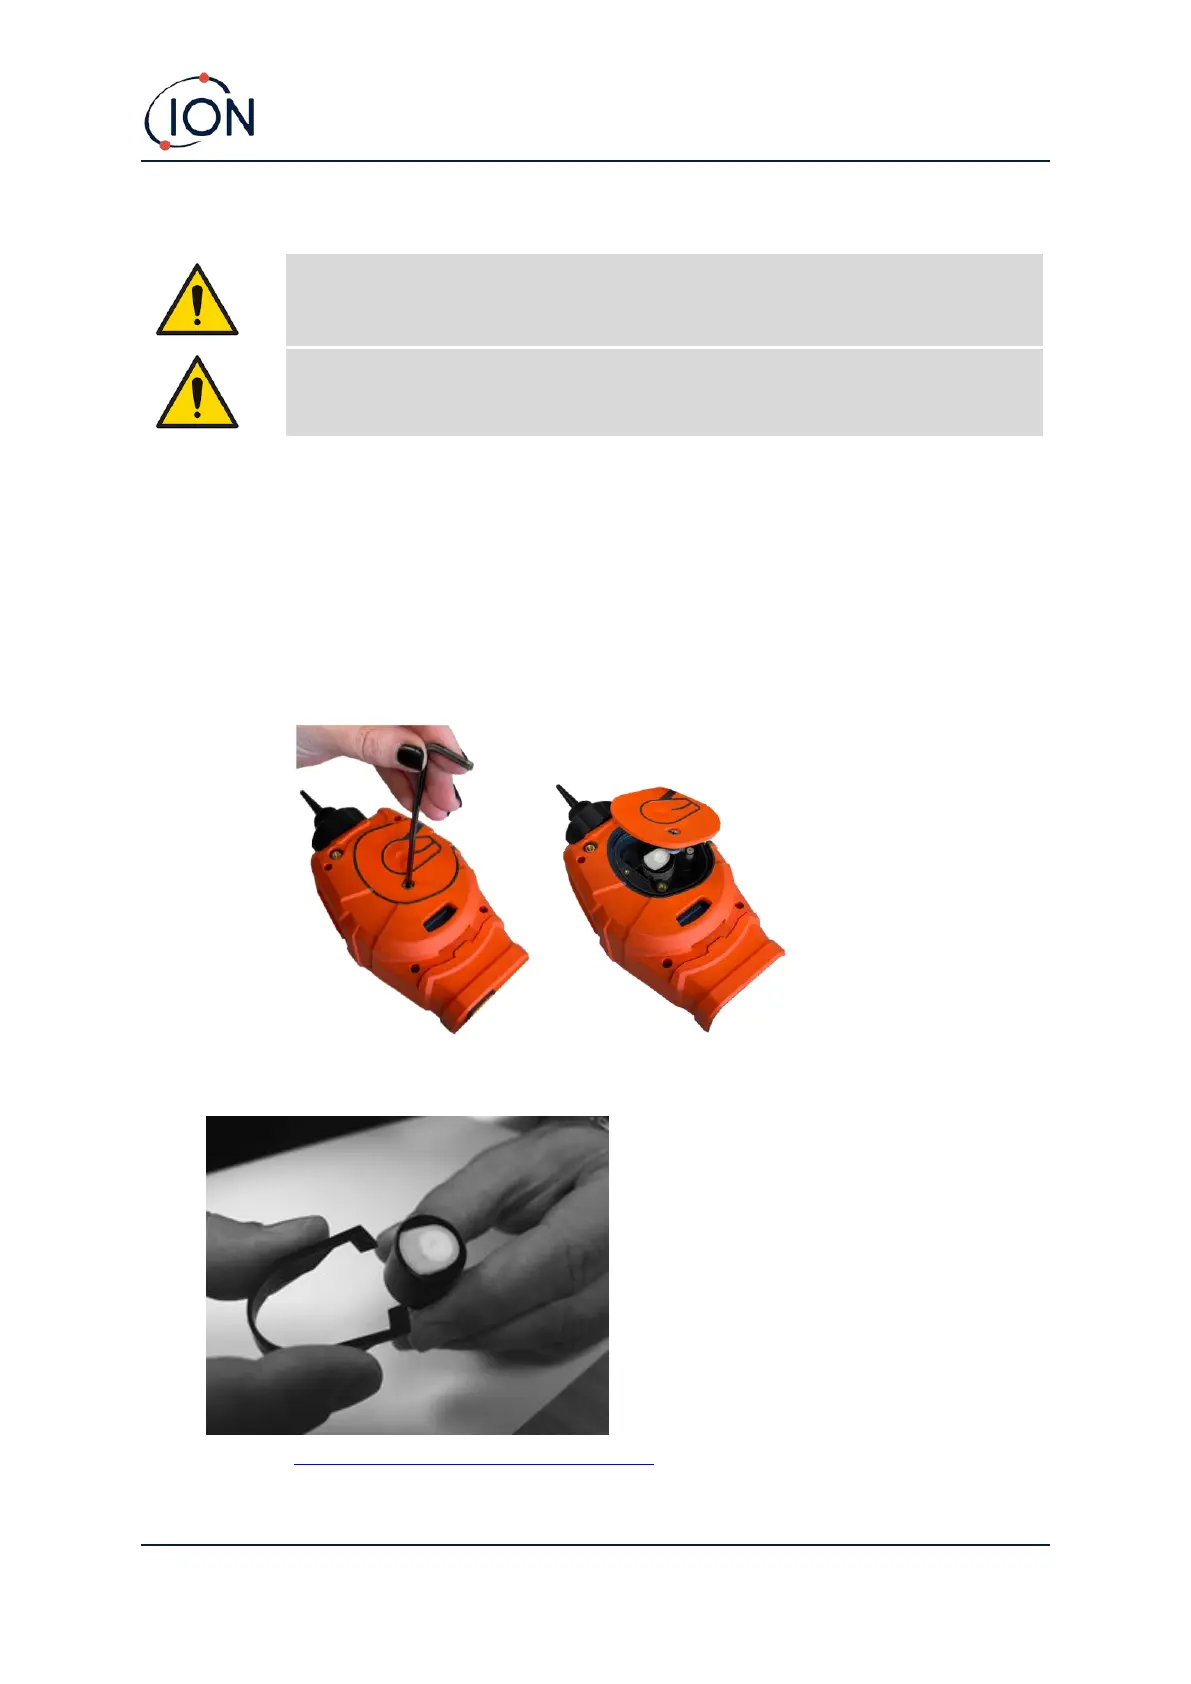
On the Sensor Cover loosen the bottom left screw using a suitable allen key.
Carefully lift the MiniPID 2 Sensor from the Instrument Body.
Using the Mini PID Electrode Stack
Removal Tool provided, locate its
‘prongs’ in the slots in the side of the
Mini PID 2 Sensor body:
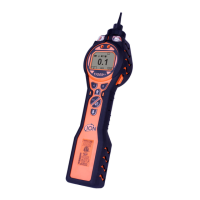
Using the forefinger to restrain the
white Electrode Stack (the internal
parts of the MiniPID 2 Sensor are
spring-loaded), squeeze the Removal
Tool to release the Electrode Stack.
At this point the MiniPID Electrode Stack can be replaced.