16
4. AZ Mount Pro
TM
Mount Operation
4.1. Power the Mount and GO
Assemble your mount. Make sure the mount is leveled.
Just flip the power switch ON and wait! The mount will first perform an Assistant Alignment
Wizard which will determine the Zero Position, i.e. the South and Zenith. Then the mount will pick up
GPS signal. Lastly the mount will GOTO a bright star for a Star Calibration. Follow the instruction on the
hand controller screen to center the bright star. If the star displayed is blocked by a tree or building, just
press the BACK button to go to next one.
Now you can use “Select and Slew” to go to any objects!
Note: The date and time displayed on the hand controller may differ from your local time. Just ignore it.
You can change it later.
4.2. GOTO a Celestial Object
Press MENU on the hand controller and select “Select and Slew”. Select a category, such as
“Named Star”, and then select a star of interest, and press ENTER. The telescope will slew to the
object and automatically start tracking. If the target is not centered in your eyepiece, use “Sync to
Target” to improve the performance. Press MENU => “Sync to Target” and enter the star you are
observing. Use the arrow keys (►, ◄, ▼, and ▲) to center it, press a number key to change the star
moving speed.
4.3. Solar Observation
Press MENU => “Sync to Target” on the hand controller, then follow the instruction on the hand
controller screen to select a catalog, here is “Solar System”, and then select “Sun” and use the arrow
keys to center it and press ENTER.
Change the tracking rate to Solar by press MENU => “Settings” => “Set Tracking Rate” =>
“Solar”
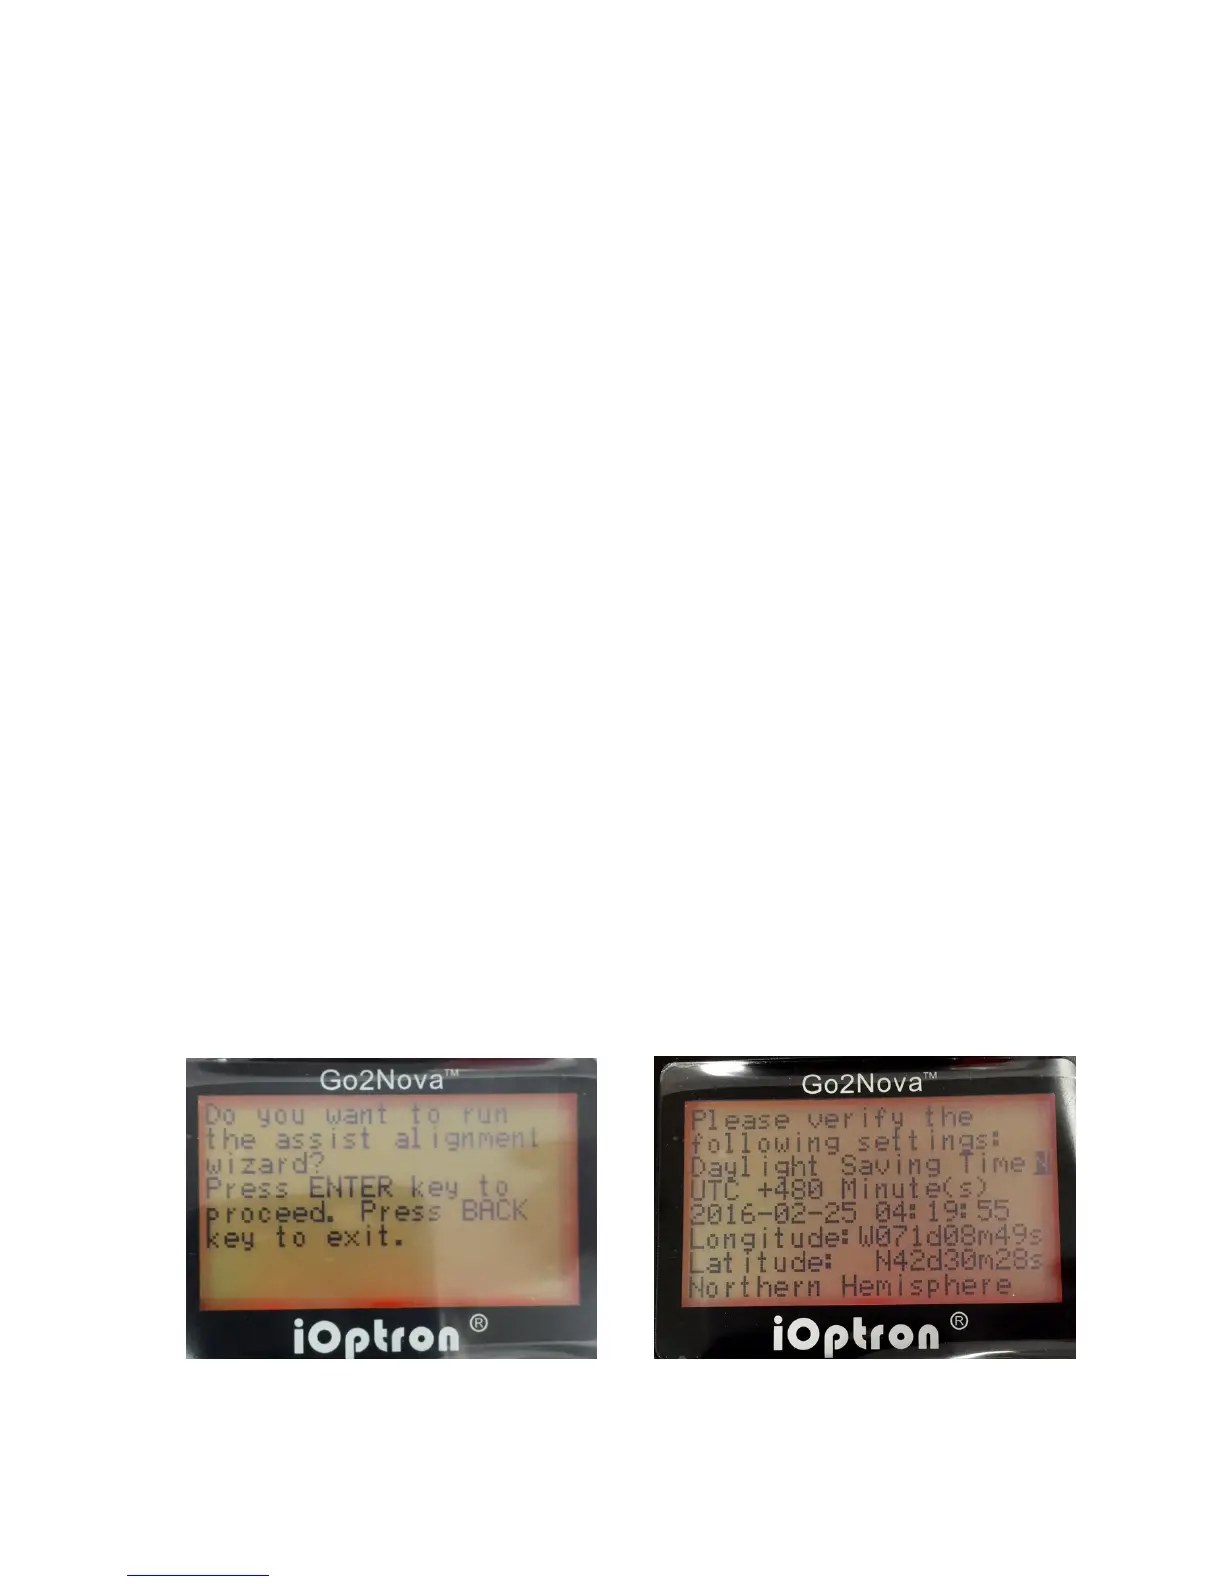
4.4. Enter Initial Information
After turn on the mount power, the mount will ask if you want to run the “assist alignment
wizard,” as shown in LEFT screen in Figure 13. Press ENTER or do nothing to start the wizard. Or
press BACK to cancel.
Figure 13 Initial hand controller screen