40
OPERATION & SERVICE MANUAL FOR MOWER DECK
6-1. Before installation
- Place the tractor on level, hard ground.
-Stop the engine and draw the engine key before mounting or dismounting the drive shaft.
-Shift the transmission range shift lever to the neutral position.
-Make sure that the parking brakes are applied and the PTO lever is in the off position.
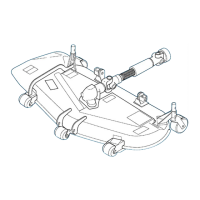
6-2. Installation of the bracket and cylinder on the tractor
Fig.6-1
CHAPTER 6. INSTALLATION ON THE TH TRACTOR
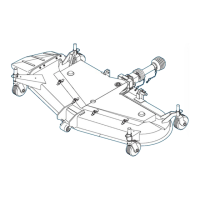
a. Fix BRACKET/FRONT/LH (9) and BRACK-
ET/FRONT/RH (10) to both left and right side
of the chassis by using each 6 pcs of
BOLT/M12X30 (25) and SPRING
WASHER/M12 (26).
b. Fix BRACKET/MID/LH (11) and
BRACKET/MID/RH (12) to both left and right
side of the chassis by using each 8 pcs of
BOLT/M12X30 (25) and SPRING
WASHER/M12 (26).
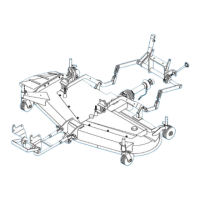
c. Remove each 4 pcs of the bolt and pin, and fix
BRACKET/CYLINDER (16) by using the
removed bolts.
d. Install HOSE (19) to CYLINDER (6). Fix
CYLINDER (6) to BRACKET/CYLINDER (16)
by using PIN/15X88 (17) and RING PIN (15).
e. Arrange HOSE (19) to right side of the tractor
and fix it with CYLINDER (6) by using 2 pcs of
BAND (21).
f. Connect ADAPTER (20) to the control valve of
the tractor. Connect HOSE (19) to ADAPTER
(20).