TM3185F3
40
CAUTION: When using a PTO-driven
implement, make sure the universal joint
does not interfere with PTO shield cover.
DO NOT work under raised equipment.
Before engaging a PTO-driven implement,
ALWAYS carefully raise and lower the
implement using Position Control. Check
clearances, PTO shaft sliding range and
articulation.
Ensure that all PTO safety shields are in
place at all times. Do not step on the PTO
shield cover.
Ensure that all PTO-driven implements
are in good condition and conform to cur-
rent standards.
NEVER step across any driveline. DO
NOT use PTO shield cover as a step.
NEVER use the driveline as a step.
NEVER wear loose fitting clothes. Keep
at least your height away from a rotating
driveline.
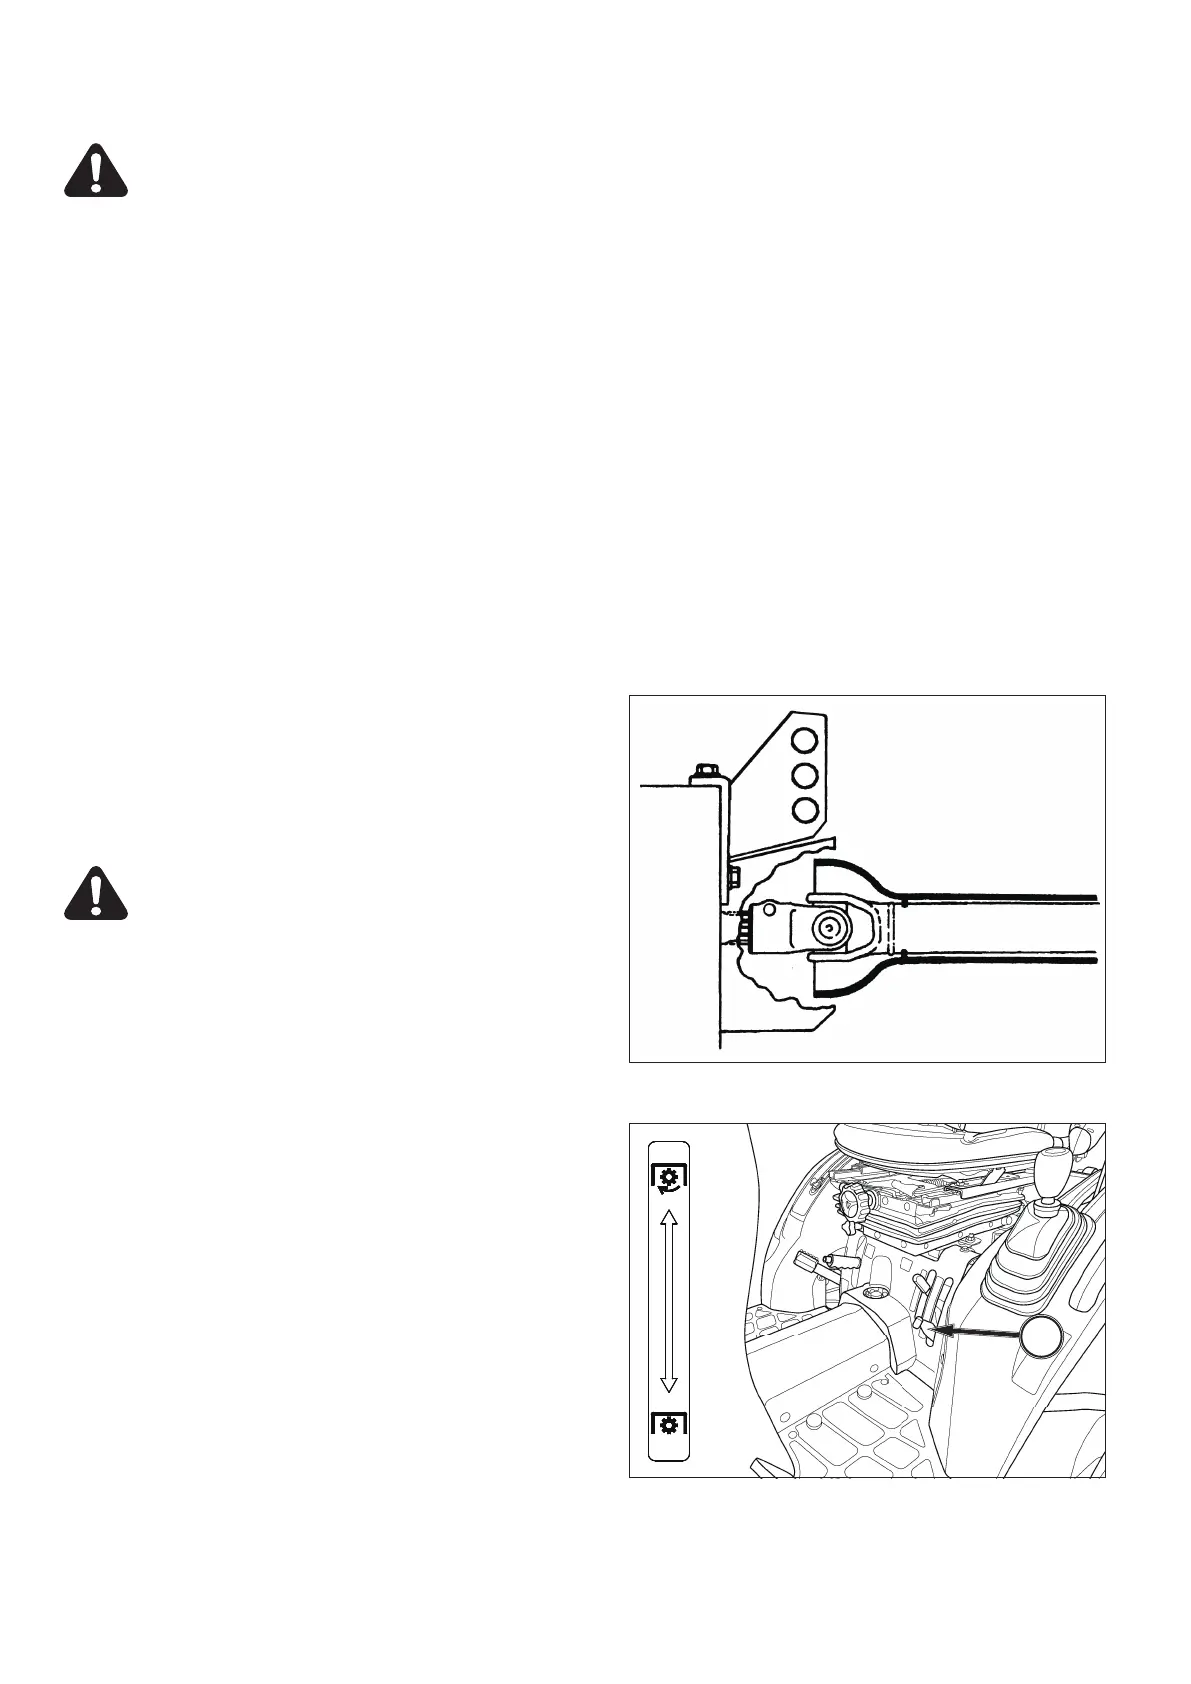
FIG. 61:
Implement driveshaft connected to tractor
rear PTO shaft
CAUTION: Make sure all PTO safety
shields are installed on the tractor and
equipment. Before cleaning or adjusting
the tractor or PTO-driven machine, STOP
THE ENGINE AND DISENGAGE PTO.
PTO Operating Controls
FIG. 62:
The rear PTO is engaged and disengaged
by using the rear PTO lever (1). When the lever is in
the downward position, the rear PTO is disengaged.
When the lever is in the upward position, the rear PTO
is engaged.
The tractor has a single clutch. With the PTO engaged
and transmission gears selected, the PTO will start
turning and the tractor will start moving forward as the
clutch is released.
To select the rear PTO, push the clutch pedal com-
pletely down to disengage drives to the PTO and
transmission. Move the rear PTO lever (1) to upward
position, and the gearshift levers to selected gear.
Release the clutch pedal at slow engine speed to start
the PTO and forward travel, then increase engine
speed to obtain the required PTO speed.
FIG. 61
FIG. 62
 Loading...