Function and Features
Copyright © Itech Electronics Co., Ltd. 31
3. Press right arrow key to “Dimmer” press to confirm when
“Dimmer” is shining.
CONFIG
Volt-MinVolt-Max >
4. Select “LeadingEdge” or “LaggingEdge” to active the function. Press
key to confirm when it is shining. Shining”*” indicate on
VFD means dimmer function is in used, conversely,”*” disappeared.
DIMMER
LeadingEdge TrailingEdge Off
5.
Press to quit the menu.
DIMMER
LeadingEdge TrailingEdge Off
> Set phase angle and start test
1. Press compound key (Shift)+ (*Dimmer)and enter menu
operation
Off *
0.0V 0.0mA 50.0
0.00W PF=0.000 0.0S
2. Press numeric key to set angle, press to confirm. Also you
can adjust angle by knob to view real-time waveform changes along .
Off *
0.0V 0.0mA 50.0
Dimmer=30.0° 0.1S
3.
Press and numeric key to set voltage based on
requirement. Press to confirm.
Off *
0.0V 0.0mA 50.0
0.00W PF=0.000 0.0S
4. Confirm that both List and Sweep are in Disable status (VFD
appears no words of List or Sweep). Press to turn on Output.
The power supply starts outputting phase dimmer wave, and the “*”
on VFD flicks. Press again to stop output.
Off *
0.0V 0.0mA 50.0
0.00W PF=0.000 0.0S
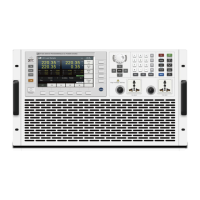
3.11 Output range
IT7300 series AC source will allow switchover between High range and Auto
range. Take IT7321 as example, the voltage, current and apparent power at the
High range is 300V/1.5A/300VA; the voltage, current and apparent power at the
Low range is 150V/3A/300VA. Auto range refers to auto switchover mode
between High range and Low range.
You can choose the range according to actual test requirements. When Auto
range is chosen, the switchover between High range and Low range will be
performed by the instrument automatically, thus sparing complicated operations
such as manual setting.
Switch High range and Auto range:
Press (Shift) and (High/Auto) together to switch between High