User Guide
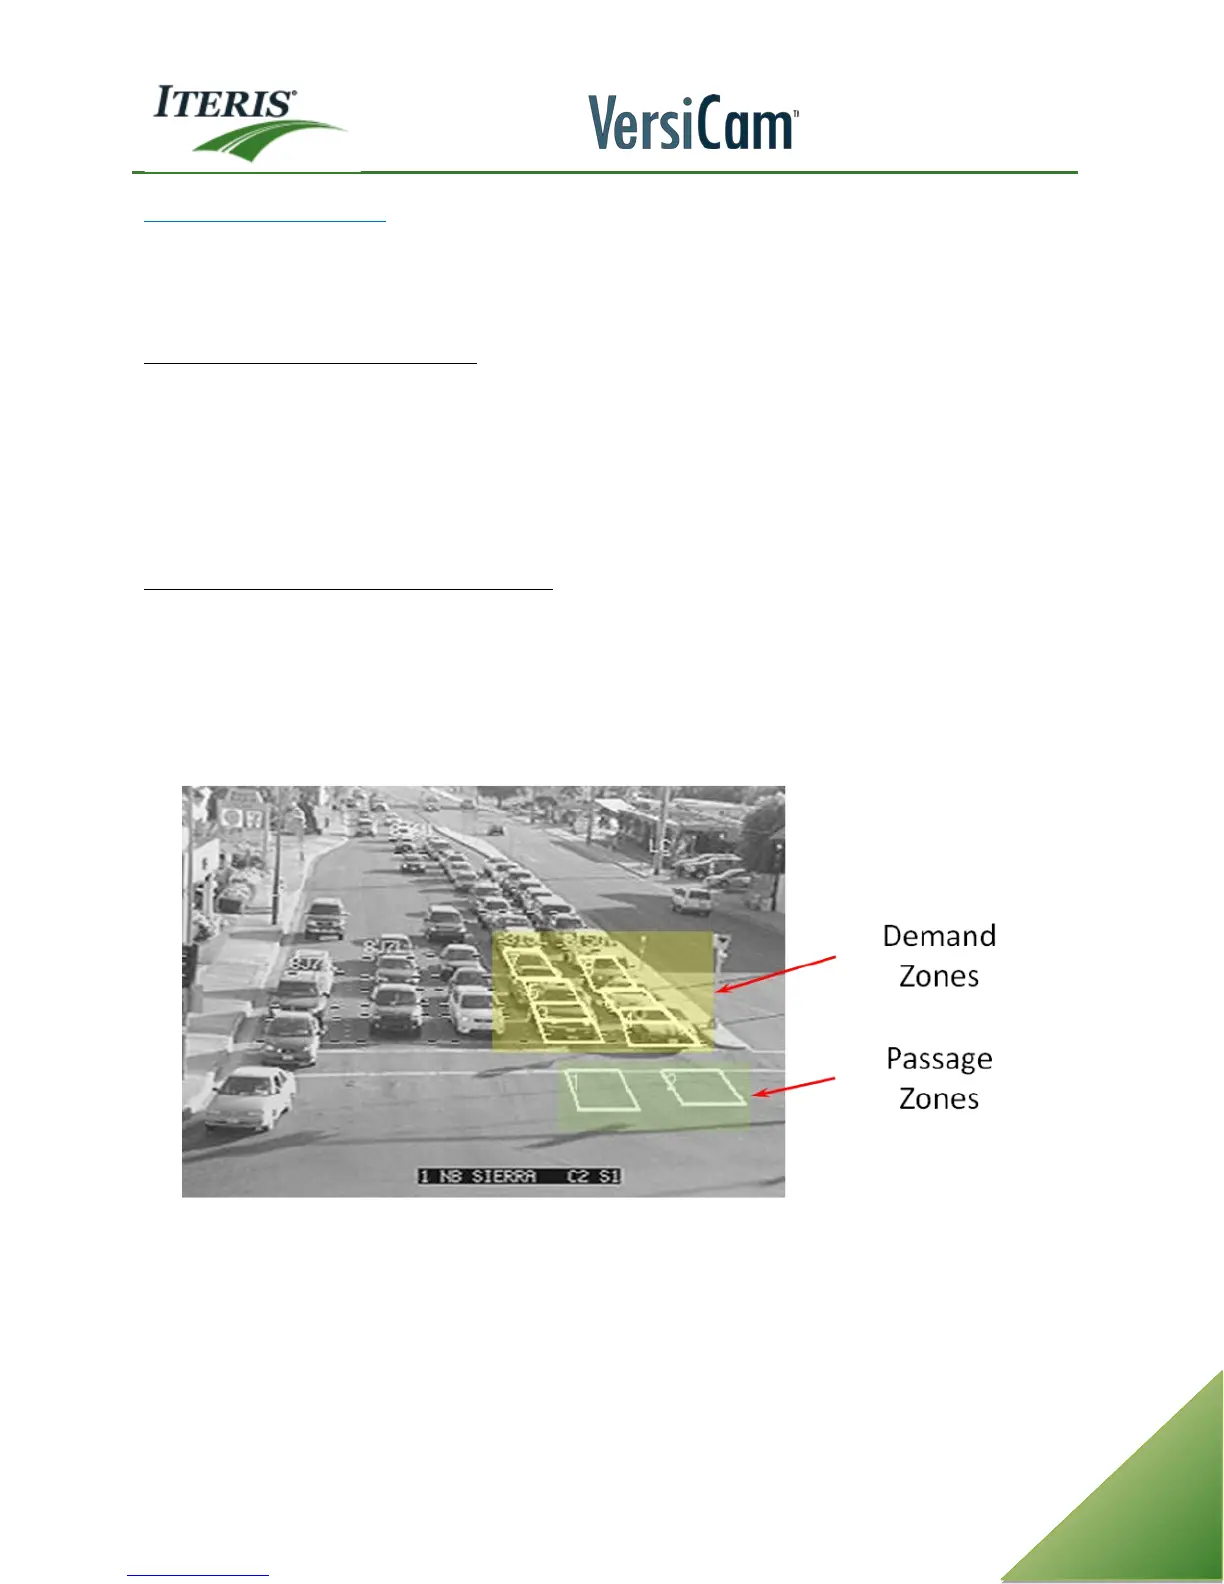
Demand and Passage Zones
These two zones types are used in combination they are used in heavily congested traffic lanes only. During
heavy traffic when vehicles occupy zones for a long period of time the processor may learn the vehicles as
part of the background. Proper usage of demand and passage zones can help to alleviate this situation.
How passage and demand zones work: When traffic is heavily congested the demand zones have a hard time
distinguishing the traffic from the background. The demand zones which are congested borrow zone
background information from the passage zones which are clear most of the time. The demand zones borrow
information from the passage zones to improve algorithm performance.
T
his feature is active from between 7:00 AM and 8:00 PM. Ensure the processors’ clock is set
correctly.
How to setup new demand and passage zones: For a heavily congested approach, the demand zone is used
just like a presence zone. Draw the demand zone just like you would draw a normal presence zone, starting
from behind the stop bar and going back in the lane. Two or three demand zones per congested lane are
recommended. The passage zone should be drawn in front of the stop bar area, where vehicles do not
occupy the zone all the time. One passage zone per congested lane is recommended. The passage zone has
timing associated with it. Leave the timing at the default setting of 3 (Pas:3) and set the channel output to
“none”.