Installing the 100W/100W+ and 100WP/100WP+ ERT Module
-0909-006 100W/100W+ and 100WP/100WP+ Datalogging Water ERT Module Installation Guide 20
Proprietary and Confidential
100W/100W+ and 100WP/100WP+ ERT Module Installation in a New Lid
This section describes installation of the 100W/100W+ and 100WP/100WP+ ERT module in a pit lid without
a drilled hole.
To install the 100W/100W+ and 100WP/100WP+ ERT Module in new lids
1. Select a hole location with enough clearance on the bottom side of the lid to attach the threaded clip collar.
2. Drill a 1-3/4 inch hole in the lid.
3. See To install in lids with holes using the Pit Lid Mounting Kit to complete installation in a new lid.
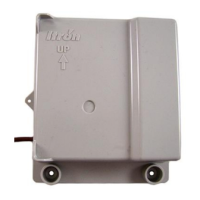
Base Mount Installation
The ERT module may be mounted to a flat surface using the base tab.
Caution Observe the following guidelines for mounting the ERT module using the wall mount
procedure:
• ERT module positioning other than upright could negatively affect radio performance
and battery life.
•
Use only Itron-approved splice kits or inline connectors.
Required Mounting Tools and Hardware
• Drill and drill bits appropriate for mounting location material.
• Common hand tools for the selected fastening method.
• #10 size pan head mounting screws appropriate for the wall or pit box material.
To install the 100W/100W+ and 100WP/100WP+ ERT module using the base mount procedure
1. Select a flat surface.
2. Position the ERT module vertically.
3. Mark the mounting-hole location.
4. Drill a pilot hole in the mounting location material. Follow the screw manufacturer's recommendation for
the pilot hole size.
5. Position the ERT module and insert a #10 pan head screw in the base mounting tab. Carefully tighten the
mounting screw until the ERT module is secure.