Do you have a question about the ITT Goulds Pumps 3501 and is the answer not in the manual?
User safety is a major focus; precautions minimize injury risk.
Specific risks for pumping equipment, reinforcing safety precautions.
Defines terms like Warning, Caution, and Electrical Hazard for operator attention.
General safety measures for operation, including handling hazardous fluids.
Importance of genuine parts for reliable operation and safety.
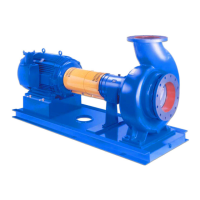
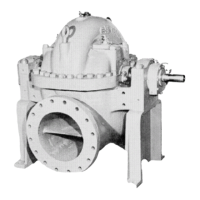
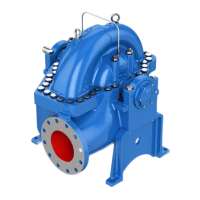
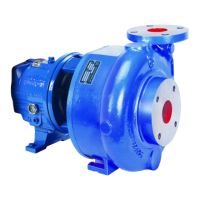
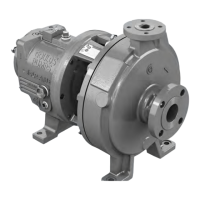
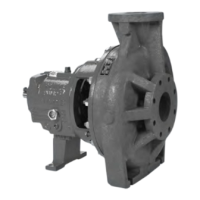
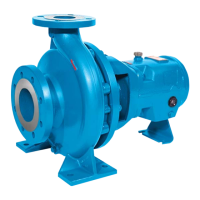
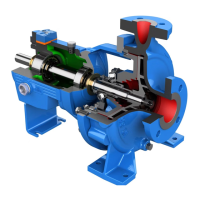
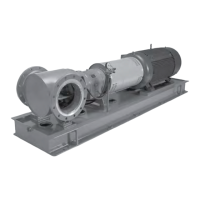
Details the components of the mixer: casing, rotor, shaft sleeves, power end, seal chamber.
Explains the location and purpose of mixer nameplates for identification.
Procedures for inspecting the mixer upon receipt and handling claims.
Guidelines for short-term and long-term storage of the mixer.
Proper techniques for lifting and moving the mixer assembly.
Requirements for mixer installation site and foundation, including bolt types.
Steps for leveling the baseplate on the foundation using wedges or shims.
Procedures for aligning the mixer and driver.
Initial and final alignment checks before and after operation.
Specifies acceptable dial indicator readings for proper alignment.
Instructions for mounting dial indicators for alignment measurement.
Procedures for measuring alignment parameters.
Procedure for achieving and checking angular alignment using dial indicators.
Procedure for achieving and checking parallel alignment using dial indicators.
Combines angular and parallel alignment checks for overall equipment alignment.
Steps for grouting the baseplate to the foundation for a stable installation.
General guidelines for piping installation, including support and cleaning.
General guidelines for piping installation, including support and cleaning.
Specific requirements for inlet piping installation to ensure proper operation.
Requirements for outlet piping installation, including isolation valves.
Steps to verify piping installation and check for pipe strain.
Specific instructions for piping related to mixing processes.
Instructions for piping related to liquid mixing, including material selection and valves.
Instructions for piping related to gas mixing, including flow velocity and pipe supports.
Steps for installing spring mounted baseplates.
Pre-start-up checks and preparations for the mixer.
Procedure to safely check the mixer's direction of rotation.
Steps for connecting the mixer and driver, including coupling installation.
Procedure for checking and potentially adjusting rotor axial clearance.
Instructions for oil and grease lubrication of bearings.
Information on mechanical seals and connection of sealing liquid.
Steps to safely start the mixer.
General operation procedures and considerations.
General advice for operating the mixer to prevent overload and damage.
Warnings and consequences of operating the mixer below minimum flow rates.
Precautions for operating or storing the mixer in freezing temperatures.
Steps for safely shutting down the mixer.
Procedure for checking alignment after the mixer has reached operating temperature.
Guidelines for interlocks and alarms for the feed pumping system and mixer.
Importance of routine maintenance for extending mixer life and reducing repairs.
Outlines routine, quarterly, and annual maintenance tasks for the mixer.
Procedures for maintaining oil and grease lubricated bearings.
Detailed instructions for lubricating oil-filled bearings.
Procedures for lubricating grease-filled bearings.
Procedures for maintaining shaft seals.
Information on mechanical seals, their installation, and life expectancy.
Procedure for adjusting rotor axial clearance to maintain mixer performance.
Detailed steps for using dial indicators to set rotor axial clearance.
Detailed steps for using feeler gauges to set rotor axial clearance.
Guidelines for cleaning the mixer, avoiding direct high-pressure streams on seals.
List of tools necessary for mixer disassembly and reassembly.
Steps to take before starting mixer disassembly, including safety precautions.
Steps for disassembling the mixer, including removing the coupling guard and bearing frame.
Procedures for safely removing the mixer rotor using pry bars or a puller.
Steps for removing the seal chamber and mechanical seal assembly.
Steps for disassembling the bearing frame and removing components.
General inspection points during disassembly.
Inspecting casing gasket surfaces, alignment fits, and for wear.
Inspecting rotor vanes for damage and keyway/bores for damage.
Inspecting seal chamber gasket surfaces and for pitting or corrosion.
Inspecting the bearing frame for cracks, corrosion, bores, and seals.
General procedures for reassembling mixer components.
Steps for reassembling the bearing frame, including bearing installation and lubrication.
Steps for reassembling the taperbore seal chamber and mechanical seal.
Procedure for installing the rotor onto the shaft.
Installing casing foot and alignment pin for specific mixer models.
Steps for installing the back pull-out assembly into the mixer casing.
Lists recommended spare parts for ensuring continuous operation and minimizing downtime.
Identifies the most critical spare parts to keep on hand.
Lists recommended spare parts for general maintenance.
Lists the minimum essential spare parts.
Provides a cross-sectional view and a detailed parts list with materials.
Information on how to order replacement parts and contact representatives.
Information on the availability of emergency parts service.
| Model | 3501 |
|---|---|
| Category | Water Pump |
| Manufacturer | ITT Goulds Pumps |
| Operating Temperature | Up to 250°F (121°C) |
| Material | Stainless Steel |
| Seal Type | Mechanical Seal |
| Type | End Suction Centrifugal Pump |