Home
J2
Payment Terminal
240
Page 33 (Jumper Settings)
J2 240 - Jumper Settings
36 pages
Manual
Save Page as PDF
To Next Page
To Next Page
To Previous Page
To Previous Page
Loading...
27
6-3
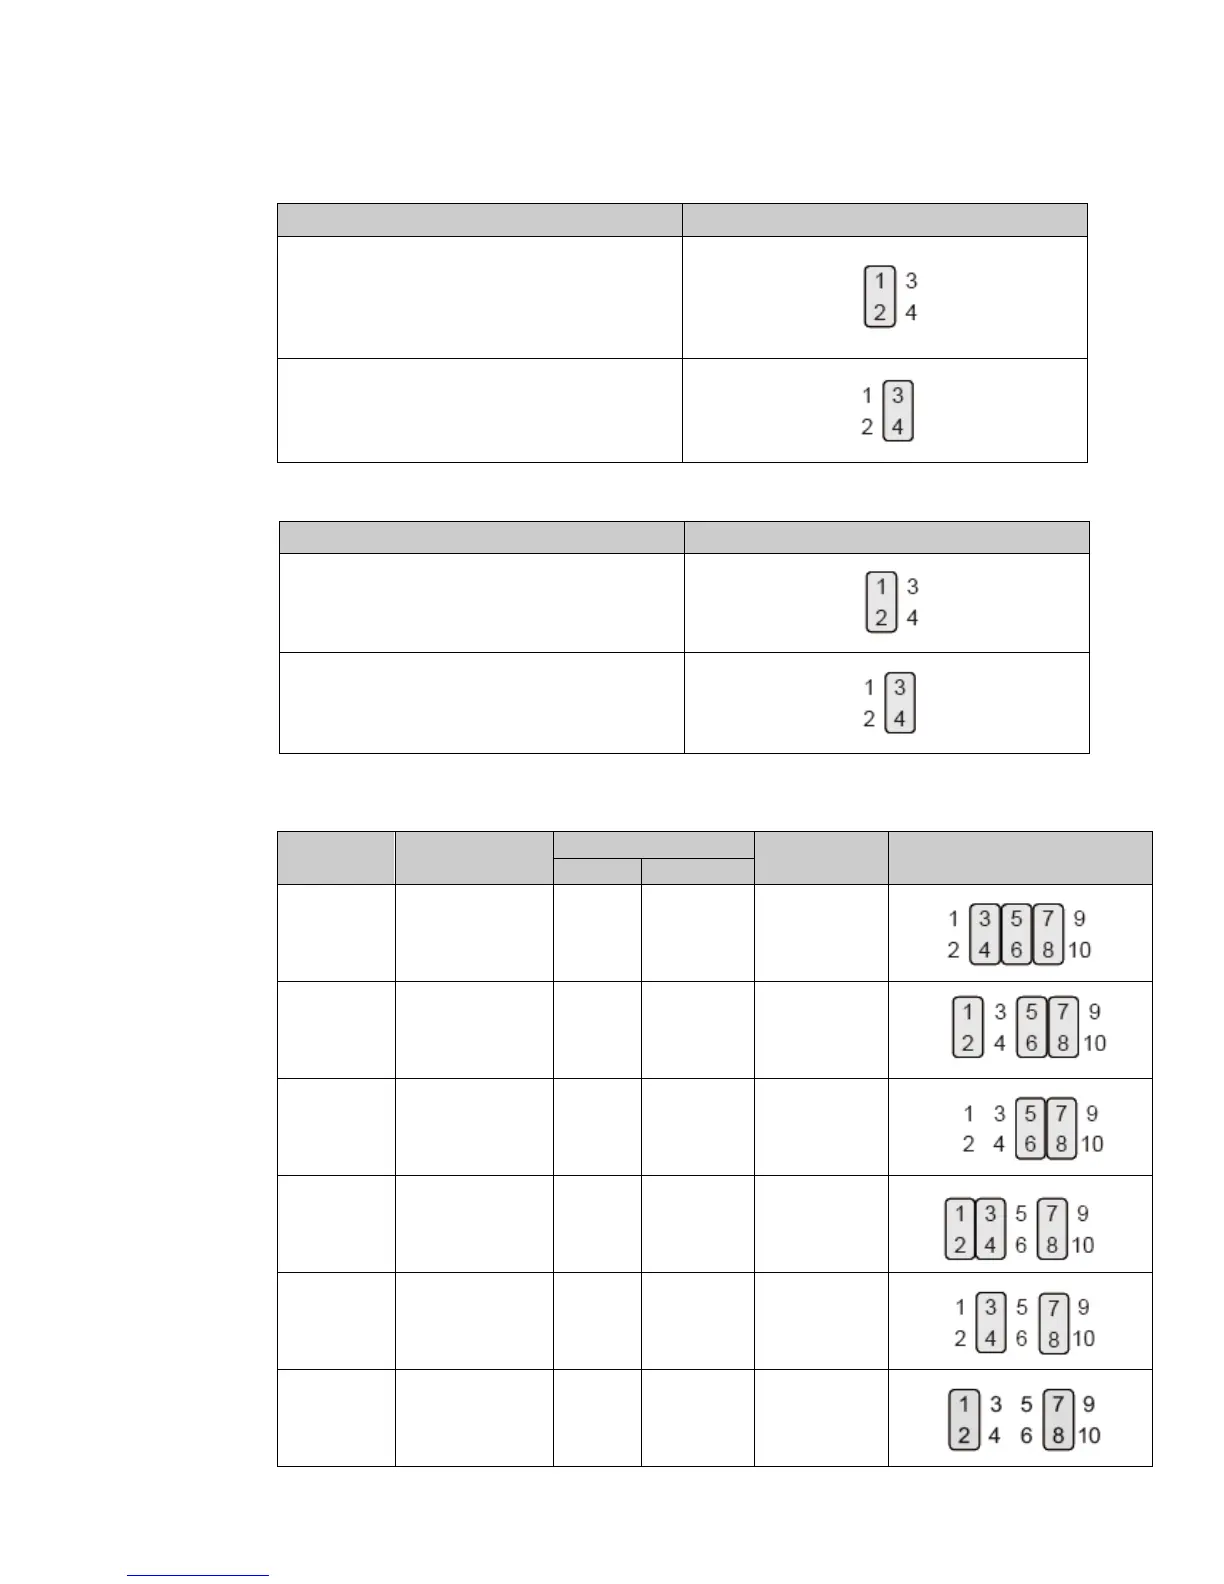
Jumper Settings
Inverter Selection
Fu
nc
t
io
n
JP1
(1-2) (3-4)
▲
LED
CCFL
Cash Drawer Power Setting
Fu
nc
t
io
n
JP6
(1-2) (3-4)
▲
+19V
+12V
LCD ID Setting
Pane
l
Number
Res
ol
uti
on
LV
D
S
Output
Interface
JP4
(1-2) (3-4) (5-6) (7-8) (9-1
0)
Bits
Channel
1
800 x 600
18
Single
L
VDS Panel
2
800 x 600
2
4
Single
L
VDS Panel
3
1
02
4 x 7
68
18
Single
L
VDS Panel
4
1
02
4 x 7
68
2
4
Single
L
VDS Panel
5
1366 x 7
68
18
Single
L
VDS Panel
6
1366 x 7
68
2
4
Single
L
VDS Panel
32
34
Table of Contents
Main Page
Default Chapter
3
Important Safety Instructions
3
Table of Contents
6
1 Item Checklist
7
Standard Items
7
Optional Items
8
2 System View
9
Front View & Rear View
9
Side View
10
Bottom View
10
Dimension & View Angle
11
I/O View
13
3 System Assembly & Disassembly
14
Install the Power Adapter
14
Replace the HDD
15
Replace the SSD Card
15
4 Peripherals Installation
16
Install the MSR Module
16
Install the Ibutton Module
17
Install the Addimat Key Reader
18
Install the Customer Display (Graphic LCM)
19
Install the 2 Nd Display
20
How to Activate the 2 Nd Display under Windows
21
Install the Wall Mount Kit
24
Install the Cash Drawer
27
5 Specification
29
6 Configuration
31
D36 Motherboard Layout
31
Connectors & Functions
32
Jumper Settings
33
Appendix: Driver Installation
36