Mini-JLT GNSS™ User Manual
38 © 2017 Jackson Labs Technologies, Inc.
4.2.2 Flash Magic Flash Programming Utility
The second utility is the Flash Magic tool available on the Flash Magic website:
http://www.flashmagictool.com/
If the Philips LPC2000 tool doesn’t work, please use this one.
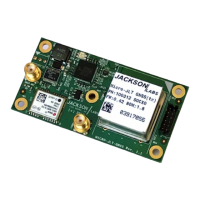
4.3 Putting the PCB into In-Circuit Programming (ISP) mode
Momentarily short-out the ISP# pin 2 of header J5 to pin 1 of header J5 of the Mini-JLT GNSS™
board to ground the ISP# pin during power-on. It may be useful to connect a push-button to pin 1 and
pin 2 of J5 to allow in-field firmware upgrades on the Mini-JLT GNSS™ PCB. Both LED’s should
remain off, indicating the unit is properly placed into ISP mode. If the LED’s light up after power-on,
the unit is not in ISP mode.
4.4 Downloading the firmware
Download the latest version of Mini-JLT GNSS™ firmware from the Jackson Labs Technologies,
Inc. support website and store it in a place that will be remembered. The file is in .hex format.
The unit needs to be connected to the computer’s TTL serial port prior to firmware download. The
Mini-JLT GNSS™ is TTL-level compatible. A TTL-to-RS-232 converter must be used when
connecting to the computer’s RS-232 serial port to prevent damage to the board. Connect a USB or
TTL serial connector to the Mini-JLT GNSS™ as indicated in Section 2.1.1 . The units’ firmware
may also be updated through the USB connector serial port.
4.4.1 Philips LPC2000 Flash Utility
A) Open the LPC2000 utility. Set the COM port in the LPC2000 application as needed on your PC.
B) Select the Baud Rate of the LPC2000 utility to be 38400 or slower. Faster Baud rates will not
work properly.
C) Press the “READ DEVICE ID” button, this should then show “LPC2138” in the DEVICE
window if the unit is communicating correctly to the application.
Warning: Make sure NOT(!) to press the “erase” button under any circumstances, this may erase
factory calibration data, and the unit will not operate and will have to be returned to the
factory. Pressing the “erase” button on the ISP utility will thus void the warranty.