Do you have a question about the Jands Vista T2 and is the answer not in the manual?
Details the power and external display connections for the console.
Describes the procedure for powering on the console and launching the application.
Explains how to create new shows, open existing ones, and save progress.
Details the common main toolbar with navigation and soft buttons.
Explains the Fan toolbar for spreading feature values and event times.
Details methods for adding fixtures from the factory or user lists to the patch.
Step-by-step guide to selecting fixtures from the factory library.
Explains how to patch fixtures by dragging them to the patch panel.
Describes using the Patch box for adding multiple fixture instances efficiently.
Covers configuring properties for fixtures using the Properties and Transforms tabs.
Details the fields for editing fixture properties like Name, ID, Type, and Notes.
Explains the use of transforms like Preheat, Limit, Dimmer Curve, etc.
Explains how to use advanced transformer parameters for fixture customization.
Describes the three different views (Table, List, DMX) for the patch window.
Explains the default Table view for patching and arranging fixtures.
Details commands like Strike, Douse, Reset, Park, and Unpark for fixture control.
Explains the process of cloning fixtures for easier show programming.
Covers saving and loading patch data using CSV files.
Details connecting universes to DMX outputs and external devices.
Explains how to connect universes to DMX outputs and external Art-Net devices.
Provides an overview of the main elements on the Chooser screen.
Explains how to organize fixture icons visually in custom layouts.
Details creating and using matrix containers for fixture control and effects.
Covers basic and advanced methods for selecting fixtures using various tools.
Explains how to sort fixtures based on various criteria for programming.
Guides on creating custom sort orders with advanced grouping and fanning options.
Explains the two tabs (Palettes and Components) of the Programmer Sidebar.
Details how to use palettes for adjusting fixture attributes like Intensity, Position, Colour, etc.
Provides steps to verify fixture setup and patching through intensity and color checks.
Describes the All panel for quick access to common fixture features like Intensity and Position.
Details the different color setting mechanisms available in the Colour palette.
Describes setting colors using CMY or RGB values via sliders.
Details managing color wheels and their slots for fixtures.
Explains how to select and manage gobos and their rotation.
Explains how to control beam attributes like focus, zoom, and iris.
Introduces detailed settings panels for Intensity, Position, Colour, etc.
Details the controls for setting intensity and strobe parameters for fixtures.
Describes the detailed position panel for controlling Pan and Tilt with fine mode and flip options.
Details the detailed color palette for managing color mixing and wheels.
Explains using the HSV tab for color selection and saturation.
Details managing color wheels and their slots for fixtures.
Explains the detailed Gobo panel for managing gobo wheels and patterns.
Describes the detailed Beam panel for controlling focus, zoom, and iris.
Explains using the Frame tab for beam shaping and shutter control.
Introduces the custom panel for fixture-specific settings and miscellaneous controls.
Explains how to store, select, and organize Groups, Presets, and Extracts.
Explains the use of Quick Picker panels for selecting various items.
Explains the two panels (QP1 and QP2) of the sidebar for displaying quickpickers.
Details the multi-quickpicker that appears at the bottom of the Fixture Chooser and Timeline windows.
Explains storing cuelists directly to playback controls or via the toolbar.
Details adjusting timing, naming, and selecting store options using the Store All window.
Explains Vista's advanced recording method with multiple options for adding or merging cues.
Details adding new cues, merging, or replacing existing ones.
Explains how to open an existing cuelist or create a new one in the editor.
Provides an overview of the Timeline window for editing fixture events.
Explains how to block cues to prevent changes from tracking through previous cues.
Guides on programming fixture movements or changes with intensities at zero.
Details how to set cue number, name, duration, and end-of-cue action.
Guides on adding and playing audio files with cuelists or specific cues.
Details properties that control how a cuelist plays back and interacts with others.
Explains how to set timing properties like Release Timing and Playback rate.
Details how cuelists respond to timecode input (Mode, Armed, Offset).
Explains how to set cuelist chase properties like mode, direction, and tracking.
Explains the timeline concept for sequencing and editing lighting events.
Guides on filtering timeline information by fixtures, event features, and advanced options.
Explains creating and managing individual lighting events within a cuelist.
Guides on creating events on the timeline by storing cues or creating new cuelists.
Guides on setting event timing and durations by zooming or entering values.
Explains how to create and apply extracts, which are reusable cuelist sections.
Defines extracts as programming templates that can save and reuse lighting effects.
Guides on creating extracts from cuelist sections or timeline events.
Explains how commands can control playback of other cuelists.
Guides on inserting commands into a cuelist via the Insert Commands window.
Explains how to apply changes to presets or cuelists while they are playing back.
Lists the different types of effects Vista provides: Wave, Swing, and Video.
Details the SmartFX Control Panel components: Rate, Feature tabs, Sequence, and Advanced tabs.
Explains rate controls for effects, including BPM and per-cycle/per-item settings.
Describes sequence tab controls for applying effects to multiple fixtures.
Guides on creating custom effects by defining feature types and names.
Details two ways to stop effects and revert fixtures to original settings.
Details how to add an audio track to a cuelist and manage its playback.
Explains how to use the Learn Timing window to adjust cue start times based on actions.
Guides on adjusting cue timing to match audio or video playback.
Details how to use Linear Time Code (LTC) or MIDI Time Code (MTC) to trigger cues.
Explains how to set Vista to automatically play cuelists based on date and time.
Guides on creating new events triggered by specific dates and times.
Details the process of creating a new event to control playback and actions.
Provides an overview of the Playback Control window for managing cuelists.
Details two methods for editing cue names, times, and end-of-cue actions.
Provides an overview of the faders, encoders, and displays on Vista consoles.
Introduces controls used for programming and playback modes (IPCG, Play, SFX).
Explains how Super Playback controls link to selected playback using buttons and encoders.
Explains starting and controlling cuelist chases, including rate and direction.
Details controlling effect size, rate, and phase for running effects.
Explains assigning stored components like Cuelists and Presets to playback controls.
Guides on assigning actions to buttons and faders to suit playback style.
Guides on setting cuelist properties like name, priority, and playback behavior.
Explains assigning groups to playbacks for controlling intensity via faders and buttons.
Explains storing and recalling console states, including output, buttons, and faders.
Guides on assigning components and configuring controls to record a snapshot.
Provides an overview of the Output window for displaying fixture states.
Details how to configure the Output window display using a popup menu.
Guides on accessing and configuring system settings on T and I series consoles.
Details the process of recalibrating the pen tablet or external touchscreens.
Explains how display and input device settings are controlled by the PC OS.
Details configuring network settings like Host name, IP Address, and Gateway.
Lists options for managing the patch, including showing, deleting, renaming, and cloning fixtures.
Guides on re-imaging consoles with Vista V2 software using an image file.
Step-by-step instructions for installing the Vista V2 Console Image file.
Details how to apply software updates via USB or FTP.
Covers installing Vista V2 software on a Windows PC.
Explains how to use FTP for transferring files between console and computer.
Guides on configuring network settings on the console for FTP.
Details PC network settings required for FTP connection.
Provides instructions for using an FTP client to connect to the console.
Step-by-step guide for creating a bootable USB drive for console installation.
Explains requirements for physically connecting consoles and computers for backup.
Details network connection methods for backup systems.
Explains network configuration requirements for tracking backup.
Guides on configuring network settings on T & I series consoles.
Details PC network settings required for tracking backup.
Step-by-step instructions to initiate the tracking backup process.
Explains the console's behavior and slave takeover when the master fails.
Provides troubleshooting steps for network connectivity issues in backup systems.
Guides on starting the VNC server on T or I series consoles.
Details the procedure for connecting to Vista via VNC using a Windows PC.
Provides instructions for connecting to Vista via VNC using a Mac.
Explains how to set up the MIDI port and device ID for MSC communication.
Lists MSC terms and their Vista equivalents for controlling cues and cuelists.
Details the cable requirements and connection process for serial communication.
Guides on setting serial port parameters in User Preferences for Vista.
Lists serial commands for controlling cuelist playback and loading shows.
Explains the syntax for sending commands to set fixture levels via serial.
Introduces the application for creating and editing fixture profiles.
Provides a step-by-step guide to creating a sample fixture profile.
Details entering general fixture data like Manufacturer, Name, and Type.
Explains adding DMX channels, ranges, modes, and slots for fixtures.
Details the fields for adding DMX channels, including Feature Class and Type.
Details creating 16-bit Pan channels, setting default values and Hi Byte.
Details creating 16-bit Tilt channels, setting default values and Hi Byte.
Details creating 16-bit Gobo Rotation channels and setting default values.
Explains creating custom timing channels for Focus, Colour, and Beam.
Guides on generating and exporting crash report packages from consoles.
Details configuring a Windows PC to collect crash dump files for analysis.
Steps to set up Dr. Watson as the default debugger for crash analysis.
Steps to enable local crash log saving and reconfigure the registry.
Explains basic touchpad operations like clicking, double-clicking, and dragging.
Provides information on using the pen-tablet, including resting hand and grip pen usage.
Guides on pen usage for pointing, selecting, clicking, and dragging.
Covers precautions related to temperature, humidity, and handling the pen tablet.
Details power requirements, consumption, and connectors for various Vista models.
Provides guidance on routine maintenance and cleaning of Vista products.
Explains the procedure for replacing the internal battery in Vista T and I series consoles.
Covers installation requirements, including ventilation and UPS connection.
Provides a detailed overview of console inputs and outputs.
Lists and describes various input/output connectors like DMX, Ethernet, MIDI, and Video.
| Type | Lighting Console |
|---|---|
| Manufacturer | Jands |
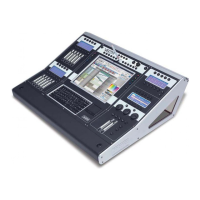
| Model | Vista T2 |
| DMX Outputs | 4 |
| Motorized Faders | Yes |
| Touchscreen | Yes |
| Master Fader | Yes |
| Grand Master | Yes |
| Blackout Button | Yes |
| MIDI Input/Output | Yes |
| Ethernet Port | Yes |
| Number of monitors supported | 2 |
| LCD Touchscreen | Yes |
| Connectivity | Ethernet, MIDI |