Page 7
Cartridge Pool Filters - CL and CV Series Filters
QXWDQGLQWRWKH¿OWHUWDQN8VHWKHÀDWV
on the tank adapter to tighten. Do not
overtighten.
b. Place the larger, thinner o-ring onto the
gauge housing. Thread the housing into the
coupler on the tank adapter.
F 2ULHQWWKHJDXJHDLUUHOHDVHDVVHPEO\LQWKH
desired position. Raise and thread the locknut
RQWRWKHERWWRPRIWKHJDXJHDLUUHOHDVH
assembly. Hand tighten the nut only. Using
a wrench to tighten the nut may damage the
nut, gauge or air release assembly.
3.4 Filter Plumbing
7KLV¿OWHURSHUDWHVXQGHUSUHVVXUH:KHQFODPSHG
properly and operated without air in the water
V\VWHPWKLV¿OWHUZLOORSHUDWHLQDVDIHPDQQHU
2. If the system can be subjected to higher pressure
than the maximum rating of any component,
install an ASME approved automatic pressure
relief valve or pressure regulator in the circulation
system. Set the relief valve or pressure regulator to
lowest working pressure of any of the components
in the system.
3ODFHWKH¿OWHURQWKHFRQFUHWHSDGOLQHGXSZLWK
WKHLQOHWRXWOHWSLSHVVHH)LJXUHVDQG$
7RUHGXFHSUHVVXUHORVVHVPLQLPXPSLSLQJLV
recommended for plumbing the system.
)RUEHVWHI¿FLHQF\XVHWKHIHZHVWSRVVLEOHQXPEHU
RI¿WWLQJV7KLVZLOOSUHYHQWDUHVWULFWLRQLQWKH
ZDWHUÀRZ
7KH&9PRGHO¿OWHUFRPHVZLWKD-DQG\
Sweep Elbow for this purpose. The sweep
elbow also includes a threaded port and plug
VRWKDWDòKRVHELEFDQEHFRQQHFWHGIRU
pressure testing. See Figure 7.
5.2 To install the sweep elbow use the following
instructions:
WARNING
To avoid an electrical shock hazard, which can result
in serious injury or death, ensure that all electrical
power to the system is turned off before approaching,
inspecting or troubleshooting any leaking valves
or plumbing that may have caused other electrical
devices in the surrounding area to get wet.
WARNING
Follow all filter manufacturer's
instructions. NEVER attempt to
assemble, disassemble or adjust the
filter when there is pressurized air in the
system. Starting the pump while there
is any pressurized air in the system can
cause the filter lid to be blown off, which
can cause death, serious personal
injury or property damage.
a. Switch off the circuit breaker to the
equipment and open the air relief valve on
WRSRIWKH¿OWHUOHDYHLWRSHQGXULQJWKLV
procedure).
NOTE
,IWKH¿OWHULVEHORZSRROOHYHOFORVHWKHVXFWLRQDQG
UHWXUQOLQHYDOYHVWRLVRODWHWKH¿OWUDWLRQV\VWHP
5HPRYHWKHGUDLQSOXJIURPWKH¿OWHU/HWWKHZDWHU
GUDLQIURPWKH¿OWHU
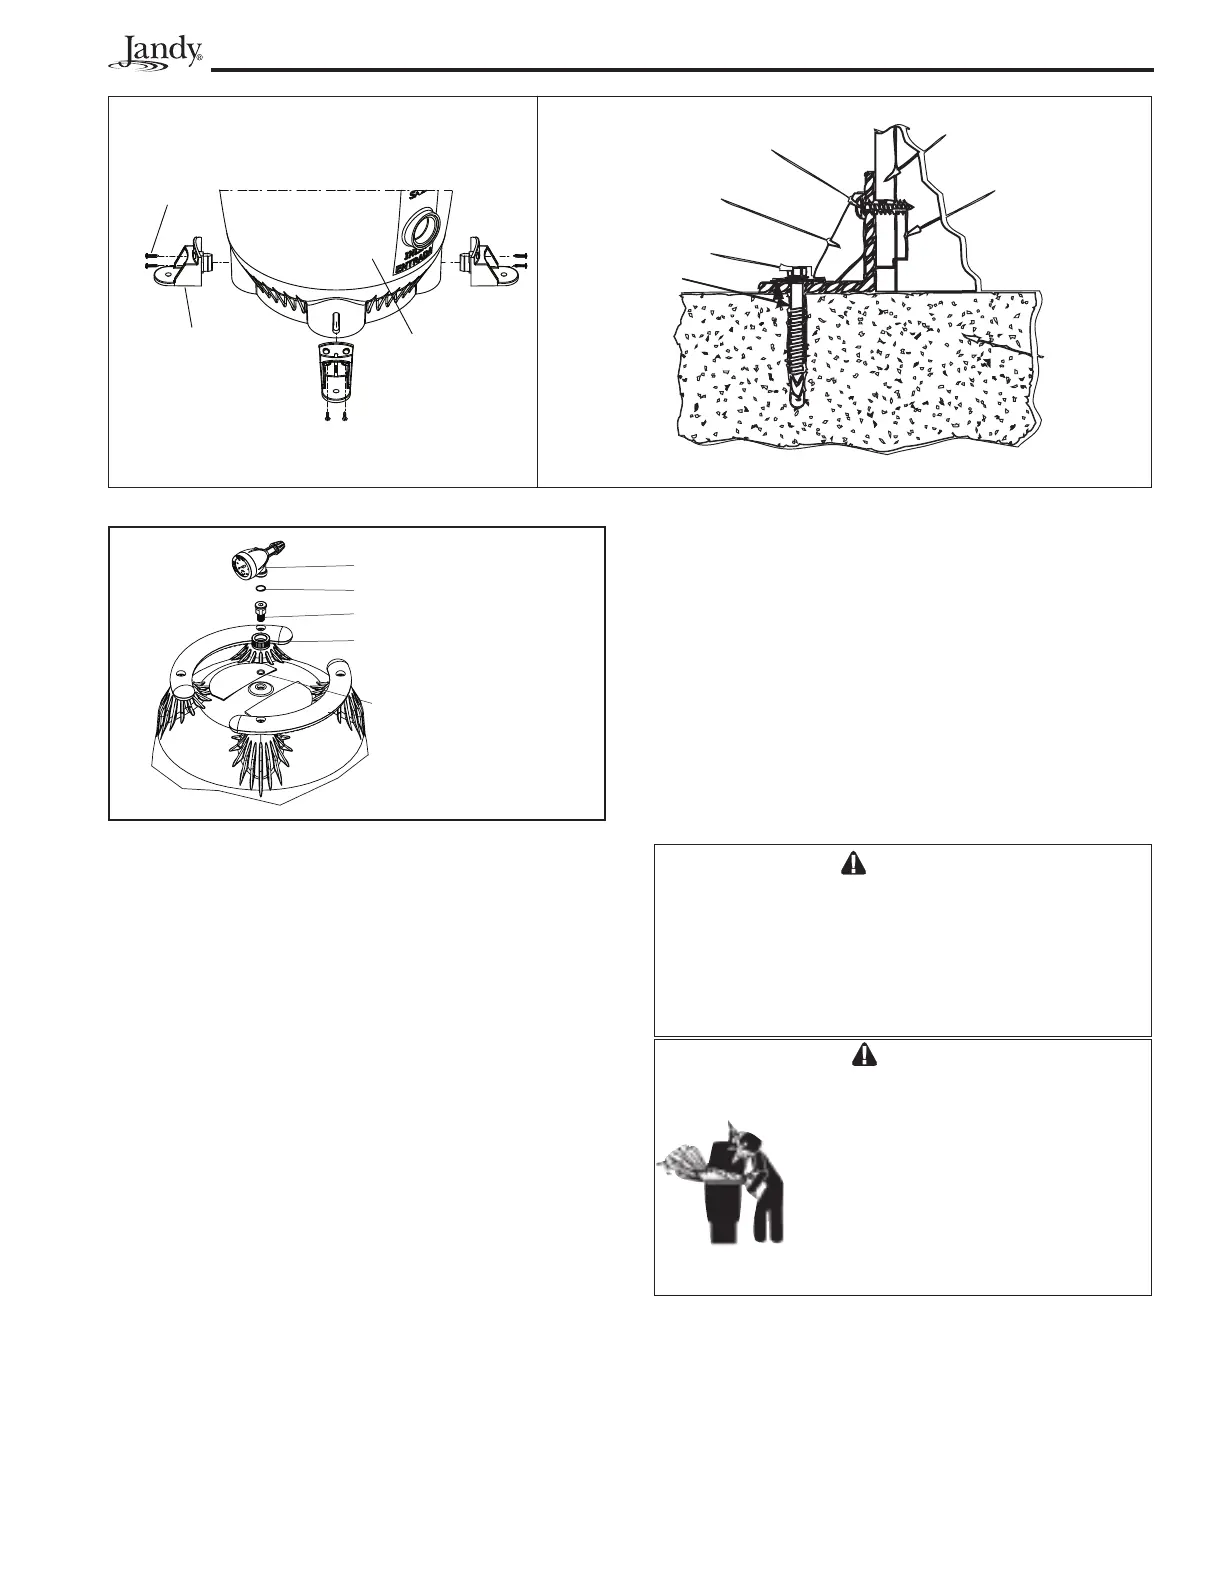
Figure 4. Pressure Gauge/Air Release Assembly
Housing
O-Ring
O-Ring
Tank Adapter
Tank Adapter to Housing
Coupler
Filter Base
Drill 5/32” Hole
Mounting Tab
Mounting Bracket
#12x1” Stainless Steel Pan
Head Screws (Qty 2)
Drill Two 3/32” Holes
Through Filter Base
1/4” x 2-1/4” S.S. Tapcon
Screw and S.S. Washer
3-1/2” Thick
(Min.)
Concrete Pad
Anchor
Bracket
(Qty 4)
#12x1” Pan Head
Stainless Steel
Screw (Qty 8)
Tank Bottom
Filter Tank Anchor Bracket Installation Anchor Bracket to Platform Installation
Figure 3. Anchor Bracket Installation
 Loading...