Page 24
ENGLISH
Jandy
®
Pro Series, Hi-E2
®
and Hi-E2R Gas-Fired Heater
|
Installation & Operation Manual
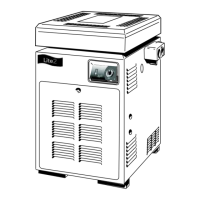
Figure 29.
Burner ame (visible near top of heater in mirror).
neutralizer and enough water to create a water
trap in the condensate drain assembly.
2. Replace combustion air lter. Refer to Section
4.4.
3. For heaters installed with combustion air or vent
piping, inspect screens at the inlet or outlet of
these pipes. Clean screens as necessary to assure
free ow. See illustrations in combustion air and
vent pipe installation section.
4. Make sure that the pressure switch operates
properly by shutting the lter pump off and on a
few times. The burner should go off immediately
after the pump stops. An ignition sequence should
start shortly after the pump is turned back on.
5. Make a visual check of the main burner ame.
The ame can be seen in a mirror/viewport
arrangement in the upper part of the heater. The
ame should be light blue and the burner surface
should be dark, with only a few glowing bers.
See Figure 29.
6. Inspect the gas and electronic controls, including
the following:
• High temperature limit switch
• Water pressure switch
• Venturi differential pressure switch
• Automatic gas valve
• Burner temperature limit switch
• Vent limit switch
• Temperature control
• Control circuit fuse
7. Perform a temperature rise test in accordance with
Section 2.12.
8. If the heater is equipped with a pressure relief
valve, clean any accumulated corrosion and make
sure that water runs freely through it.
9. Inspect the outside of the combustion chamber
and burner for corrosion and indication of
improper operation.
10. Regularly inspect electrical controls for
deterioration. Repair and replace as necessary.
NOTE Keep this manual in a safe place for future reference
by you and your professional technician when
inspecting and servicing the heater.
To reactivate the heater in the spring, have a qualied
professional technician reassemble the heater as follows:
1. Attach the pressure switch tting to the copper
tubing. See Figure 28.
2. Tighten the drain plugs in the headers.
3. Clean the condensate drainage system and
condensate trap.
4. Replace the combustion air lter.
5. Uncover the vent grille.
6. Turn on the main supply gas cock outside the
heater jacket.
7. Turn on the heater according to the lighting and
shutdown instructions inside the top cover.
3.8 Periodic Inspection
WARNING
Improper installation or maintenance can cause
nausea or asphyxiation from carbon monoxide in flue
gases which could result in severe injury, or death.
3.8.1 Owner Inspection
The Hi-E2 heater has been designed and constructed to
provide long performance life when installed and operated
properly under normal conditions. The following basic
guidelines should be maintained:
1. Keep the top of the heater clear of all debris, and
make sure there is no collecting of ammable
materials, leaves, paper, etc., around or beneath
the heater.
2. Keep the pool heater area clean and free of all
combustible materials, gasoline and other liquids,
and vapors.
3. Do not use the heater if any part has been under
water. Immediately call a qualied professional
technician to inspect the heater and replace any
part of the control system and any gas control
which has been under water.
4. Check for spider webs and other debris at the
combustion air inlet and vent outlet — especially
at spring start up.
3.8.2 Professional Inspection
Inspection by a qualied professional technician,
performed at least once a year by a qualied professional
technician, are required to keep the heater operating
efciently through the years. The following basic checks
should be performed.
1. Inspect the condensate disposal system to be
sure that condensate ows freely and verify
that the condensate tray has sufcient limestone