Page 28
ENGLISH
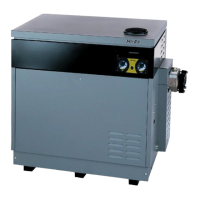
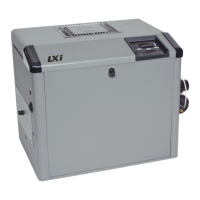
Jandy
®
Pro Series, Hi-E2
®
and Hi-E2R Gas-Fired Heater
|
Installation & Operation Manual
Absence of voltage at point 6 indicates that the control is
not calling for heat. Be sure that knobs are set to call for
heat as indicated earlier and as described in the Operating
Instructions section of this manual. Verify that the
thermistor sensor wires are not severed or shorted. Check
wiring connections by removing the temperature control
through the front of the bezel. If the control is properly
set and all wiring and connections are correct, replace the
control.
4.5.2.7 Venturi Pressure Switch
Touch the voltmeter probe to point 7, which is the
terminal of the venturi pressure switch having a purple
wire connected to it. If there is no voltage at point 7, the
venturi pressure switch is open, indicating inadequate
ow through the combustion system. The venturi pressure
switch is a differential type switch which is activated by
the pressure difference created when air ows through the
venturi. When the combustion blower is not operating,
the venturi pressure switch must be open and voltage will
not be present. See following sections on ignition control
"lockout" and combustion blower operation for possible
remedies.
Check for blockage at the combustion air inlet, a dirty
air lter or blockage at the vent exhaust or in the vent. In
improperly installed vent may trap condensate water, for
example, restricting ow. If there is no obvious problem,
analyze venturi operation as outlined in a later section of
this manual. If ow is normal, replace the venturi pressure
switch.
4.5.2.8 Ignition Control
There will be voltage at point 8, which is the “MVP”
terminal of the ignition control, only when there is an
attempt to ignite the burner or when the ignition control’s
ame sensing system has determined that it is OK to allow
burner operation. Even if voltage has been conrmed at
point 7, the “trial for ignition” sequence is imposed by the
ignition control. This sequence consists of a 15 second
period of pre-purge blower operation, a 40 second period
for heatup of the igniter and a 7 second trial for ignition,
during which there is voltage at point 8. If satisfactory
ignition is not achieved, the igniter is turned off and the
blower is operated for a 45 second post-purge. The system
may go through this cycle as many as three (3) times,
but thereafter it is “locked out” by the ignition control.
Additional attempts will be made only if the call for heat
is interrupted by turning off electrical power or setting the
control to “Off”.
4.5.2.3 Fireman Switch and External
Interlocks
Probe for voltage at point 3, the other connection of the
terminal block, which has a white wire connected to
it. If there is no voltage, the time clock switch or other
external interlock may be mis-adjusted, mis-connected or
defective. Correct this external problem.
4.5.2.4 Limit Switches
Probe for voltage at point 4, which is the water pressure
switch terminal with the white wire connected to it. This
switch is mounted on the end of a copper tube and is
about 2” in diameter. Absence of voltage at this point
indicates that one of the limit switches is open. This is
normally due to excessive water temperature, which should
be thoroughly investigated before replacement of limit
switches. Water ow deciency may be due to obvious
problems such as a defective pump or blocked water lter.
Alternatively, it may be due to overring, or to a problem
with the water piping or the heater's internal bypass control.
Overring might be a result of an incorrect gas orice or
supply of propane gas to a heater intended for natural gas.
If there are no such fundamental problems, identify which
of the switches is open by temporarily connecting a jumper
wire across its terminals. Replace a defective limit switch.
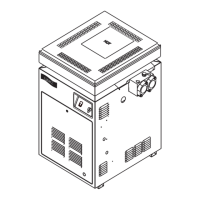
Limit switch access is through the side cover panel on the
side of the heater to which water pipes are connected.
NOTE The limit switches have different trip points, and it is
important that replacements are correct. The 150°F
switch has a red dot on the side of the brass fitting, and
must be installed closest to the combustion chamber.
The 135°F switch has no dot and must be installed in
the tapping closest to the water piping connections.
4.5.2.5 Water Pressure Switch
Touch the voltage probe to point 5, which is the other
terminal of the water pressure switch having a black wire
is connected to it.
If there is no voltage, the pressure switch contacts
are open. This is almost always due to a water ow
deciency, the most common one being a blocked water
lter. It may be due to causes cited in the previous
paragraph, however, and sometimes is due to blockage
of the copper tube or mis-adjustment of the switch.
Investigate thoroughly, referring to the earlier section on
“Adjustment of Pressure Switch”. If there is no problem
with the pool system or pressure switch adjustment,
replace the pressure switch.
4.5.2.6 Temperature Control
Probe for voltage at point 6, which is the terminal of the
venturi pressure switch having a yellow & black wire
connected to it. This is the switch mounted on the frame
above the blower between the vent diffuser and the
venturi tailpipe. It is about 4” in diameter.