9 - 8
Adjustments
Determining the Thickness of Flange 3
This procedure must be carried out if any of the following
components have been renewed: hub 1, spindle 2, flange 3,
bearing 21.
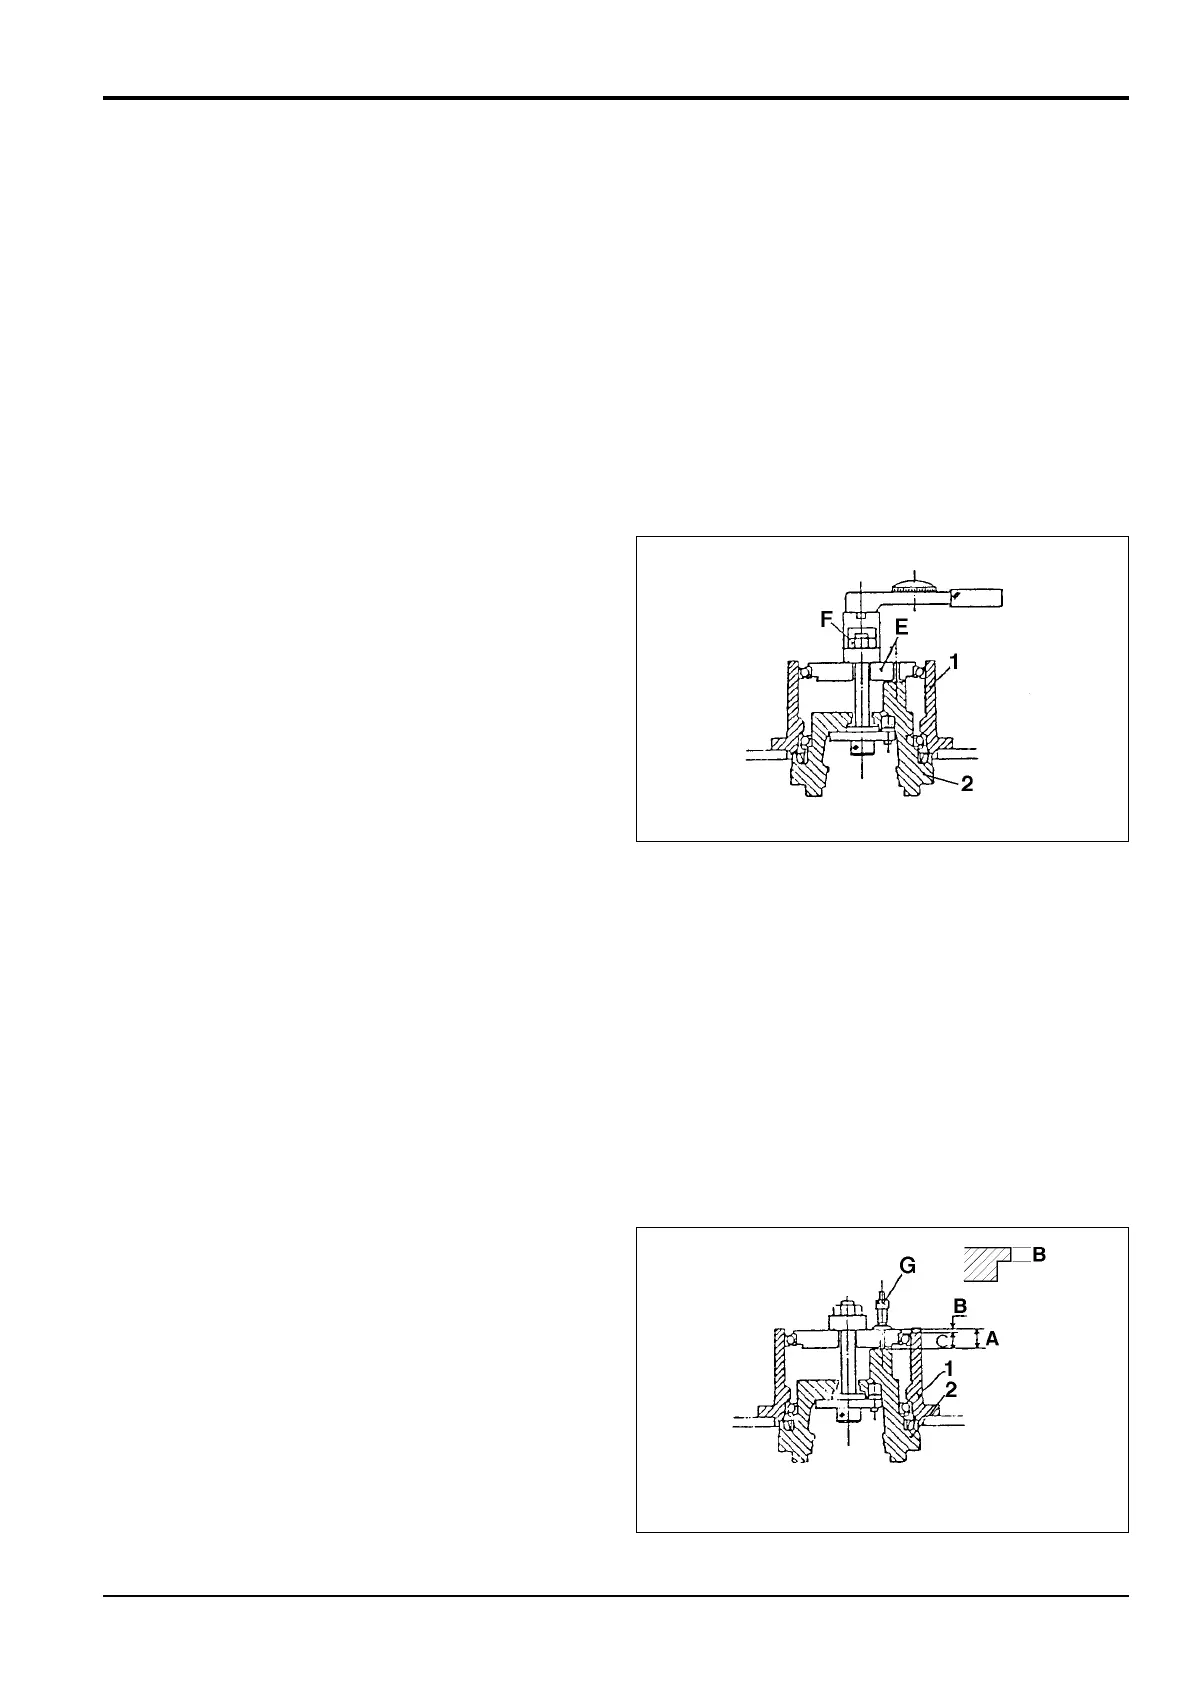
1 Fit clearance measuring jig E (see Service Tools,
Section 1) to spindle 2 as shown.
2 Tighten the special nut F of the jig to a torque of 58 Nm
(43 lbf ft, 6 kgf m).
3 Using a micrometer G through a hole in the clearance
measuring jig, measure depth A. Since dimension B of
the clearance measuring jig is known, calculate the
clearance C as follows:
C = A - B
Note: If dimension B is not stamped on the jig it must
be measured.
Section F Transmission
9803/6410
Section F
9 - 8
Issue 1
Reduction Gear - JS130
JS00500
JS00510
 Loading...