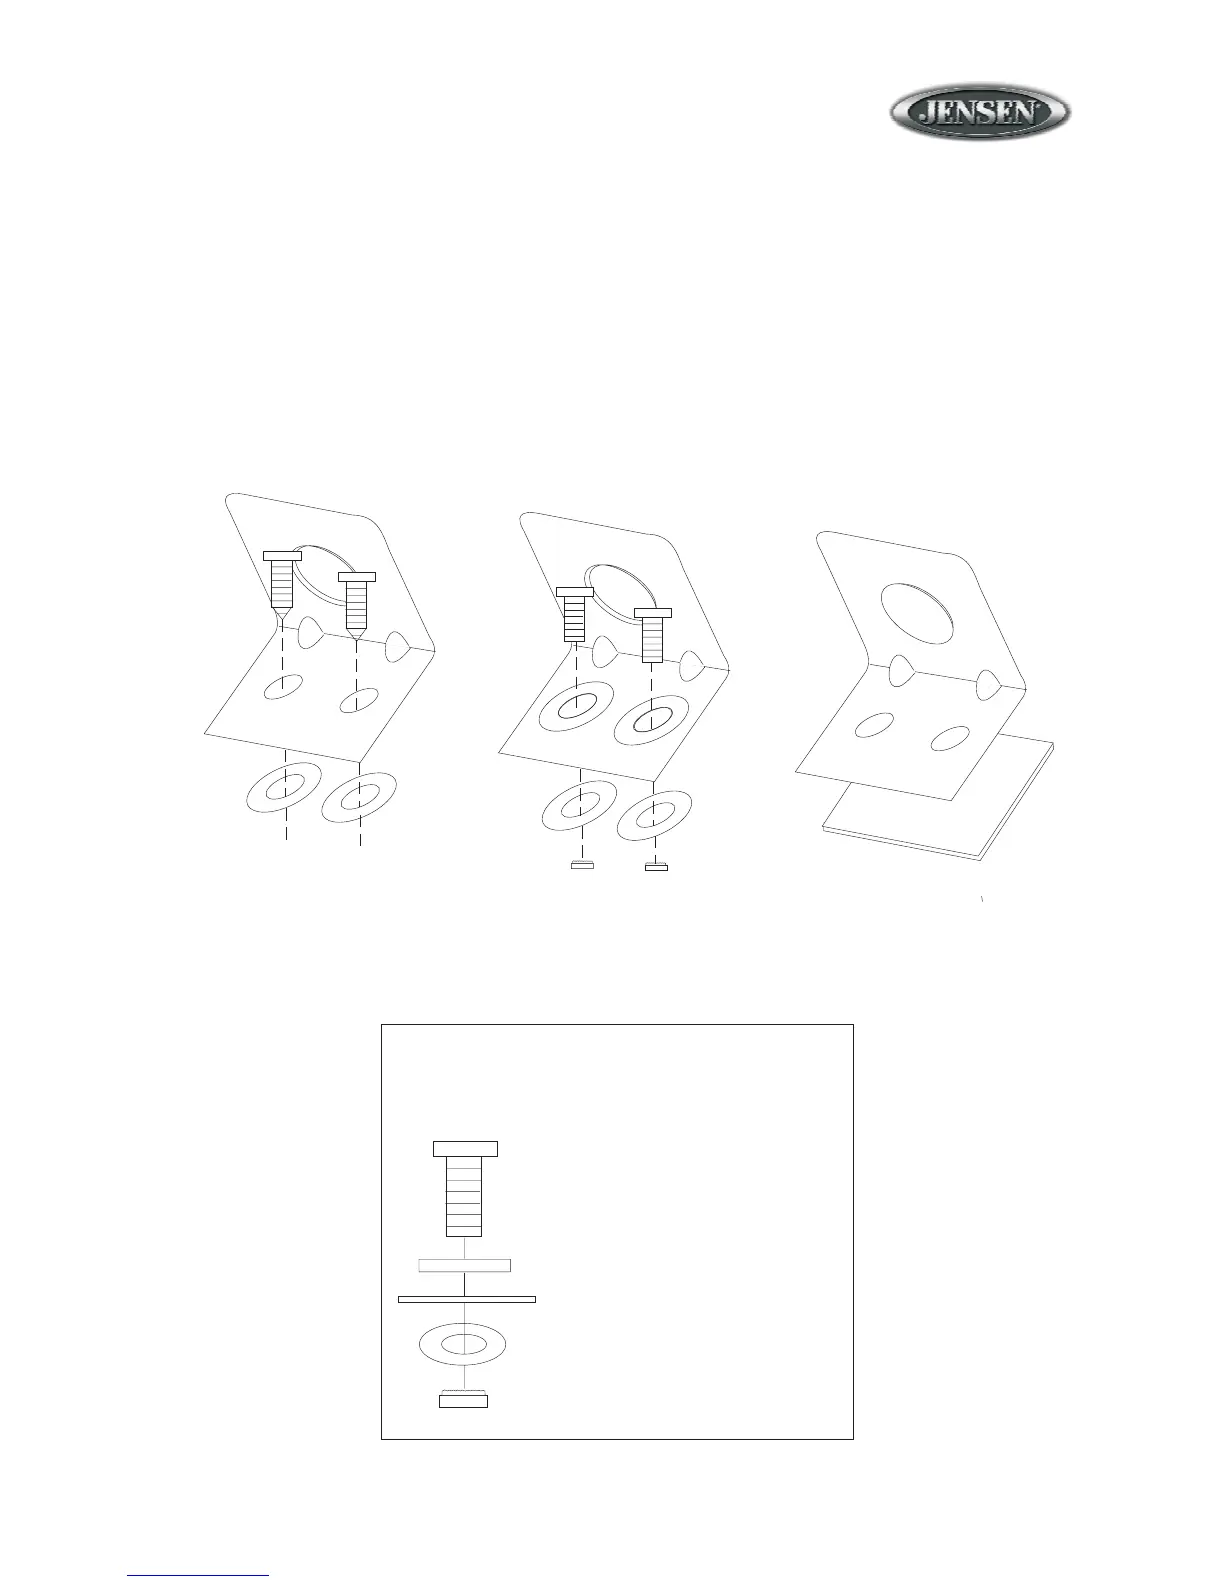
EasyManuals Logo

Jensen JHD910 User Manual

Jensen JHD910
12 pages
To Next Page IconTo Next Page
To Previous Page IconTo Previous Page
Page #5 background imageLoading...
Page #5 background image
JHD910
5
Machine Screws
with Nuts
Double-Sided
Tape
(Hole size 7/32")
(Hole size 7/32")
Self-Tapping
Screws
Mounting machine screw
Bracket metal
Vehicle mounting surface
Washer
Nut
Mounting Stack
Installation (continued)
Mounting the Headphone Bracket
Three options are provided for mounting the bracket (self-tapping screws, machine screws with nuts
or double-sided tape) to ensure a mounting option ideal for your mounting location. Alternately, the
headphone can be mounted directly to the instrument panel if access to the rear of the instrument
panel is available.
Note: Mounting holes should be drilled to 7/32”. Before drilling the mounting holes, make sure
the area behind the panel where the holes are desired is clear of wires and fuel, vacuum and or
brake lines.

Questions and Answers:

Question and Answer IconNeed help?

Do you have a question about the Jensen JHD910 and is the answer not in the manual?

Jensen JHD910 Specifications

General IconGeneral
power supply requirementsDC 12 Volts, Negative Ground
chassis dimensions131.6 (W) x 47.5 (D) x 86 (H)
loading impedance4 - 8 ohms per channel
Tone Controls IconTone Controls
bass control±10 dB at 100 Hz
treble control±10 dB at 10 kHz
current drain1.5 Ampere (max)
FM Tuner IconFM Tuner
tuning range87.5-108.0 MHz
FM mono sensitivity1.5uV
stereo separation at 1 kHz>25dB
AM Tuner IconAM Tuner
tuning range522-1710 kHz
sensitivity<30uV
weather band sensitivity<1uV
Amplifier IconAmplifier
total system power15 Watts Maximum
signal to noise ratio>70dB
loading impedance4 - 8 ohms per channel

Related product manuals