72 73
PROCEDURE:
– Before every assembly, remove the tank: disconnect the two hoses and undo the velcro
with which the tank is attached.
– Check the engine, whether it is not too hot. We recommend performing the assembly
minimum 0.5 hours after the engine was switched o.
– Check whether the ICU control unit is not on (the LED is not lit or ashing)!
Required tools: spark plug spanner supplied by the manufacturer (accessories) - 19 mm.
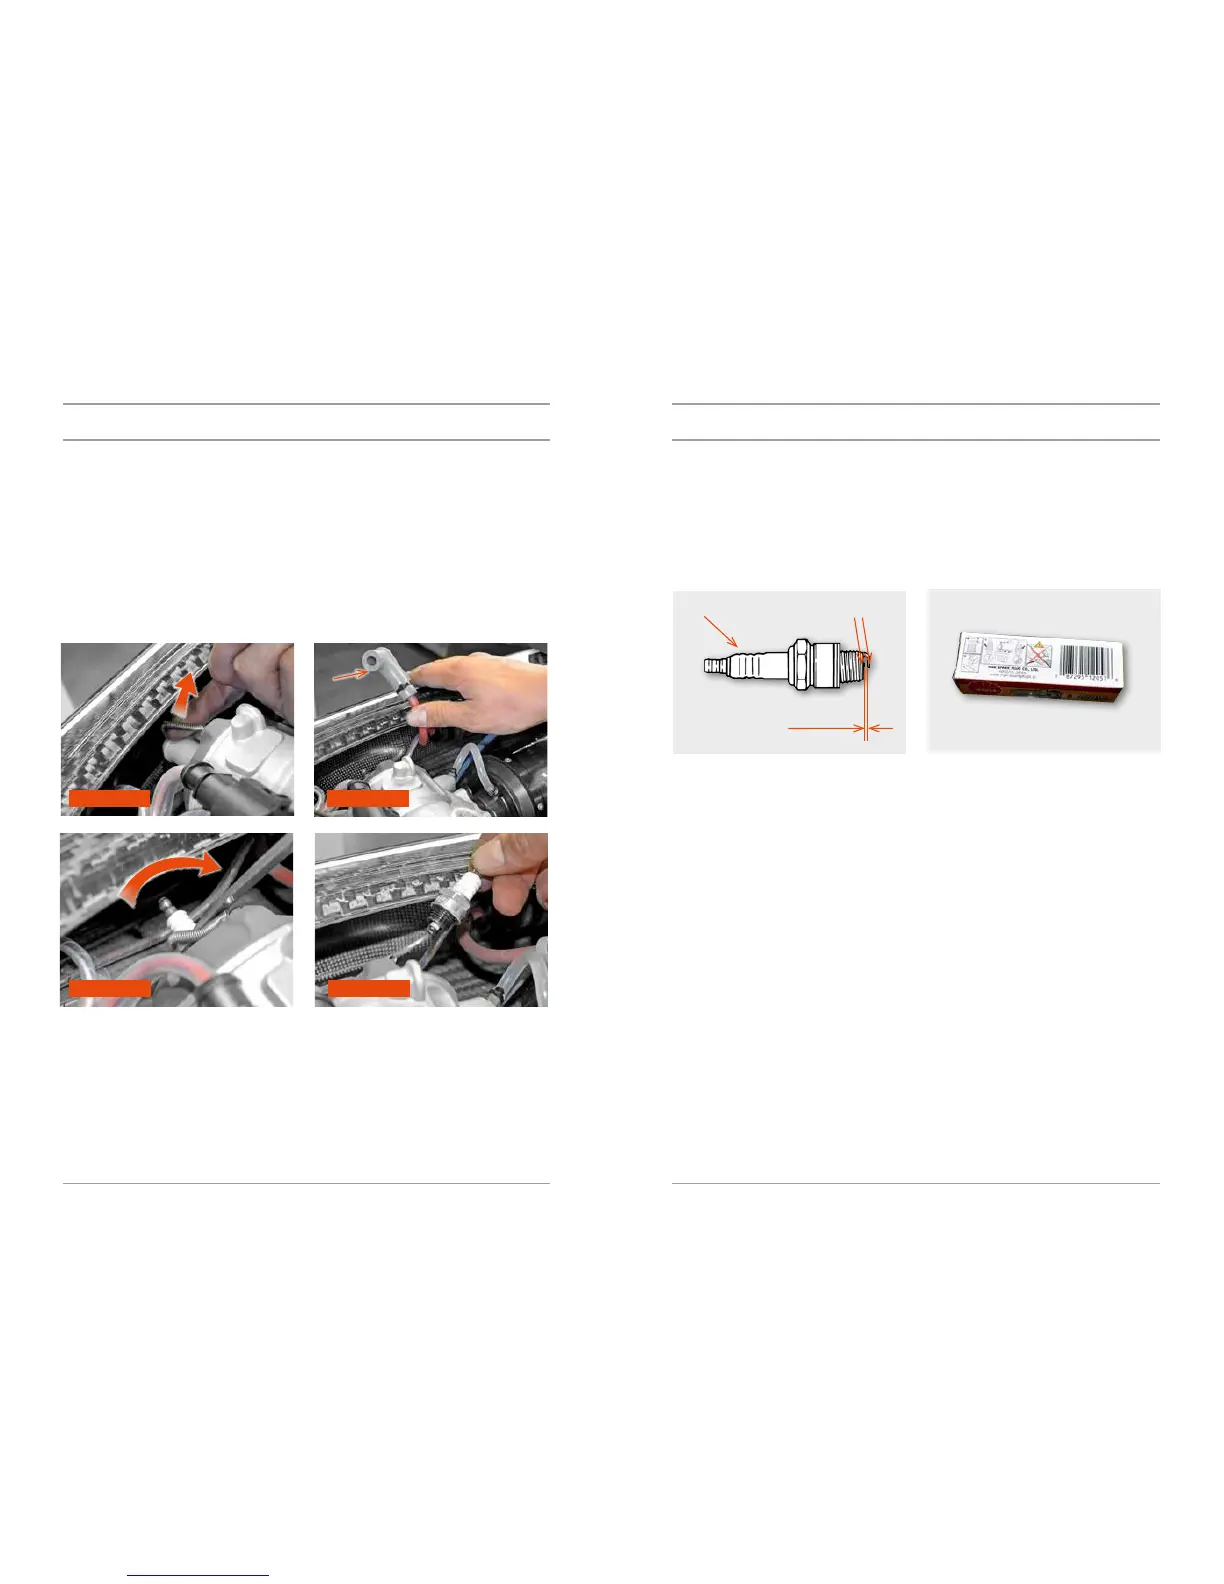
1) Take o the spring from the spark plug boot – FIGURE 1.
2) Remove the spark plug boot – FIGURE 2.
3) Screw the spark plug out using a spark plug spanner – FIGURE 3 and 4.
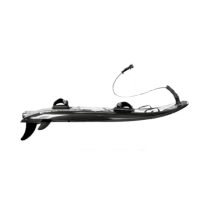
4) Using a gauge check the gap between the electrodes on the new spark plug. If necessary, adjust
the gap by slightly bending the electrode. The gap should be 0.7 – 0.8 mm.
5) Insert a new spark plug in the seat, FIRST SCREW THE SPARK PLUG IN USING YOUR HAND to
prevent damaging of the thread. When the spark plug is in the seat, tighten it carefully with a spark
plug spanner. If the spark plug is brand new, tighten it with a spanner by 2/3 of a turn. If the spark
plug has been used before, tighten only by 1/8 – 1/4 of a turn.
FIGURE 1 FIGURE 2
spark plug
boot
FIGURE 4FIGURE 3
WHEN TIGHTENING THE SPARK PLUG, FOLLOW THE INSTRUCTIONS FROM THE SPARK PLUG
MANUFACTURER!
6) Mount the boot on the spark plug. The boot is mounted correctly if the spark plug insulator is fully
covered by the boot.
NOTE: After the boot has been removed from the spark plug, NEVER START THE ENGINE –
if the engine was started without a mounted spark plug boot, it would damage the control
unit.
FREEWHEEL
Freewheel is part of engine which is extremely strained when the engine is running. To keep the free-
wheel in good shape, it is needed to rell grease into housing where freewheel is located every 25 En-
gine Hours. Not relling this grease into the freewheel housing leads to a serious damage to engine.
APPLYING LUBRICANT IN THE FREEWHEEL
You can nd freewheel under cover in the middle of carbon gear cover on the side of the engine.
It is necessary to rell grease Kluber Isoex LD18 Special A every 25 Engine hour while following
instructions.
PROCEDURE:
– Before every assembly remove the tank: disconnect the two hoses from the tank and
undo the velcro fastening the tank.
– Ensure that the engine has cooled down. We recommend performing the assembly mini-
mum half an hour after the engine has been switched o.
– Check whether the ICU control unit is not on (the LED is not lit or ashing)!
Insulator
0,7–0,8 mm
Electrode
MAINTENANCEMAINTENANCE