14
CT200 ASSEMBLY
The cross trainer has been assembled and tested at the factory, so you shouldn’t have any
problemsputtingallthepartstogether.Componentsaredesignedtottogether,and
onlybasictoolsarerequiredfortheassemblyprocess.InsidetheboxyouwillndaTools
Pack(HexAllenKey,Spanner,WashersandBolts).Seepreviouspage.
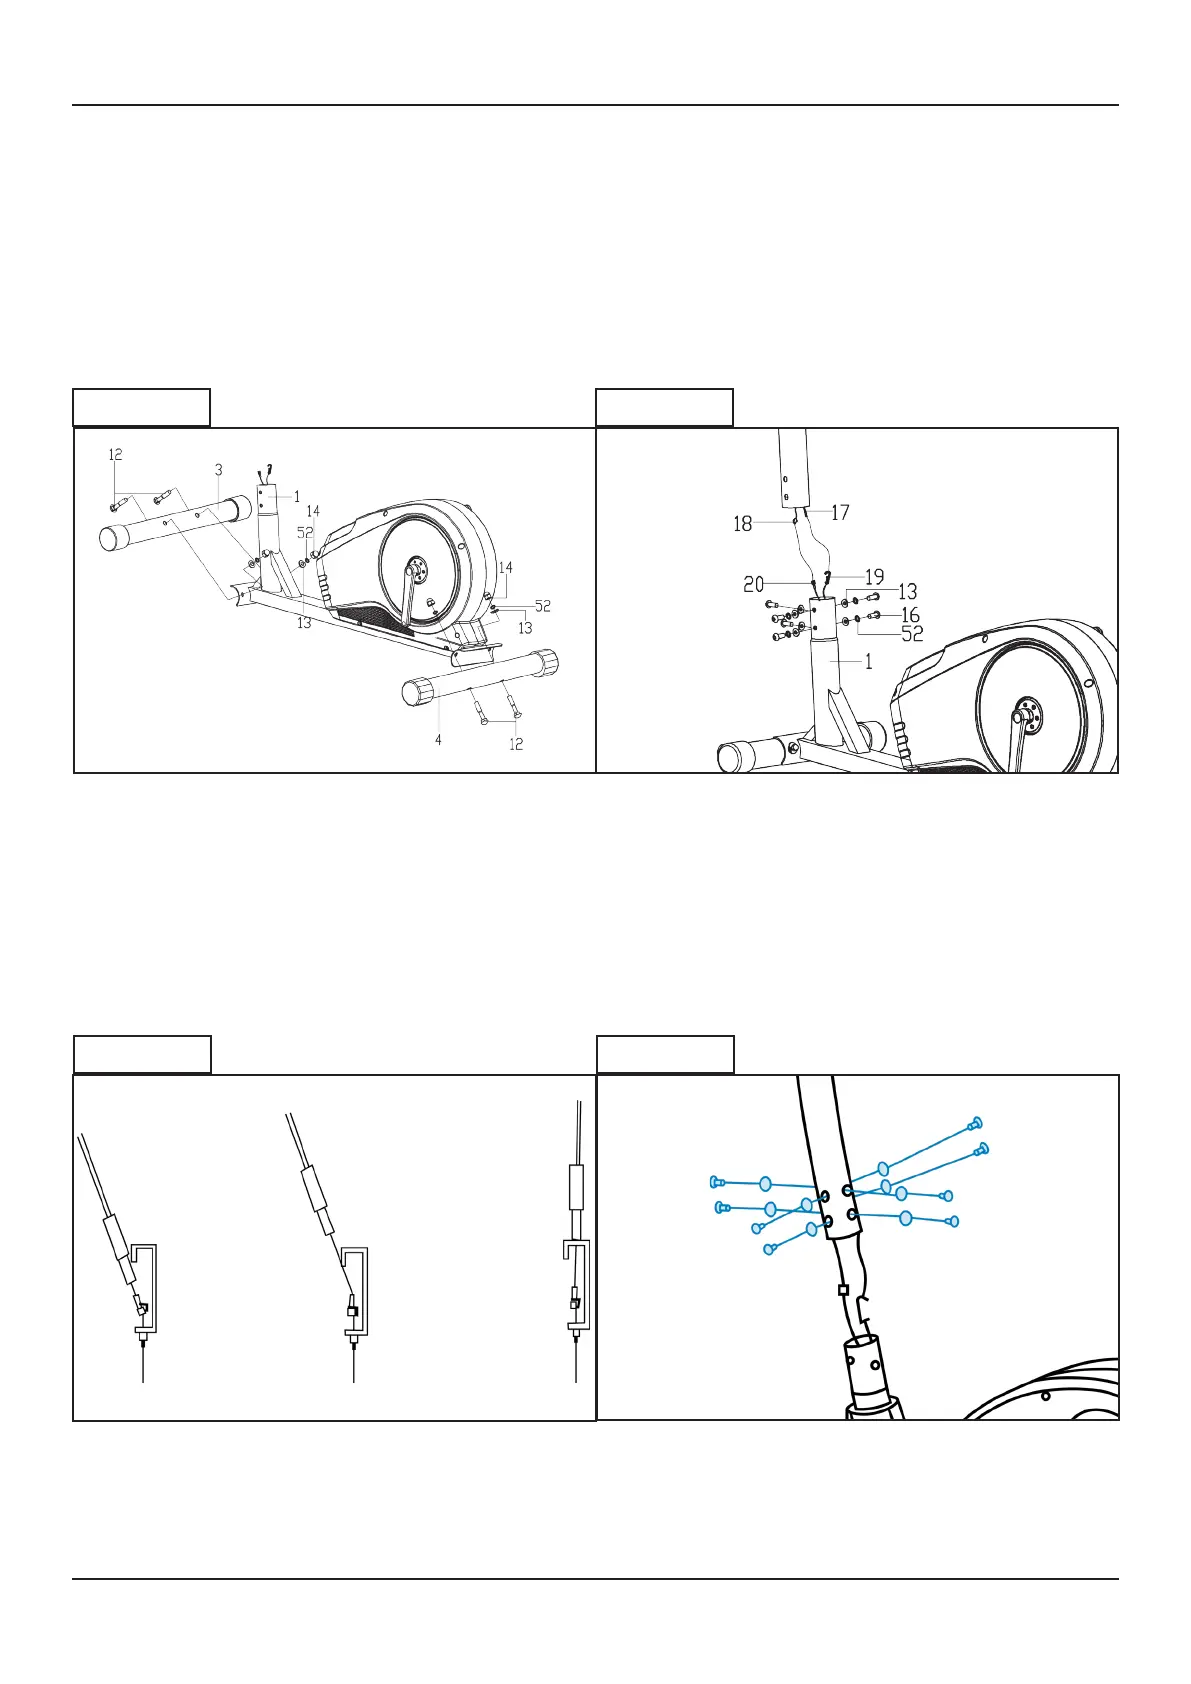
To assemble your JLL CT200 please follow these easy steps:
Start by attaching the stabilisers to the
main base using four carriage bolts,
four arc washers and four acorn nuts.
Tighten using the multi-tool.
Connect the sensor wire from the main
base to the bottom of the handlebar
post. Make sure the pins align and you
hear a click.
Connect the tension cable following
the diagram. This may take some force.
Secure the handlebar post to the main
base using six Allen head bolts, spring
washers and arc washers.
Tighten using the Allen key.
STEP 1 STEP 2
STEP 3 STEP 4