4 INSTALLATION
4.1 General description
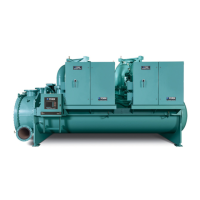
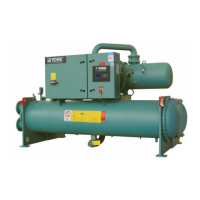
This instruction describes the installation of a model
YEWS Rotory Scew Liquid Chiller/Heatpump. The unit is
shipped as a single factory assembled, piped, wired and
nitrogen or refrigerant charged package, requiring a
minimum of field labor to make chilled water connections,
condenser water connections, refrigerant atmospheric relief
connections, and electrical power connections.
Acording the requirement of bargain, YORK representat-
ive should provide the following service: Installation
checking and, Initial starting and so on.
The YORK Warranty will be voided if the following
restrictions are not adhered to:
1. No valves or connections should be opened under any
circumstances because such action will result in loss of the
factory charged refrigerant or nitrogen.
2. Do not dismantle or open the Unit for any reason except
under the supervision of a YORK representative.
3. Do not make final power supply connections to the
compressor motor or control panel.
4. Do not charge the compressor with oil.
5. Do not attempt to start the system.
6. Do not supply the evaporator with hot water(The
temperature Limit is 100 F,38℃)or steam.
4.2 Location Requirements
The unit should be located in an indoor location where
temperature ranges from 4℃~ 43℃.The altitude shoude be
less than 2000 meter.
The units are furnished with neoprene vibration isolator
mounts for basement or ground level installations. Unit
may by located on upper floor levels providing the floor is
capable of supporting the total unit operating weight (in
this application, the spring isolator is prefered).
A level floor, mounting pad or foundation must be pro-vided
by others, capable of supporting the operating wei-ght of the
unit
Clearances should be adhered to as follows:
Rear, Ends and Above Unit - 610mm
Front of Unit - 914mm
Tube Removal - See following table
Model Tube removal space
YEWS100 2100mm
YEWS130/170/200/210 2650mm
YEWS215 3800mm
4.3 Installation of Vibration Isolators
The optional vibration isolators can be loose shipped with
the chiller.
Please refer to the foundation figures in Section 10 to decide
proper installation position for the units.
Fixation-Installation
There are two methods: rubber pad and spring isolator.
Locating and installing isolator pads
The isolator pads should be located in accordance with the
floor layout of the dimensional product drawing. After the
isolator pads have been placed into position on the floor,
lower the unit onto the pads. Make sure the pads are even
with the edges of the mounting feet. When the unit is in
place, remove the rigging equipment and check that the
chiller is level, both longitudinally and transversely. See the
following Fig.
The longitudinal alignment of the unit should be checked by
placing a level on the top center of the evaporator shell
under the compressor. Transverse alignment should be
checked by placing a level on top of the shell end sheets at
each end of the unit.
The unit should be level within 6.4mm from one end to the
other end and from front to rear. If the chiller is not level
within the amount specified, lift it and place shims between
the isolation pad and the tube sheets.
YEWS-E Water Cooling Screw Chiller/Heat Pump
12
 Loading...