3. Install the discharge nozzle onto the condenser heat exchanger connection using the correct
gaskets and hardware. Verify that the discharge pipe is level in both directions. Install the
discharge isolation valve on top of the discharge pipe using correct gaskets and hardware.
Note that the actuator valve uses O-rings instad of a flat gasket. If you use any oil on the O-
ring, ensure that you use York K oil. See the discharge line weight in Table 19.
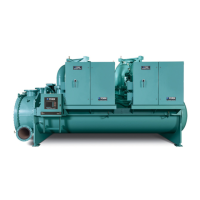
4. Lift a compressor/motor assembly and remove the packing materials (see Figure 26 for
rigging). Carefully lower the compressor/motor assembly on to the supports on the condenser
discharge valve. Fasten with the correct hardware. Do not tighten the bolts until all connections
are made to the compressor.
5. Install the suction line nozzle onto the evaporator heat exchanger connection using the correct
gaskets and hardware. See the discharge line weight in Table 19.
Table 18: Compessor weights
Compressor Assembly Weight, lb Weight, kg
H9 364-53366-201 3000 6600
K1 364-53357-201 4100 9020
K2 364-53362-201 4200 9240
K3 364-53348-201 6100 13420
K4 364-53349-201 6400 14080
K7 364-53350-201 8100 17820
Figure 26: Rigging - driveline assembly
Table 19: Suction / discharge piping
Evap code Cond code Suction line with flanges Discharge line
Q Q 600 250
R R 600 250
B L 494 250
M M 494 250
N B 483 255
45Centrifugal Liquid Chillers