10
REMOVING & REPLACING FILTERS:
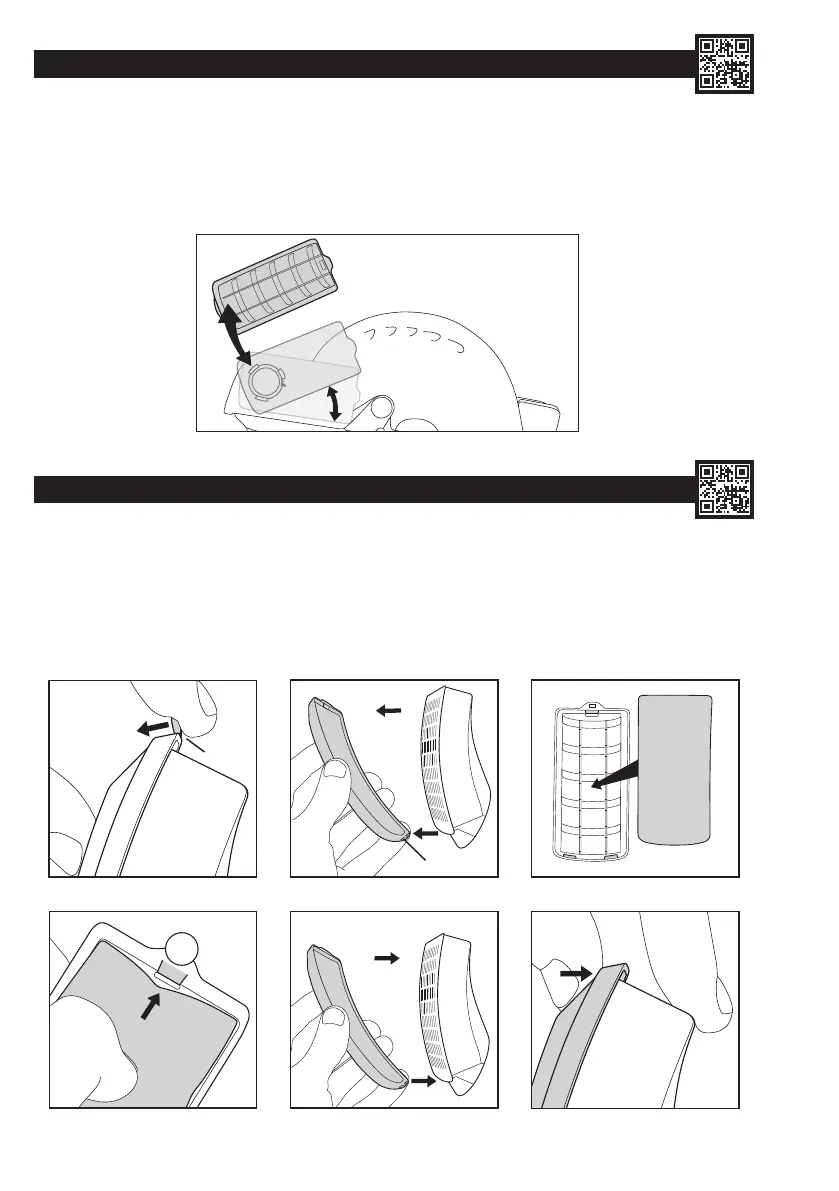
To Remove the Filters: Rotate the rear of each lter upwards by 30° until compression is lost, then pull away from the motor housing.
To Replace the Filters: Ensure that the lter and motor housing mating faces are clean; do not allow any dust or foreign objects to fall into the
motor housing. Align arrows on lter and motor housing, press lter into place and rotate until a click is heard/felt. Recheck airow before use.
(See Battery and Airow Check). If the lters are not tted correctly, ltering efciency will be severely reduced. Each lter is tted with a
pre-lter housed within a protective cover. Pre-lters prolong the life of the main lters by trapping larger particles. The pre-lters can be replaced
from within the protective covers as required. Dispose of used lters in accordance with local legislation.
REMOVING & REPLACING PRE-FILTERS: (Always replace both pre-lters simultaneously)
1. Locate the tab at the rear of the pre-lter cover and lift it to begin freeing the cover.
2. Release the two remaining hooks from under the front of the main lter case lid to release the cover from the main lter body.
3. Pull the pre-lter out from under the three locating hooks. Dispose of used pre-lters in accordance with local legislation.
4. Clean the pre-lter cover using a damp cloth and/or soft brush, then feed a fresh pre-lter underneath the three locating hooks. Ensure the
correct orientation of the pre-lter pad in the cover.
5. Clip the pre-lter cover back onto the lter, locating the curved front edge rst.
6. Snap the rear clip into place over the rear of the lter case lid.
1 2 3
1
4 5
6
HOOKS
PRE-FILTER
30°
TAB
 Loading...