−9 −
3. CONFIGURATION
3-1 Adjusting the needle stop position
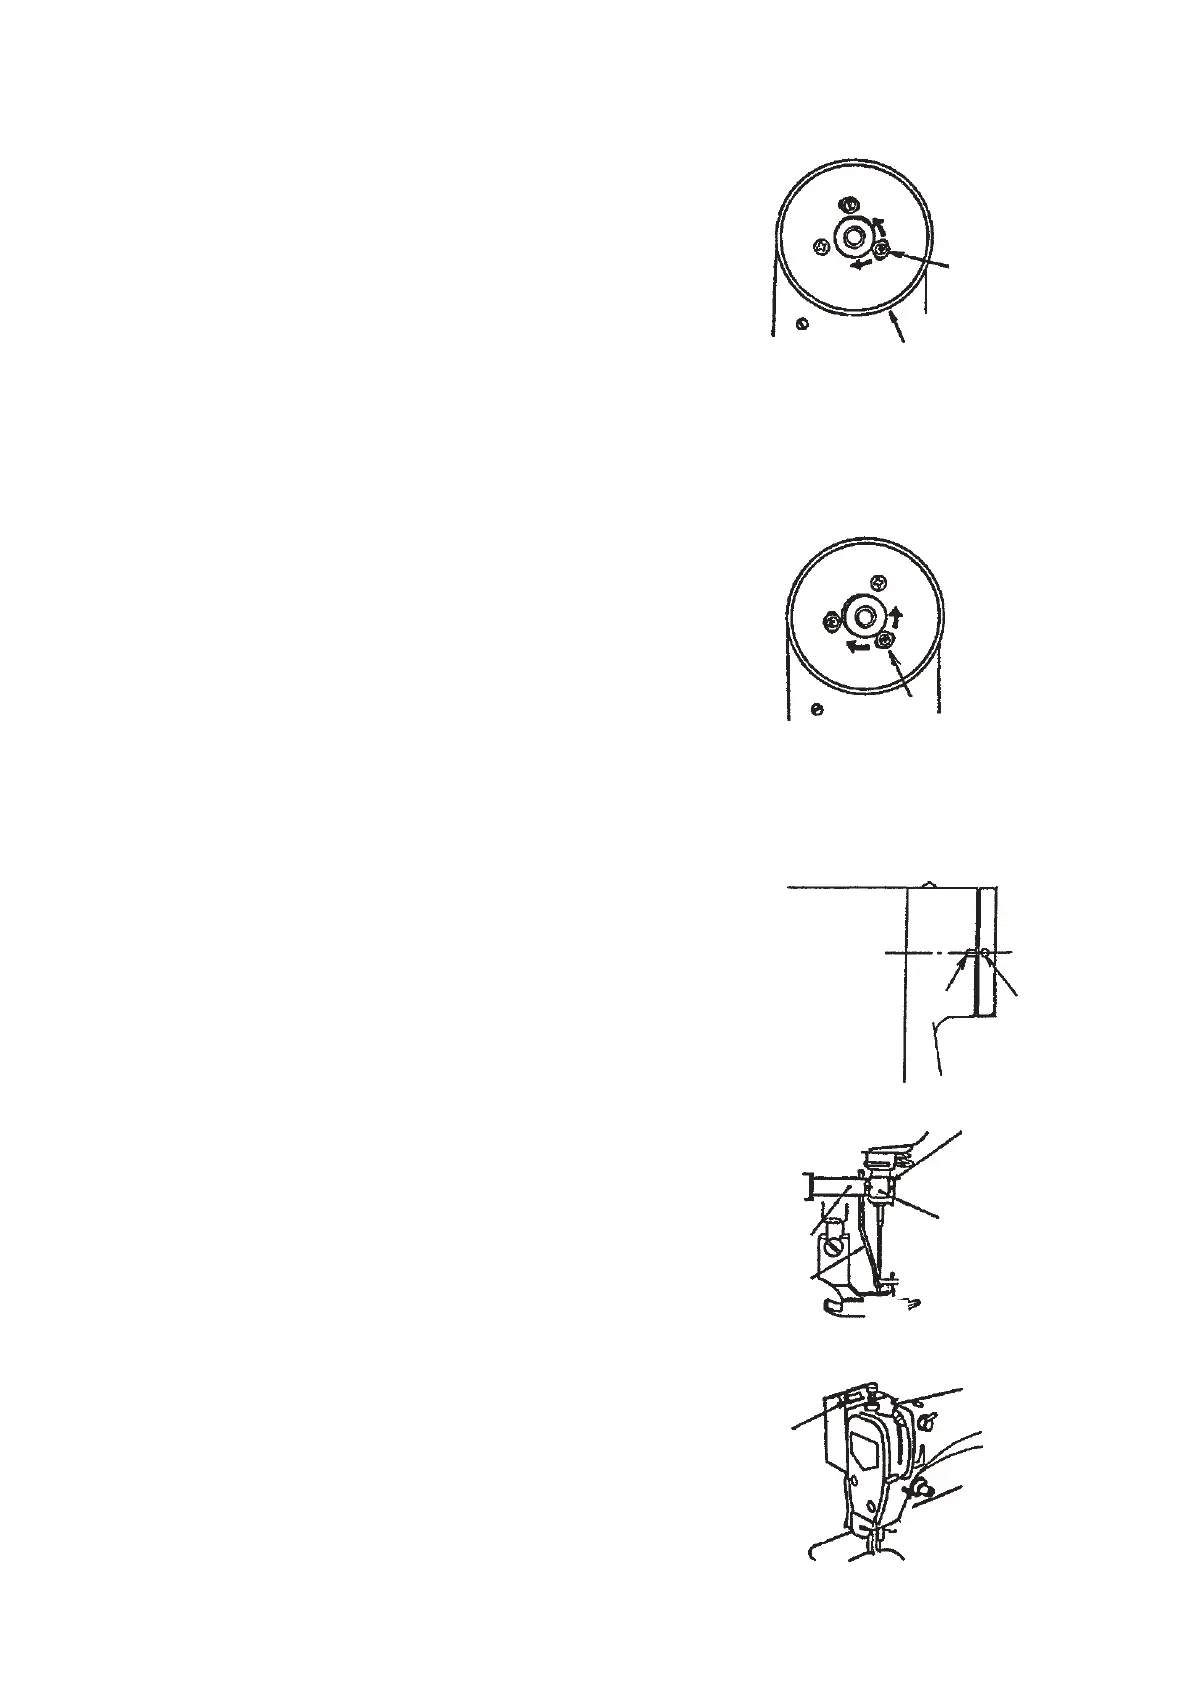
1) Adjusting the upper stop position (Upper stop position
after thread trimming)
The standrad needle stop position is obtained, when
needle stops after thread trimming, by aligning the red
marker dot on the machine arm with the white marker
dot on the handwheel.
Stop the needle in its highest position, and loosen screw
(A) in the figure on the right to perform adjustment within
the slot of the screw.
○ To advance needle stop position → Direction (1)
○ To delay needle stop position → Direction (2)
2) Adjusting the lower stop position
The lower needle stop position when the pedal is
returned to the neutral position after the front part of
the pedal is depressed can be adjusted by loosening
screw (B) in the figure on the right and adjusting within
the slot of the screw.
○ To advance needle stop position → Direction (1)
○ To delay needle stop position → Direction (2)
[Caution] Do not rotate the machine with screws (A)
and (B) loosened.Just loosen the screws,
and do not remove them.
3-2 Adjusting the wiper (WB type)
1. Adjusting the wiper position
Adjust the wiper position in accordance with the thickness
of fabric to be sewn.
Normally, adjust it as follows :
1) Turn the handwheel in the normal direction to align white
marker dot (1) with marker dot (2) on the machine arm.
2) Insert wiper (3) into wiper shaft (4) so that a clearance
of 2 mm is provided between the top end of the wiper
and the top end of the needle. At this time, adjust so
that the distance from the flat section of the wiper to
the center of the needle is 1 mm. Securely fix the wiper
with wiper adjusting screw (5) as if pressing wiper (3)
with wiper collar (6) .
[Caution] Do not loosen the wiper solenoid setscrew.
When the wiper is not used, turn OFF the
wiper seesaw switch.
(1)
(2)
(A)
(1)
(2)
(B)
(1)
(2)
(5)
(4)
(3)
(6)
1 mm
2 mm
Fig. 4
Handwheel
Fig. 5
Fig. 6
Fig. 7
Wiper seesaw
switch
Fig. 8

 Loading...


