– 27 –
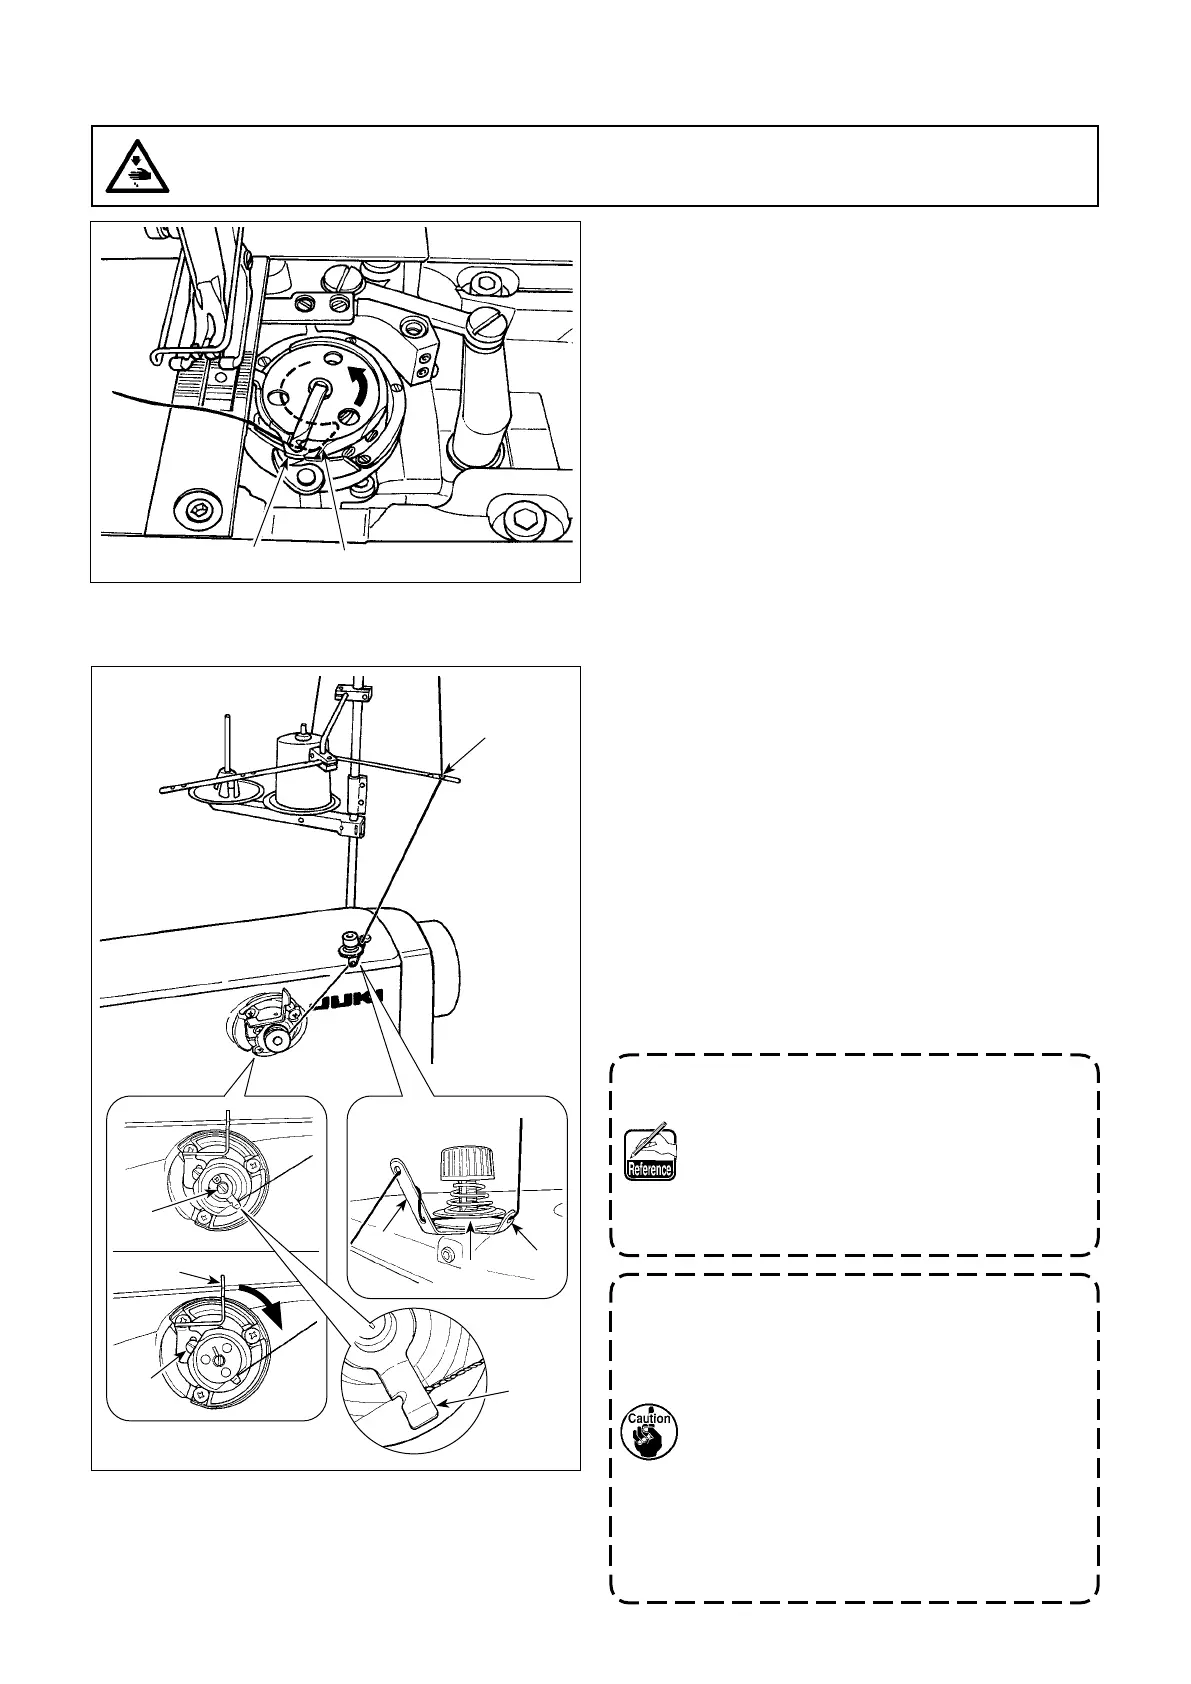
1) Carefully draw the thread through threading slit
❶
of the inner hook and the space provided be-
tween the bobbin case opener and inner hook
❷
to route it below the tension spring.
2) Make sure that the bobbin revolves in the direc-
tion of the arrow when you draw the thread.
WARNING :
To protect against possible personal injury due to abrupt start of the machine, be sure to start the
following work after turning the power o and ascertaining that the motor is at rest.
❶
❷
3-3. Threading the hook
3-4. Winding a bobbin
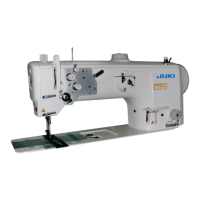
1) Pass the thread through sections
❶
to
❹
in the
numerical order.
2) Put the thread until the root of bobbin thread
clamp
❺
is reached. Then, trim the thread. (The
thread end is retained under the looper thread
clamp.)
3) Load a bobbin on bobbin winder shaft
❻
.
4) Press bobbin winder lever
❼
in the direction of
the arrow.
5) When you start the sewing machine, the bobbin
rotates to automatically wind the thread on itself.
6) When the bobbin is lled up, the bobbin winder
lever
❼
automatically releases the bobbin and
the bobbin winder stops running.
1. The bobbin thread winding amount is ad-
justed by loosening setscrew
❽
. The bob-
bin thread winding amount is increased
by moving bobbin wider lever
❼
upward.
2. If the thread comes o the thread tension
controller, wind the thread on the interme-
diate thread guide by one turn.
❶
❽
❼
❹
❸
❷
❻
❺
1. This is the one-touch type bobbin wind-
er. When the bobbin is fully wound with
thread, bobbin thread clamp
❺
automati-
cally returns to the initial position.
2. To terminate bobbin winding before the
bobbin is fully wound with thread, turn the
handwheel, while slightly lifting bobbin
winder lever
❼
, to bring bobbin thread
clamp
❺
back to its initial position.
3. If the thread is not brought to the root of the
bobbin thread clamp, the thread slips o the
bobbin at the beginning of bobbin winding.


 To Next Page